

Web Form Builder is an amazingly powerful, responsive form creator. Create forms for registrations, surveys, purchasing and more. Now that you have created a totally cool form, it is ready to be added to Site Designer. It only takes a few steps and you will have added your contact form to Site Designer in no time at all. Let's Go!
Publish and Embed Forms into Your Website
Did you know?
While this article is written for Site Designer, the same process follows for adding a menu to Foundation Framer or Bootstrap Builder
Quick Links
Adding a published S-Drive form to Site Designer
Now that your form is ready for the public, you’ll want to explore your options for putting it on the web. You can publish to S-Drive by entering your CoffeeCup Account information, export your form for hosting on a web server, or simply add it to a website project that you’re working with on your local computer.
Step 1:
The even better news is that it’s amazingly simple to set this up. To do so, click the Settings toolbar button and switch to the Form Publishing section. Once you’ve entered your CoffeeCup account information, you’ll be able to put your form on the web with a single click!
Simply enter your CoffeeCup user name and password in the Email Address and Password fields, then click Go! If you don’t have a CoffeeCup account, you can sign up on the CoffeeCup website for free. For more information about the benefits of this publishing method, read the S-Drive Forms chapter. Once you log in with your CoffeeCup account information, all of your web addresses that support form publishing.

Step 2:
Select the one you wish to use for one-click publishing, and everything’s set up. Click Manage if you need to make administrative changes to your S-Drive account; click Refresh if you’ve enabled a web address that’s not in the list. Now, when you’re ready to put your form online, just click the Publish toolbar button.
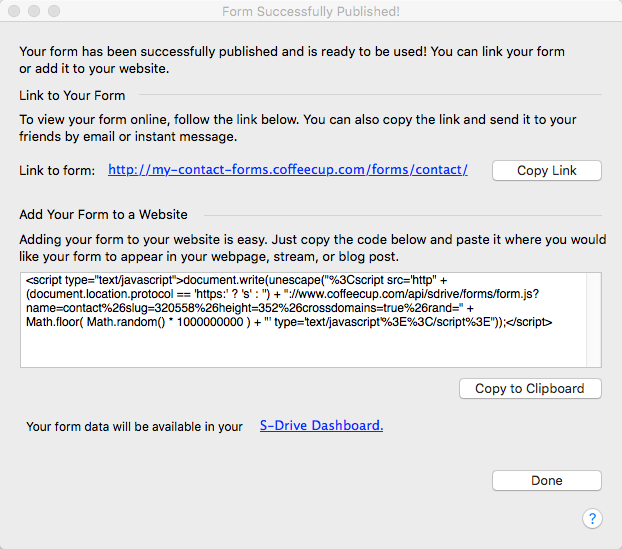
When your form has been successfully published, you’ll be given a link to where it can be accessed online and embed code that can be placed within any webpage, anywhere. Since all the form’s files are hosted on S-Drive, you can use this embed code anywhere you want without having to upload your files to another server.
Step 3:
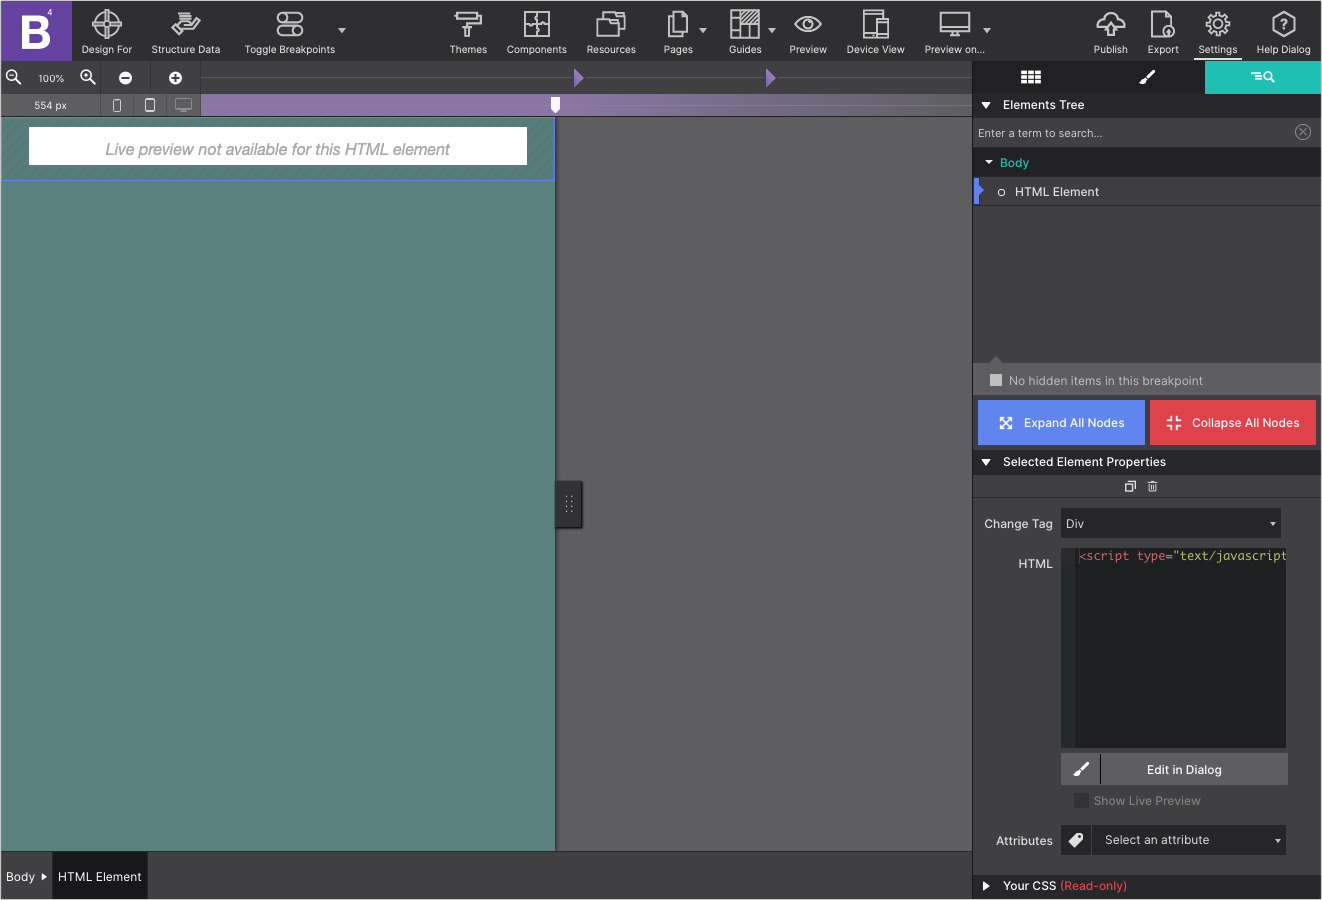
Click the Copy to Clipboard button in Step 1 of the Exported Dialog and then switch over to Site Designer and add an HTML Element to your page where you want the form to appear. Now go to the Content pane and drag-n-drop or click-n-drag the HTML Element onto the canvas. Once it is on the canvas, go to the Element Pane > Element Properties then paste in the markup into the HTML box.
Be sure to use a good semantic CLASS or ID name for the HTML Element!
While adding the code to the HTML Element it would be a good time to create a semantic <CLASS> name. Use simple descriptive words like contact-sales-form, company-contact-form, registration-form etc. If you are not familiar with these yet, read over the article on Working with selectors.
Success! You have added the form to your page!
One of the best features of using S-Drive to host your forms is you get an instant view of how it will look on your page without having to export your form files manually. To see your form in action, click Publish your website and view it online.
Adding a form located on your server to Site Designer
Step 1:
Publishing your form to S-Drive is the easiest way to get your form on the web, but there is another export option in the File > Export menu called Manual Server Setup . This process excludes S-Drive entirely and requires that you upload all the form’s files to your web server first and then add the form to your page.
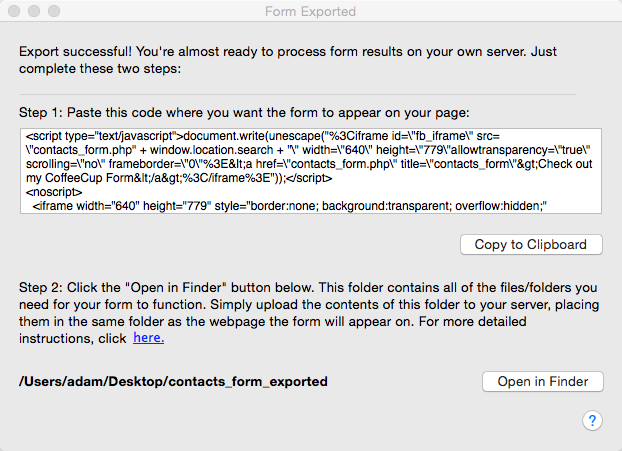
When you select this option, you’ll be prompted to save your form if you haven’t done so recently. Once this is completed, the Form Exported window will open telling you everything you need to do to use your form on any webpage. It’s an easy two-step process.
Step 2:
Click the Copy to Clipboard button in Step 1 of the Exported Dialog and then switch over to Site Designer Content pane and add an HTML Element to your page where you want the form to appear. Now go to the Element pane and under Element Properties locate the HTML section and paste in the markup.
Step 3:
Upload all of the files located in the exported folder as described in Step 2 of the Form Exported dialog to your server using any FTP client. Make sure to upload these files to the same folder as the web page that you want the form to appear on.
Don't forget to Upload!
Remember that when using this method, your form will not display inside of Site Designer or when using Preview. You must upload your website and view the page online to see the form.