How about a quick and "dirty" background for your stores?
With this method you need not add any other colour backgrounds to the various areas of your store, but just leave all options transparent.
Use your favourite image editing application (I use Jasc Paint Shop Pro usually) and open up a new image canvas about
1950 px wide x 200 px high including a background colour or pattern of your choice. Promote the background image to a raster layer status.
Open up a new layer, the same height but only 800 or 980 px wide according to which shopping cart width template you intend to use. Colour this new layer with a fairly light colour or low opacity pattern and then copy and paste over on to your previously created layer. Remember that this is the central panel of your page, so you will want to make sure that your text and content shows up well against whichever colour you choose for the panel.
You will see that when you paste the new layer onto the wide strip, this new layer will automatically be centrally positioned. You can now add dropped shadow effects to the top layer to make it pop out against the background.
Now you must go to the effects tools and choose one which will seamlessly tile your background image. You may need to experiment a little to get this right, and it's a good idea to open a new large canvas, 1950 x 1000 px approximately to "pour" in your merged background image and see if it has tiled well.
When you are satisfied, save the background.
Now here is how it works in the Shopping Cart Designer:
1. Open up a
new page 800px or 1024px width shop with your shopping cart designer. Make sure that you have saved an appropriately sized background to use with your store.
2. Choose one of the
blank templates
4. In the application interface, choose
Page Properties from the dropdown list on the right.
5. Under the
background tab, browse to where you have saved the background image on your computer and open it up in your shop. It will probably be uneven initially so now needs to be centred on the page.
6. Still under the page background tab, now select the
3rd box from the left under
"repeat"
7. Under the
"horizontal position" select
"align to center"
8. Under the
"vertical position" select
"align to top"
9. According to which template you chose originally, you may then have to adjust the position of the central content by increasing margins and padding if you have the Pro version of the designer. In the basic version, it might be sufficient to just use a slightly different blank layout.
10. You can also decide whether to use
transparency throughout the site underneath the content to allow the background to show through - or perhaps toning blocks of colour. A little experimentation will give you a better idea of what works best for you.
11. Once you have added the background into the cart designer, you can then add in your own logo. wording etc.
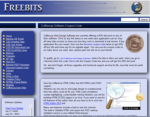
I have attached a
sample background to see how this works. This background includes 3 different layers and not just the two explained here. The principle remains the same if you want to try with more than two. Just remember that you should try to
optimize the image to the lowest acceptable quality to speed up your page load.
* The reason for the 1900 px background width (approximately) is that this should cover the widest screen resolutions most commonly used on the internet today, according to the W3C statistics.
If you have doubts, at the same time that you install your page background image, select a toning background colour also.