

Your form looks great! Now you can set up what happens behind the scenes. To set these options, click the Settings button in the Toolbar to open the Form Settings window.
General Settings
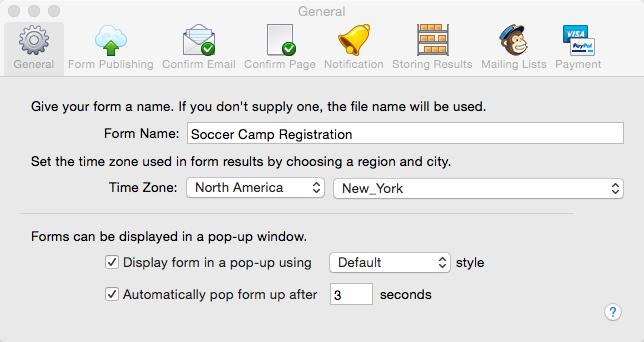
The first tab in the Settings window is where you can configure a few global options.
- Form Name: By default, the name of your form (only visible to you) is the file name of your form. If you’d like to give your form a different name, enter it here. It’ll help you stay organized and keep track of your forms if you have more than one.
- Time Zone: These two drop-down menus help you choose your current time zone so that form results are time stamped with your local time. From the first drop-down, choose your world region. From the second drop-down, pick the nearest major city (or any major city in your time zone).
- Display form in a pop-up: Embedded forms don’t have to appear alongside other content on a webpage — they can pop up on top of other content in a nifty light box if you select this option. Choose the pop-up style you’d like to use from the drop-down menu.
- Automatically pop form up: Select this option to make your form pop up on the page it’s embedded in automatically. Just choose the number of seconds that the form will wait once the page is loaded before being displayed.
Advanced feature: You can access the images and web files associated with each pop-up style by going to File > Browse Resources and choosing the colorbox folder.
Form Publishing
This tab is where you can configure form publishing to the CoffeeCup web platform. It uses the power of S-Drive Forms to automatically process and set up your forms so they’re ready for the web. All you need to do is enter your CoffeeCup account information and choose a publishing location.
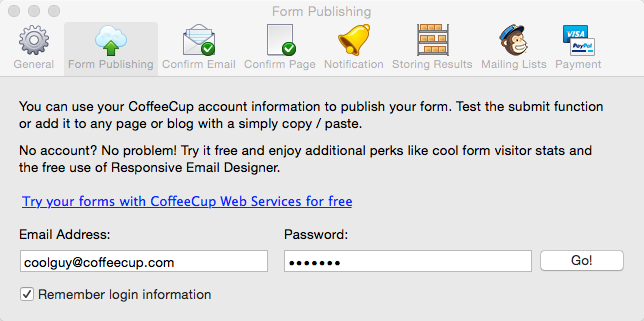
Click “Get an account” if you don’t have a CoffeeCup account yet. It costs nothing, and it automatically sets up your free S-Drive testing account.

Now that your publishing destination is set up, your form can join its HTML pals on the Internet. Feel free to click the Publish toolbar icon at any time.

You’ll probably be prompted to save the form first, which is always a good idea. Click Publish as many times as you want; Web Form Builder will overwrite all the necessary files so you don’t end up with hundreds of redundant files.
The last part of the publishing process is the Form Successfully Published! window:
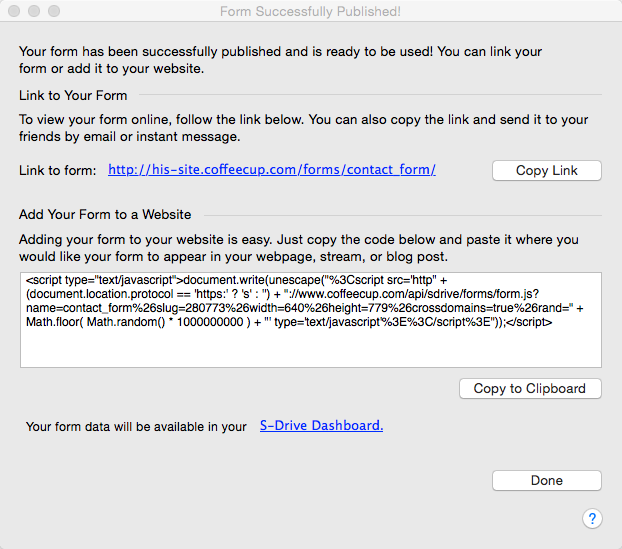
You can click the link shown here to test the form in the real world—right on the web! It’s not just a really good preview, it’s the real deal.
If you like what you see, you can purchaes a hosting plan to activate your form. [url=httsp://www.coffeecup.com/carts/webbie12/]Plans start at $59.40[/url] for the Webbie service.
Confirm Email tab
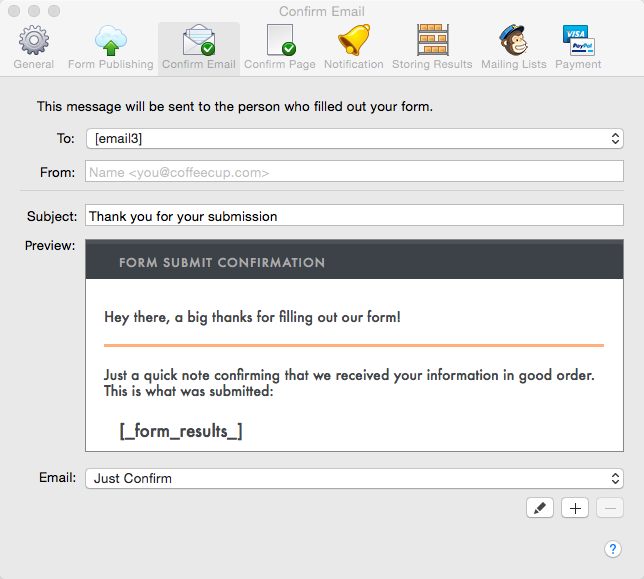
Under this tab, you can optionally set up and send a confirmation email to the person filling out the form. To enable the confirmation email message, you must select a To: option from the dropdown. If the To address does not contain something to select, this means your form does not contain an email address element, or your email address element is part of a display rule.
From address
If you do not include a From: address your results will come from formbuilder@yoursite.com, where yoursite.com is your domain name. Make sure to enter your email address so that your customers can reply back to you.
Editing the confirmation email
Web Form Builder offers two different ways to edit your confirmation email. You may, edit the code in Web Form Builder itself, or you can edit it in Responsive Email Designer!
To get started, you will need to choose an Email template by selecting one in the Email: dropdown and select the template you wish to work with. In this instance select “This is the default template”. You may keep the email as is, or edit it within WFB by clicking the Pencil icon and selecting Edit Code. Please note that any changes made to this default theme are not supported.
Editing in RED
To learn more about converting your web form email response to a responsive email using Responsive Email Designer, read over our “blah blah”. THIS NEEDS TO BE CHANGED. :)
Confirm Page
After the user clicks the submit button, you can provide a quick message or send them to another webpage. To set this option, click the Settings button in the Toolbar and then click the Confirm Options tab at the top of this window.
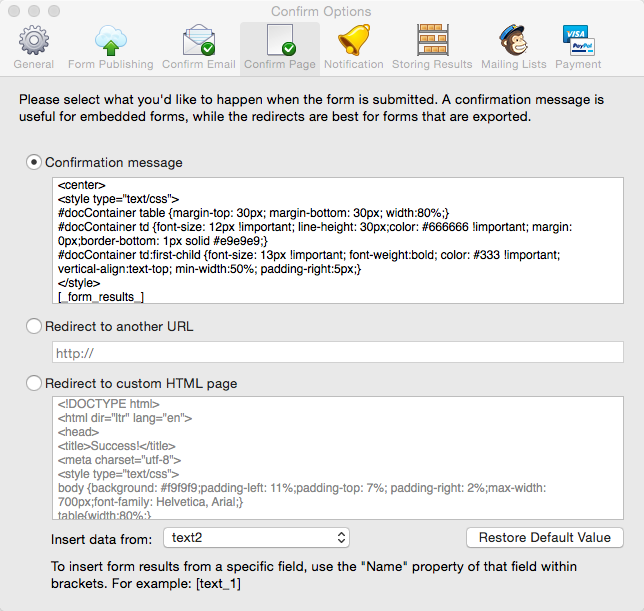
- Confirmation message: Displays the contents of this box within the currently selected theme, and supports HTML and the use of field values. Useful for embedded forms.
- Redirect to another URL: Sends the submitter to the URL shown here.
- Redirect to a custom HTML page: Sends the submitter to a temporary webpage generated from the code shown in this box. Supports HTML and the use of field values.
What do we mean by “the use of field values”? Well, you can include the content the user included in your form’s fields by placing the “Name” property of that field within square brackets. For example, if you wanted to include the person’s email address, you could write this:
“Thanks for contacting us! We’ll send a response to [email1] as soon as possible.”
If you’re nervous about typing this correctly, select the proper field from the drop-down menu below and it will be inserted where the cursor is placed in your email text.
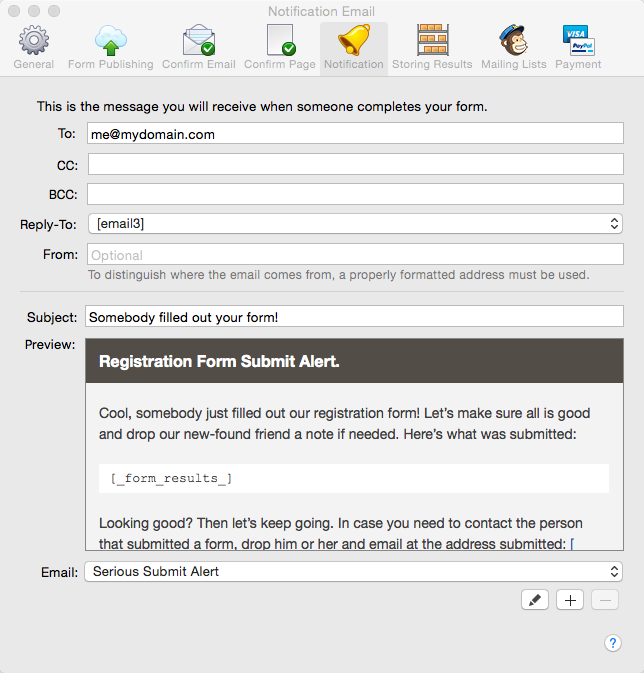
Notifications tab
If you're the kind of person that likes to keep on top of your emails, there’s no quicker way to be notified that your form was filled out. Using the Notifications tab you can configure your form to send you an email each time someone clicks the submit button. Simply fill out the appropriate fields just as you would when sending an email, and a notification will be sent to the address(es) specified. You can enter multiple email addresses such as those of your teammates or anyone else you want to get a copy of the message, just separate them with a comma.
As with the Confirm Email settings, you also have two different options when editing your notification email. You may, edit the code in Web Form Builder itself or you can edit it in Responsive Email Designer!
To get started, you will need to choose an Email template. You can do this by selecting the Email: dropdown and choosing the template you wish to work with. In this instance select “This is the default template”. You may keep the email as is, or edit it within WFB by clicking the Pencil icon and selecting Edit Code. Please note that any changes made to this default theme are not supported.
Editing in RED
To learn more about converting your web form email response to a responsive email using Responsive Email Designer, read over our “blah blah”. THIS NEEDS TO BE CHANGED. :)
Storage Results
There are two places (other than S-Drive Forms) where the data from submitted forms can be stored: a text file or a MySQL database. If you’re using S-Drive Forms, you won’t need to use either of these other options. To configure these options, click the Settings button in the Toolbar and then click the Saving Data button at the top of this window. To
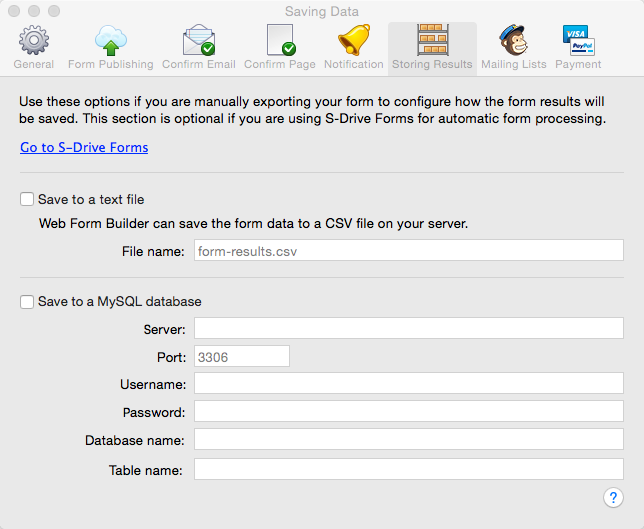
To save form results in a text file, check the box marked Save to a text file and enter a desired file name in the input box. The data will be recorded to a CSV file in the folder on your web server that contains the Web Form Builder files.
To save the form data to a MySQL database, check the box marked Save to a MySQL database and enter the appropriate information into the input boxes here.
Mailing Lists
You can integrate your form with an email campaign by submitting fields to a mailing list service such as MailChimp. Currently, MailChimp is the only service that works with Web Form Builder, but others are on the way. To configure your mailing list options, click the Settings toolbar button and click the Mailing Lists tab.
To send your form results to a MailChimp mailing list you’ll need to set up an account first. You can do so on the MailChimp website for free. Once your account is set up, you’ll need to retrieve your API Key which can be found by going to Account > API Keys & Authorized Apps. Copy the API Key shown here and paste it into the box that says Your MailChimp API Key in Web Form Builder and clicking Go.
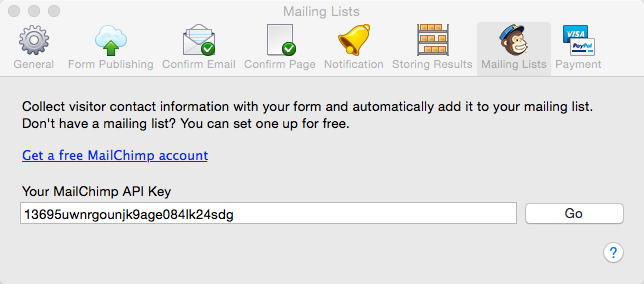
Remember to keep this key private, because anyone can access your account using it!
If you’d like to switch to a different mail service or account, you can click the Change button.
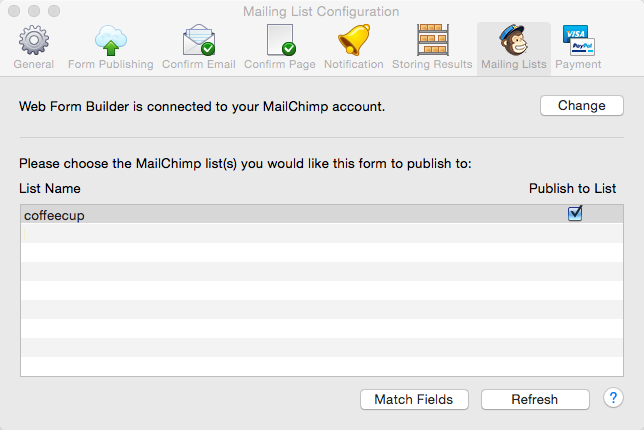
All of your mailing lists appear in this window. Selecting the Publish to List box next to each one means that information from your form will be sent to those lists. You’ll need to match fields to your MailChimp lists first, though. Click a list and select Match Fields.
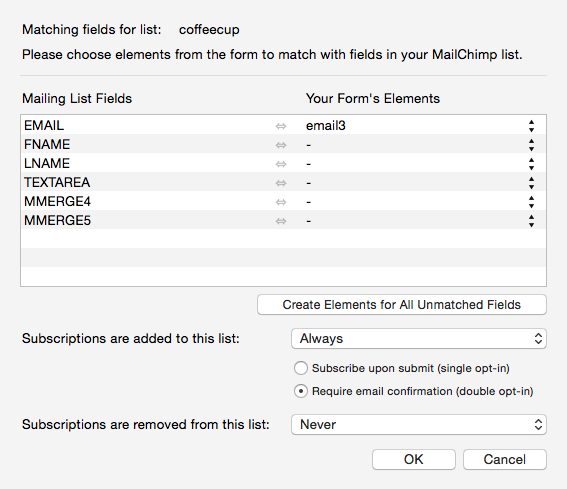
MailChimp mailing lists use information from your form to personalize emails to your subscribers (most importantly, the email address element). Matching fields means that specific elements in your form will be associated with those fields in your MailChimp list.
Under Mailing List Fields on the left, your MailChimp fields are displayed. You may not need to match all of these fields, but you will definitely need to match the “EMAIL” field. Under Your Form’s Elements on the right, you can choose an existing form element that can match that type of field. Simply choose an element from each drop-down menu to match fields.
There are a couple important factors you should be aware of when matching fields:
- Any fields marked as “Required” by MailChimp must also be “Required” in Web Form Builder.
- The Max. Length of a matched field cannot exceed the length limit set in MailChimp.
- If you are using a list item, such as radio buttons or drop-down menus, all options must match identically to the ones in your MailChimp list. Yes, this means all spelling and capitalization must be exactly the same for it to work!
- Click the Create Elements for All Unmatched Fields button to automatically create elements in your form that will correspond with fields you’ve set up in MailChimp. Don’t forget to go back to the form editing view and customize those new elements!
Adding and Removing Subscriptions
There are two more options at the bottom of this window:
- Subscriptions are added to this list when:
- Subscriptions are removed from this list when:
Most likely, you’re creating a mailing list signup form and will use the first option while leaving the second one set to “Never”. Let’s discuss those two options.
Add Subscription: From the drop-down menu, you can choose to:
- Always send a subscribe notice, every time the form is submitted
- Send a subscribe notice only when a certain option is selected (normally the property name of a checkbox or radio button selection labelled “Subscribe to our newsletter?”)
- Never send a subscribe notice with this form
Remember that if you are subscribing people to a mailing list, it is ethically sound to clearly inform them of this before they submit the form!
Remove Subscription: From the drop-down menu, you can choose to:
- Always unsubscribe the person from the mailing list when the form is submitted
- Send an unsubscribe notice when a certain option is selected (normally the property name of a checkbox or radio button selection labelled “Unsubscribe from our newsletter?”)
- Never use this form to send unsubscribe notices
Note that you cannot use the same values for both drop-downs, because it would never make sense to perform both actions under the same conditions!
That’s it for back-end stuff! The next steps are to upload your form and add it to your code.
Payment
You can accept payments via forms made in Web Form Builder by configuring a payment provider. To do so, click the Settings toolbar icon and choose the Payment tab.

To enable payment options in your form, check the box next to Enable form payments. You can now configure the following options.
Fixed Amount
If you’d like a specific amount to be charged each time the form is submitted, enter this amount here and choose the currency you will use from the drop-down menu. If you’d like to use a specific symbol for price listings, check the box next to Custom symbol and enter the character in the box.
This option is used when there is a certain price that is charged each time the for is submitted. For example, if the form was a registration signup for a conference that cost $15 to attend, submitting the form would place a charge for $15.00 to the attendee’s credit card.
If you are charging a fixed amount, make sure to clearly inform the buyer that you are doing so somewhere in the form. Then they’ll be well aware that they will be charged when they submit the form.
Invoice Label
If your form charges a fixed amount using the option above, this label will be its description in the invoice that the buyer receives once the form is submitted.
Payment Type
You have three choices for payment processing found in the Payment Type drop-down:
- Third Party Gateway: Select this option to use one of the payment processing services in the Payment Options section below. These options allow you to accept credit card payments in your forms.
- Email Invoice: An invoice will be emailed to the buyer when the form is submitted. Basically, this is a “You take care of the rest” payment option. The email invoice that is sent should describe how the buyer can submit payment (i.e. “Send a check payable to…”). You can edit this email by clicking Configure Email.
Click Configure Payment Page to customize the page that the buyer is redirected to when the form is submitted. The payment page is slightly different from a confirmation page:
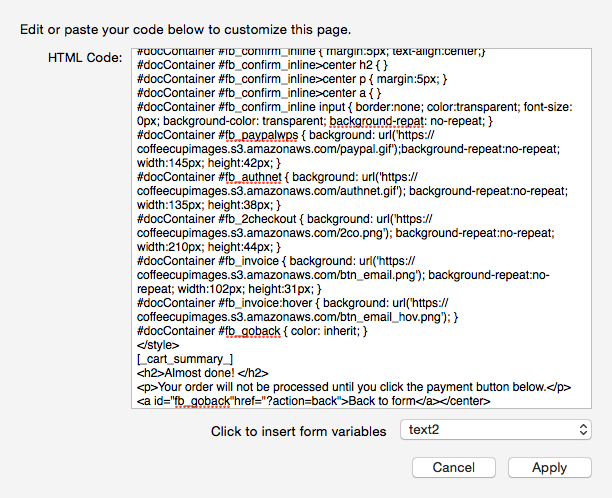
For a typical non-payment form, the submit button sends the visitor directly to the option you’ve chosen in the Settings menu’s Confirm Options tab. But when form payments are enabled, clicking the submit button sends the visitor to the payment page, where they can click to the payment provider option of their choice to finish the payment. Once payment is completed, they are redirected to the option you've chosen in the Confirm Options tab.
Payment Options
If you've chosen the Third Party Gateway option above, you can use one or more of the payment providers in this drop-down as payment options. To enable a payment provider, select it from the dropdown list, check the box next to Enabled, and enter the proper information in the fields below.
Note: When a payment form is submitted, the payment is not processed until after the entire process is completed. The submitter must complete the payment process before money is transferred.
That’s it for back-end stuff! The next steps are to upload your form and add it to your code.