Digital Signatures is easy to use and can be used to authenticate the identity of the sender of a message or the signer of a document. By following the steps outlined below you will be up and running in no time.
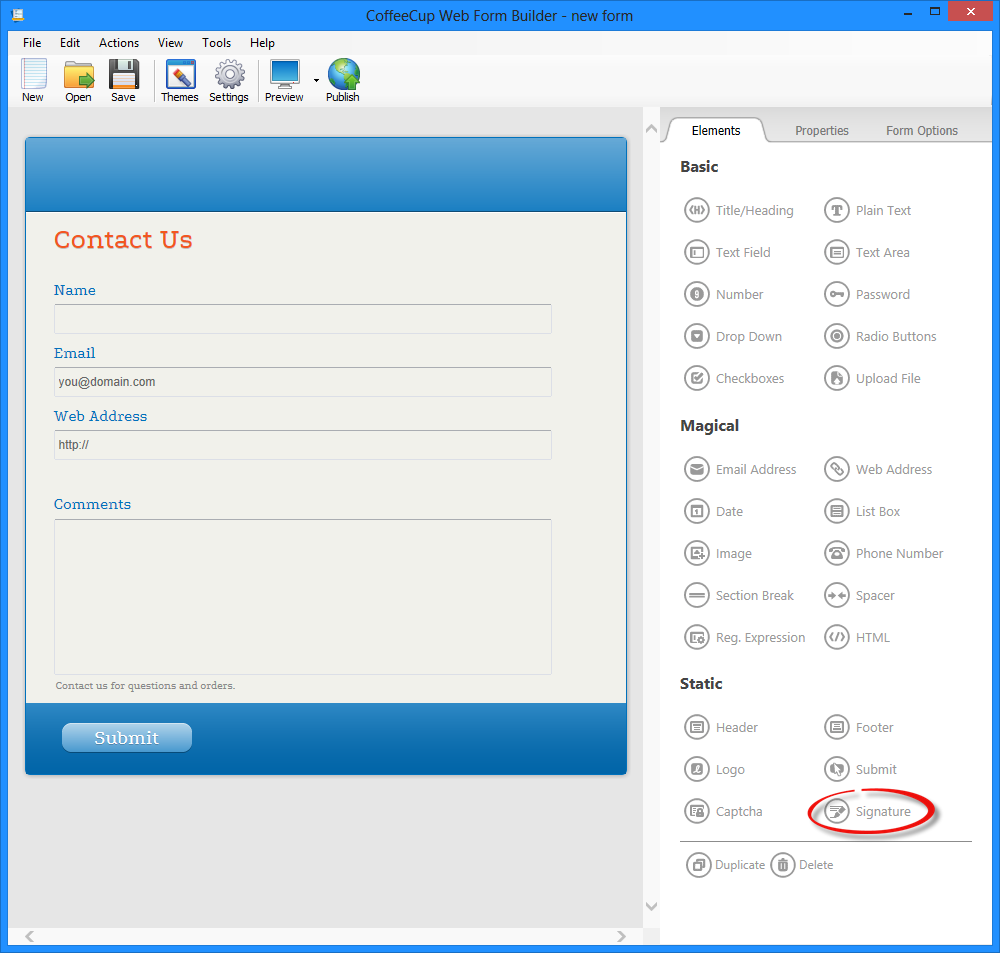
Step 1:
Navigate to the Static section on the Elements tab and click the Signature element.
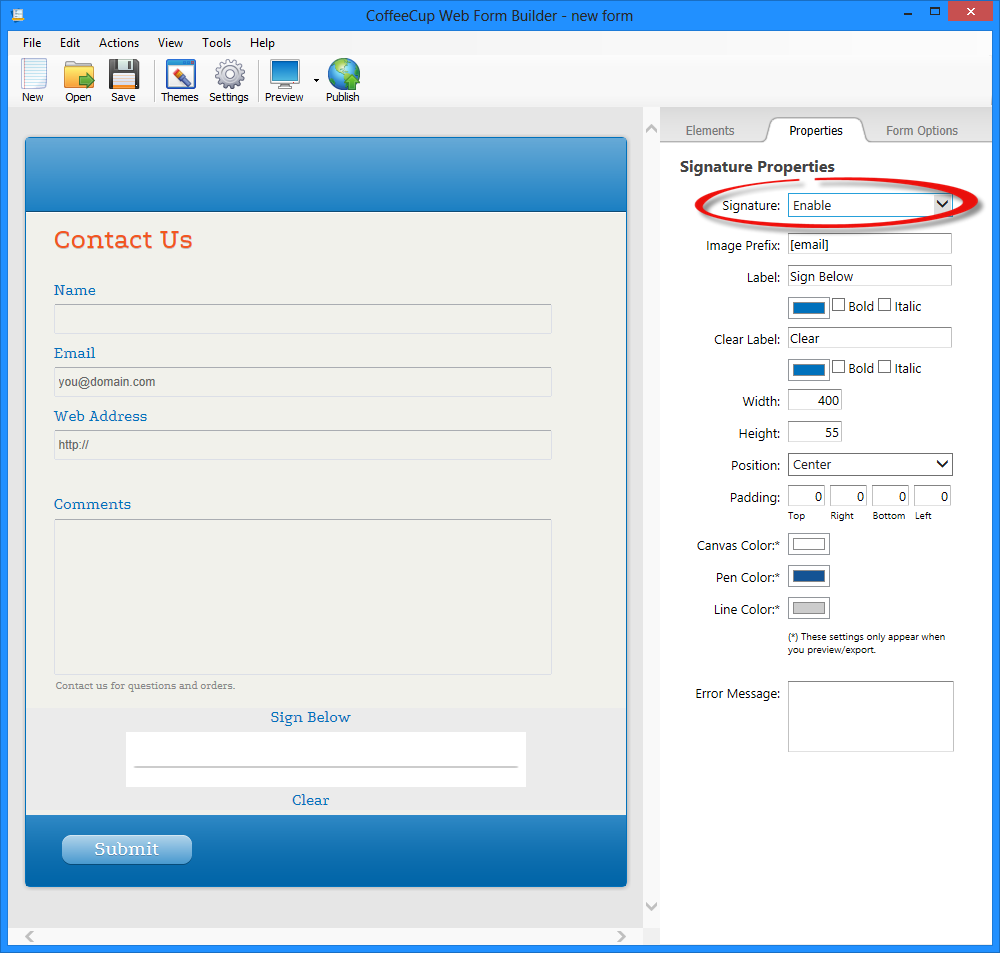
Step 2:
We now need to enable the signature element. Click on the Signature drop-down and select Enable. You will then see the signature in the preview area.
Step 3:
That is it! Now all that is left is to edit the settings and colors. Listed below are an explanation of those settings.
- Signature: Where you enable the signature element.
- Image Prefix: This can be used to set the prefix of the image name that is saved. You can set this to any element name such as [email] or [first-name].
- Label: The text that shows the label of the signature.
- Clear Label: Sets the text for the clear button element.
- Max. Width: Is used to set the maximum width of the signature element.
- Height: This allows you to increase the height of the canvas element.
- Position: This will allow you to position the element to the left, center or right of the form.
- Padding: The ability to shift the signature element inside of the box.
- Canvas Color: This is the color of the background of the signature element.
- Pen Color: This is the color your customer will sign in.
- Line Color: This is the color of the line in the signature element.
- Error Message: The message that will be displayed if your customer does not sign the form.
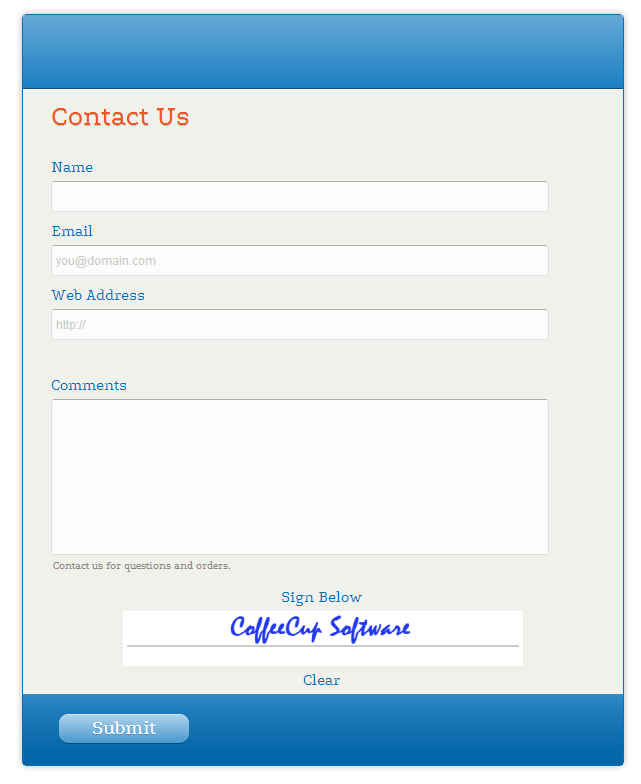
Here is the outcome. Enjoy!