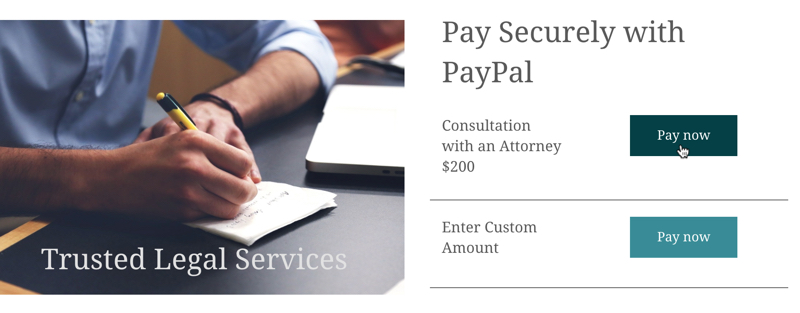
Take payments on your site with PayPal.
Collecting payments and donations is easy to set up with PayPal. Just specify a few things like amount and style, then copy the auto-generated code and paste it into your website.
In this tutorial, you’ll learn how to create buttons and connect them to the PayPal button element within Site Designer.
Locate the button tool inside your PayPal Merchant account.
To get started, log into your PayPal merchant account. Then select Pay & Get Paid from the side menu and choose PayPal Buttons from the dropdown.

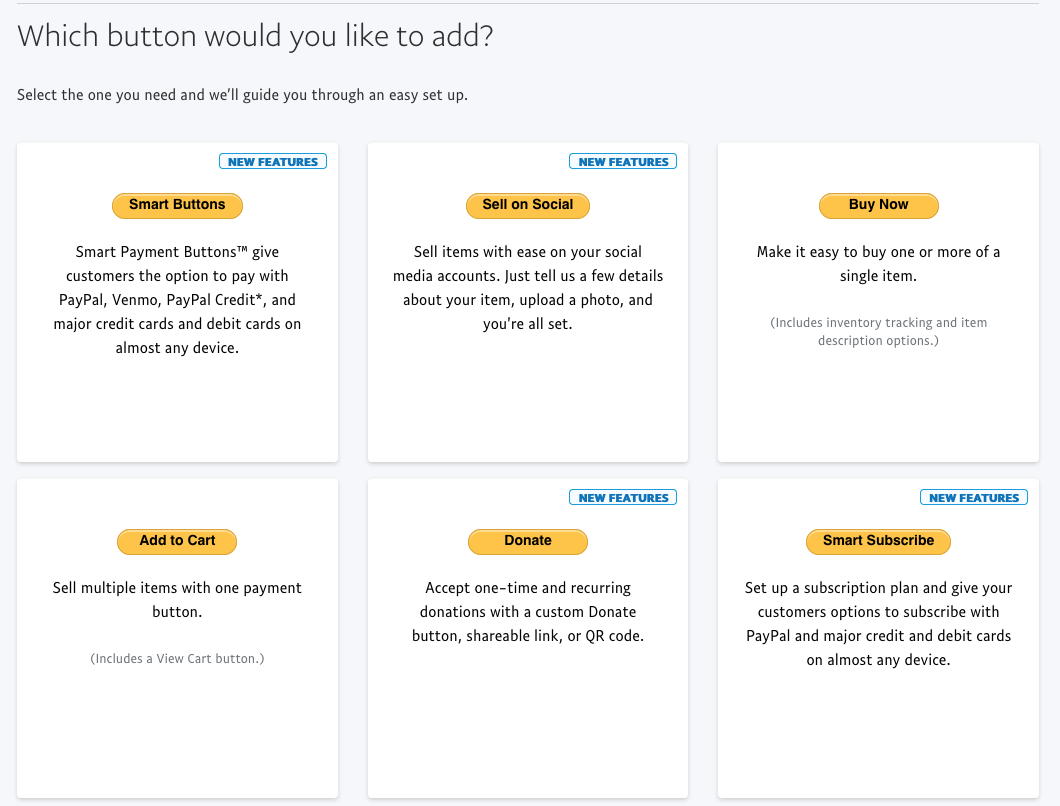
You will be presented with several button options. But first, click on the option to access Saved Buttons

Then choose the option to Create Button.

In this example, we will select the Buy Now button option.
Instructions for button creation.
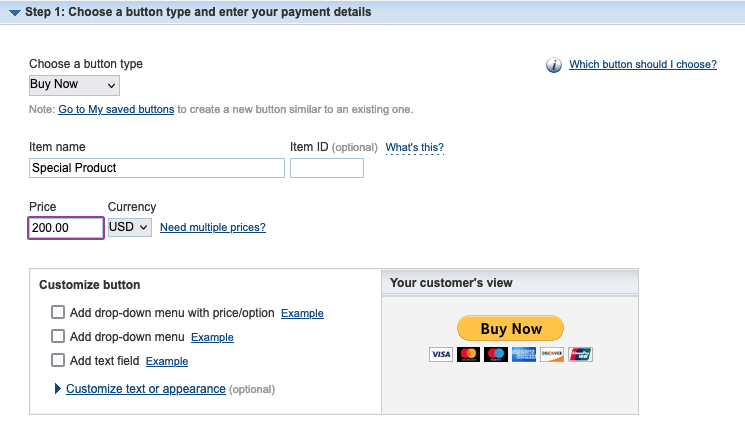
STEP 1: Choose a button type and enter your payment details.
Select your button type. For example, for a fixed-amount, you’ll choose Buy Now to allow website visitors to make a one-time payment.
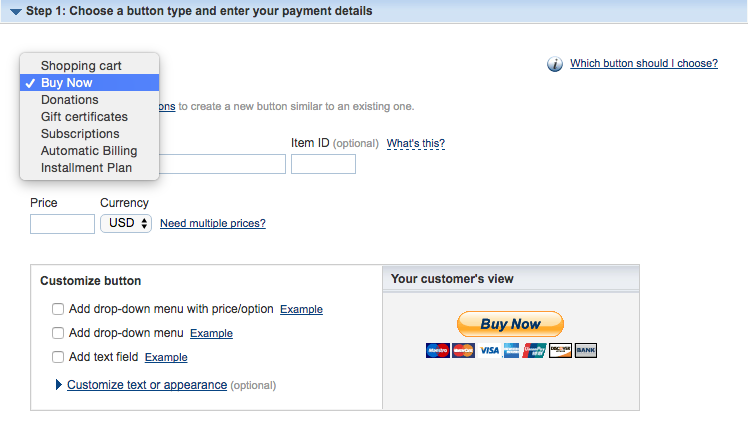
Under Item Name, enter the name of the item or service you are selling. Then set your price, currency, shipping, tax, and identifier if needed.
Multiple Choice Buttons
Please note drop-down buttons offering multiple choices to your customer are not supported at this time.
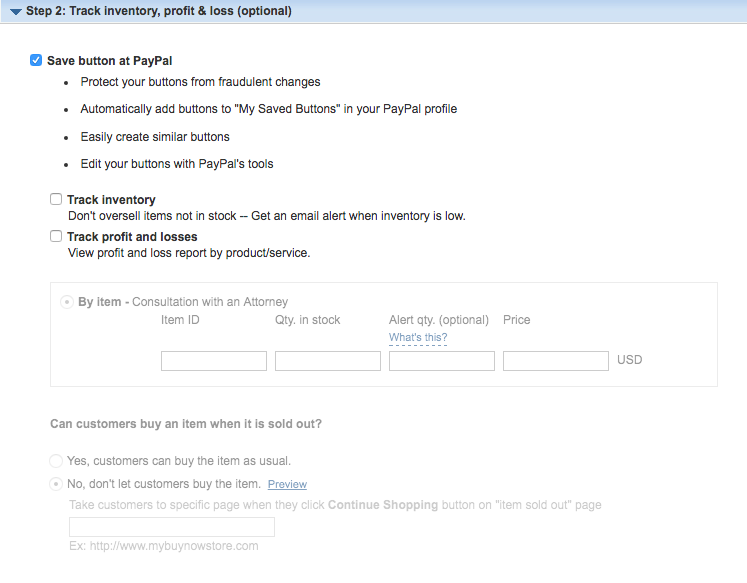
Step 2: Track inventory, profit & loss (optional)
If you’re making buttons for an online shop, the set of options in this step will come in handy. You can set the quantity of your stock, track profit and losses, and even restrict purchases for items that are sold out.
Step 3: Customize advanced features (optional)
This last section includes optional settings for the checkout page including changing order quantity, allow for a special message to be included with payment, or collect their shipping address.
There are also 2 redirect fields. The first gives you the ability to automatically send clients back to your site if they cancel their order. In this box, we recommend you direct these customers to your contact information so they can reach out to you if they have questions.
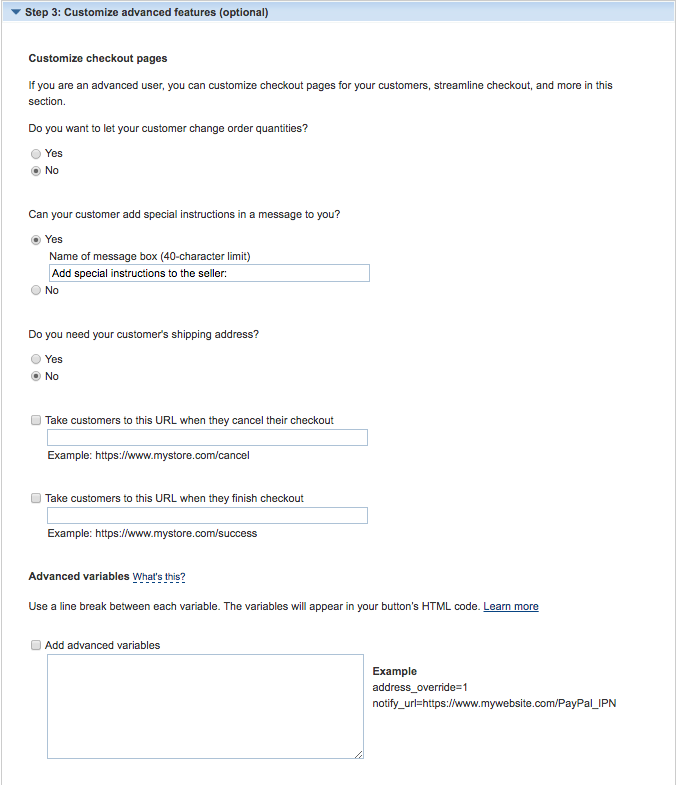
The second redirect field will send customers to a special landing page after their order is completed. It is always a great idea to send these customers to a friendly ‘success’ or ‘thank you’ page. This professional touch gives the client closure, assuring them their payment has been accepted.
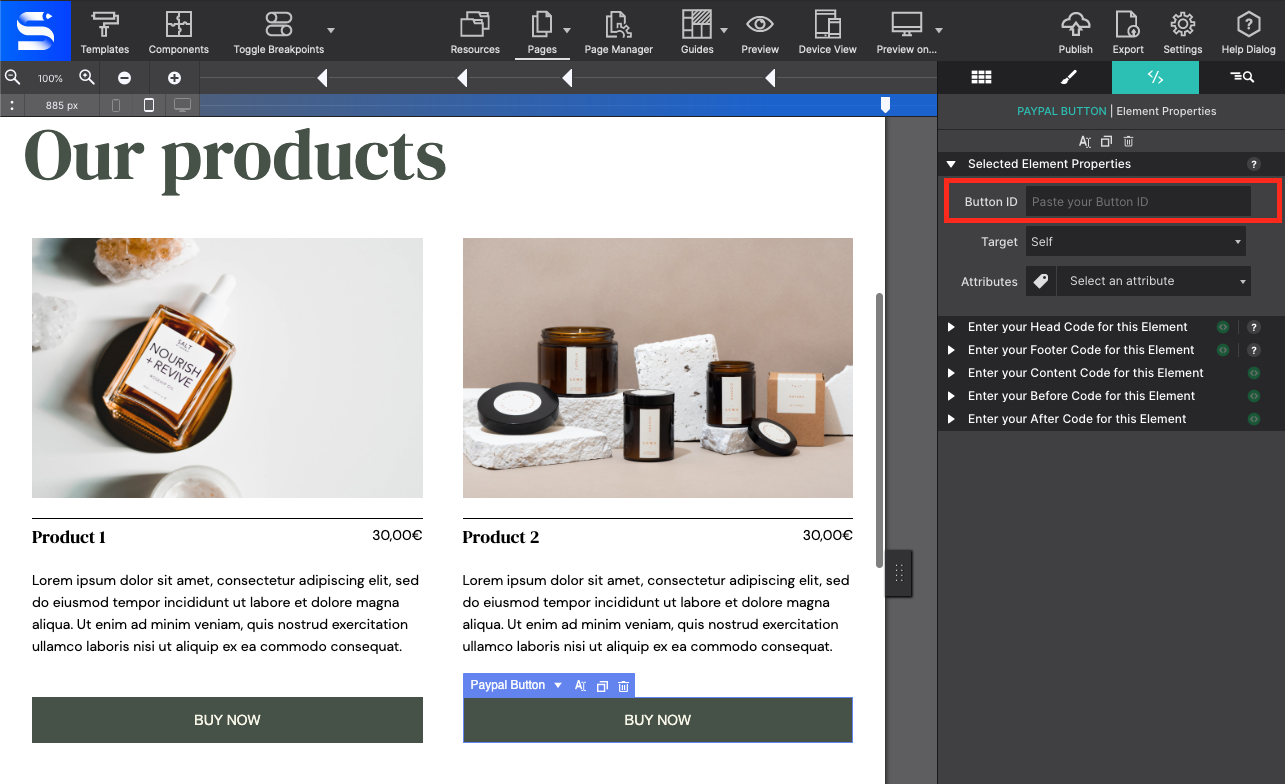
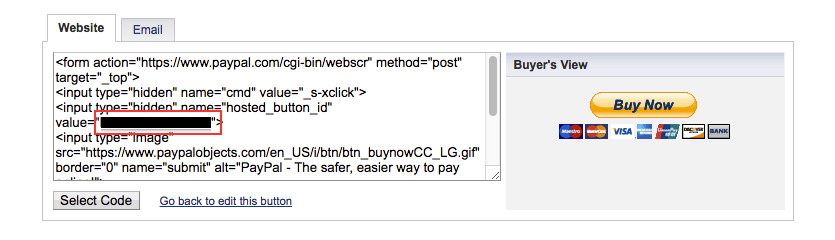
Get the button Identifier to insert into website
Click Create Button at the bottom of the window. PayPal will automatically generate the code for the payment button. The button identifier will be listed within the generated code. You'll want to copy this value manually with your mouse. You'll paste this ID into Site Designer to connect your button.
Adding the Identifier into Site Designer
Open Your project with Site Designer.
Launch Site Designer and open the page where you want to add your button. From the Content pane, click or drag-n-drop the button element you'd like to use: PayPal Button or PayPal Image.
The PayPal Button option will give you a customizable button. This allows you to change the appearance like color, size, text, font type, etc. so that it matches the style of your pages.
The second option, PayPal Image, will insert a standard PayPal button design. The Element pane options under Source will allow you to select button types. You can also choose to import or link-in a local button image.
Sync the element with your button ID.
From the Element pane, paste your PayPal button identifier into the box labeled Button ID.