

Have a WordPress Blog and wish to add your form to it? Don't panic, we're here to help, this article will walk you through a couple of scenarios our users have encountered.
Using S-Drive
Step 1:
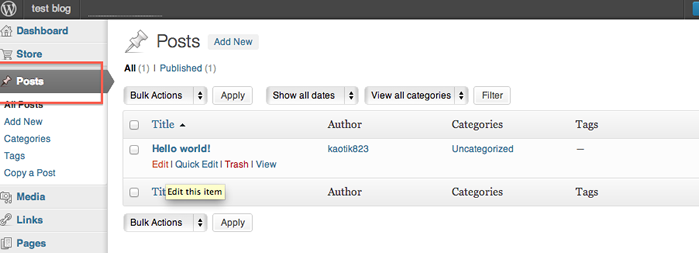
Log into your "Blog" through the admin panel, and select the "Posts" icon from the left.
Step 2:
Step 3:
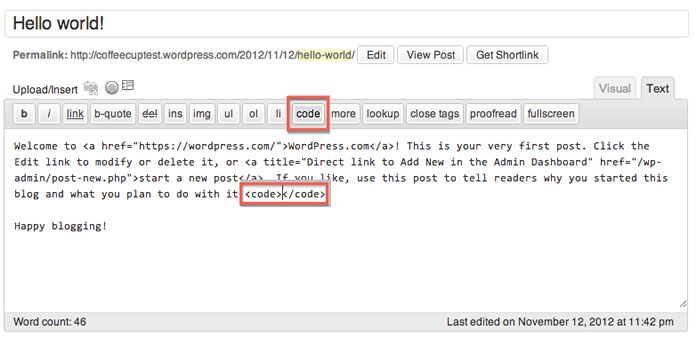
Now select the "code" tool to create an open tag, then paste the code after that and finally select the "code" once again to close the tag on the page.
Step 4:
Simply upload your form to your S-Drive account, then copy and paste the provide markup within the "Code" tags as shown here using Option 1: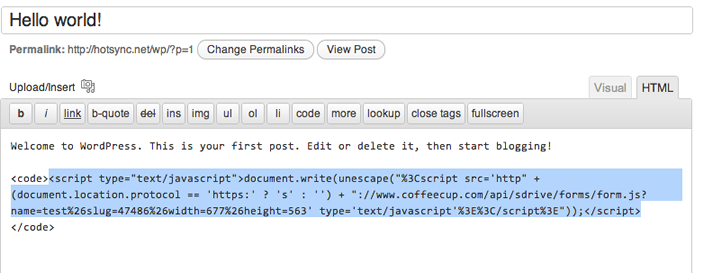
Step 5:
Click the Update option to publish the blog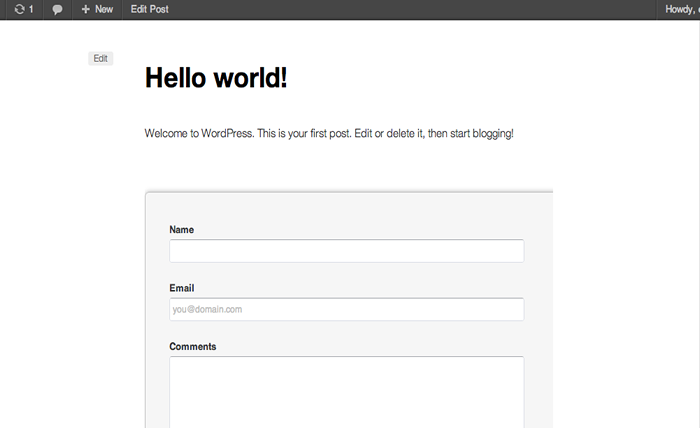
- Do not switch to the Visual tab as this will remove the custom markup from the blog, this is a known issue with WordPress that they are currently looking into.
- On some WordPress installations, the <code> tool is not always required. If you experience any issues with the form not appearing, try removing the <code></code>.
Exporting the form to your own server. This takes more work! :)
Step 1:
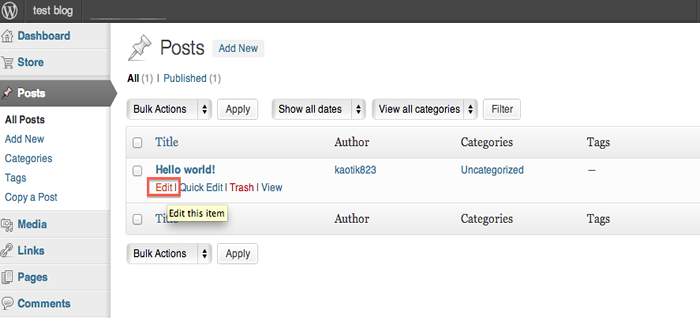
Log into your "Blog" through the admin panel, and select the "Posts" icon from the left.Step 2:
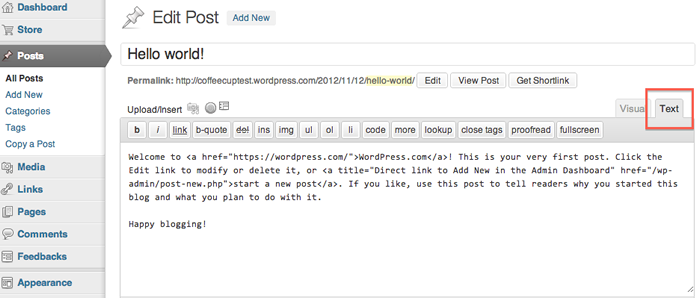
Select Edit, then select the "Text" tool to edit the markup of your blog.Step 3:
Now select the "code" tool to create an open tag, then paste the code after that and finally select the "code" once again to close the tag on the page.Step 4:
Upload the contents of the exported folder to the same location as the WordPress blog using an ftp client, then copy and paste the provided markup within the "Code" tags on the page as shown here.
Step 5:
Click the Update option to publish the blog- Do not switch to the Visual tab as this will remove the custom markup from the blog, this is a known issue with Wordpress that they are currently looking into.
- On some WordPress installations, the <code> tool is not always required. If you experience any issues with the form not appearing, try removing the <code></code>.
Hosting your blog with WordPress.
Step 2:
Log into your "Blog" through the admin panel, and select the "Posts" icon from the left.Step 3:
Step 4:
Step 5:
- Do not switch to the Visual tab as this will remove the custom markup from the blog, this is a known issue with WordPress that they are currently looking into.
- On some WordPress installations, the <code> tool is not always required. If you experience any issues with the form not appearing, try removing the <code></code>.
Hacking the markup
By default WordPress uses webURLs which have question marks and lots of numbers in them, however WordPress offers you the ability to create a custom URL structure for your permalinks and archives. This can improve the anesthetics, usability, and forward-compatibility of your links.
Example:
Default setting: http://www.mydomain.com/wp/?p=123
Using Permalinks: http://www.mydomain.comt/wp/2013/03/21/sample-post/
If you are using the default link setting, you can paste in the markup exactly as Form Builder generates. When switching to Permalinks, you have to make a small adjustment to the markup.
Here is example code that will be generated. This form was saved as wp-form. Note everything highlighted in bold.
<script type="text/javascript">document.write(unescape("%3Ciframe id=\"fb_iframe\" src=\"wp-form.php" + window.location.search + "\" width=\"602\" height=\"671\"allowtransparency=\"true\" scrolling=\"no\" frameborder=\"0\"%3E<a href=\"wp-form.php\" title=\"wp-form\">Check out my CoffeeCup Form</a>%3C/iframe%3E"));</script>
<noscript> <iframe width="602" height="671" style="border:none; background:transparent; overflow:hidden;" id="fb_iframe" src="wp-form/wp-form.html"> <a href="wp-form.php" title="wp-form">Check out my CoffeeCup Form</a> </iframe></noscript>
Here is the adjusted markup. Note how the file path was modified in bold to point to the location of the form on the server. For this, Wordpress is installed into a folder called wp or more directly www.mydomain.com/wp.
<script type="text/javascript">document.write(unescape("%3Ciframe id=\"fb_iframe\" src=\"/wp/wp-form.php" + window.location.search + "\" width=\"602\" height=\"671\"allowtransparency=\"true\" scrolling=\"no\" frameborder=\"0\"%3E<a href=\"/wp/wp-form.php\" title=\"wp-form\">Check out my CoffeeCup Form</a>%3C/iframe%3E"));</script> <noscript> <iframe width="602" height="671" style="border:none; background:transparent; overflow:hidden;" id="fb_iframe" src="/wp/wp-form/wp-form.html"> <a href="/wp/wp-form.php" title="wp-form">Check out my CoffeeCup Form</a></iframe></noscript>
You may also find on some WordPress installations that the full markup will not work. Using a simplified iframe should correct that. Here is an example of what to use:
<iframe height="830" id="fb_iframe" src="http://www.mydomain.com/form/formname.html" style="border: none; background: transparent; overflow: hidden;" width="100%"></iframe>