

A library item is a file that contains blocks of code that you can place anywhere within your markup. With library items, you write snippets of HTML, CSS, JavaSript, etc., that may be common to all your web pages. These library items can then be included within your various pages. These come in handy when changes need to be made. Instead of updating each page manually, simply update the library item and every page that uses that code will automatically be updated.
As an example, let’s say you are building a website for a business that has a menu section on every page of the website and they update it frequently. Having to update each page the menu appears on is extremely inefficient. Now this is where a library item comes in handy! When your menu content changes, simply adjust the markup within the library item, and it will be automatically be updated on all pages within seconds. No longer will you need to update each page manually.
As you create these Library items, they can be found on the left under the Library Tab. Library Items are global and can be added to any page. Just note that any referenced files still need to be added to the project folder.
Quick Links
- Creating Library Items
- Adding Library Items
- Modifying Library Items
- Updating Pages with Library Items
- Other Information
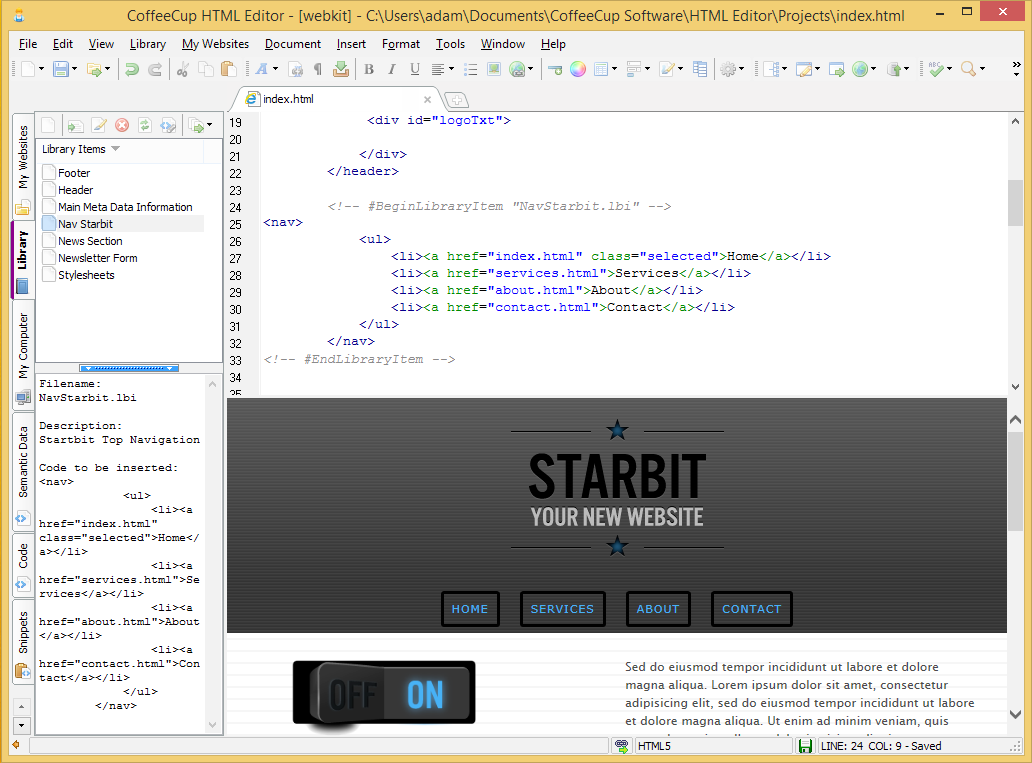
Creating Library Items
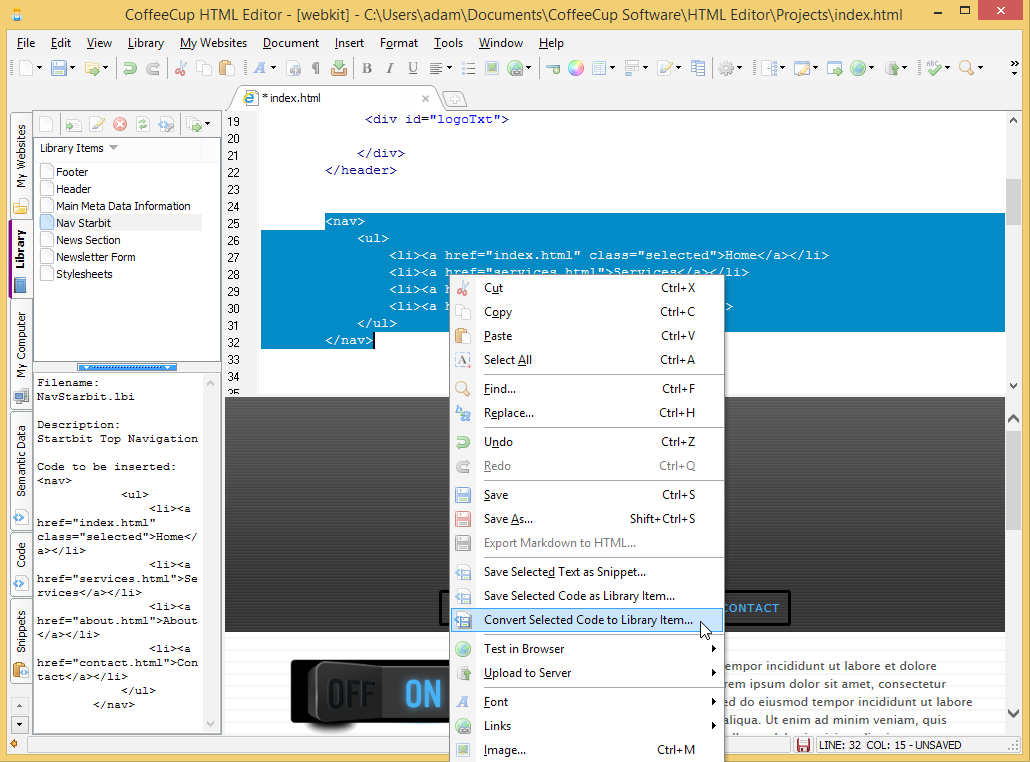
There are several ways to create a library item, such as: Clicking the Library tab and selecting the Add Library Item or navigating to Library Menu > Add Library Item… However the easiest is to select the code from an open page then right click and choose one of the two options:
- Save Selected Code as Library Item (saves the code new to the library)
- Convert Selected Code to Library Item (replaces the Library markup)
After selecting one of the two options, this will automatically insert the selected code into the Code section, allowing you to give the library item a title and description.
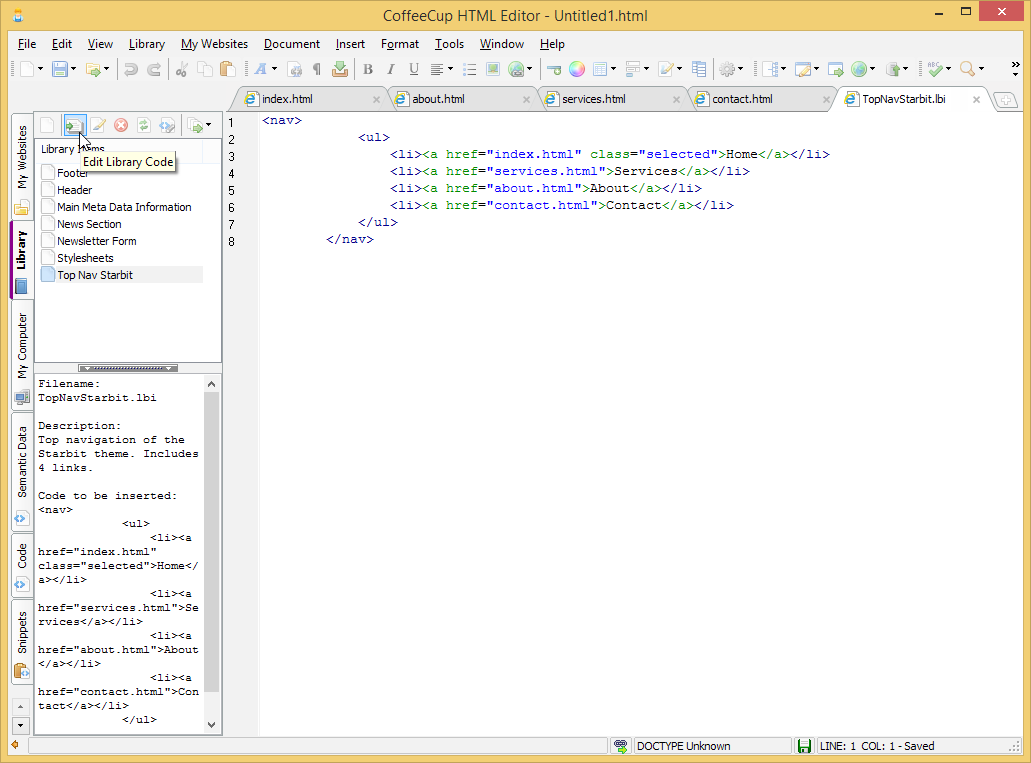
The title is the name of the library item, and it should identify the code, just remember not to write a book. ;) It should be short and to the point. As an example, if you were creating a library item for a navigation menu that is at the top of the EcoLogic theme, the title could be Top Nav Starbit or Main Nav Starbit.
Descriptions are where you can go hog wild and write a book if you like. You can place anything you like in the description section as it is optional and for reference purposes only.
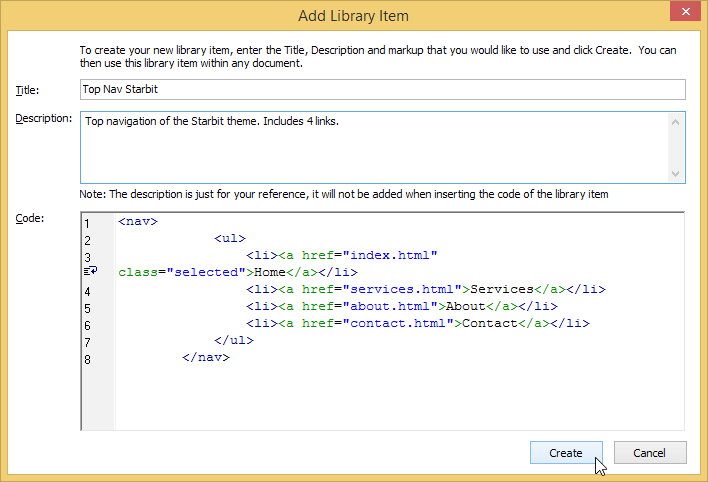
Once you have it ready, click Create!
Download Starbit Project FileAdding Library Items
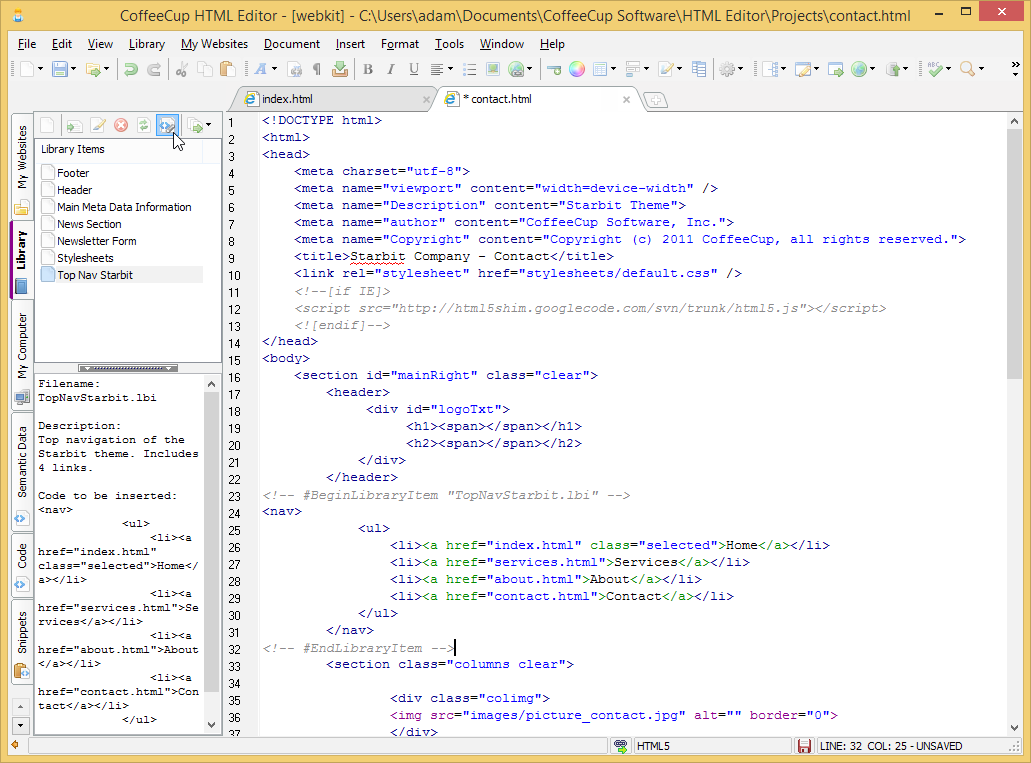
Adding a library item to your web site is very easy. Once the library item has been created it can be added to the other pages of the website. Open the contact.html page from the StarBit theme and using the Top Nav Starbit library item from above, select from the beginning Nav tag to the closing Nav tag and delete it.
       <nav>
           <ul>
               <li><a href="index.html" class="selected">Home</a></li>
               <li><a href="services.html">Services</a></li>
               <li><a href="about.html">About</a></li>
               <li><a href="contact.html">Contact</a></li>
           </ul>
       </nav>
Now where the code was displayed we need to insert the library item. Click the Library tab and select the Nav Starbit library item. You can insert the library item by double clicking it, or clicking on the Insert Library Item button.
All done, you are ready to go!
What is this commented section?
When you insert a library item you will notice that the HTML Editor inserts an HTML comment that looks like this: <!-- #BeginLibraryItem "Nav.lbi" --> This is how the Editor finds, edits and replaces the library item. If you alter or remove these comments your library item will no longer update on the page. Also, if you manually adjust the markup within these comments, that markup will be removed the next time you update the library item.
Modifying Library Items
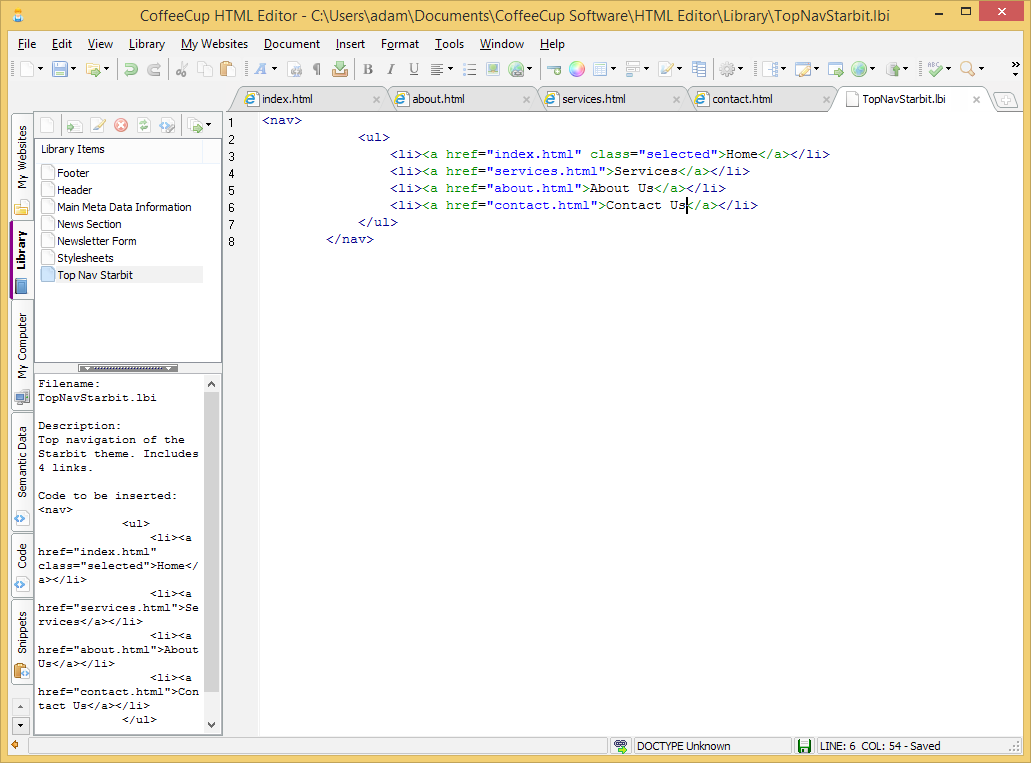
Ready to test that new library item? Excited? We know we were when we first tried it! As with creating a library item, you have three locations to choose from when editing a library item. Select a library item and click the Edit Library Item option and it will open the .lbi file. Once you make your edits, save the library item just as you would any HTML page you are creating. For this example, we will be editing the Top Nav Starbit library item that has been added to all four pages of the website.
In this example we will be adding the word us to the About and Contact links. Just type it in as you would with any HTML document and then save the .lbi file.
Now, we need to decide how we wish to update our pages. This is explained in the next section.
Updating Pages with Library Items
When updating your library items you have several options.
- Update Current Page - This updates the current page library item only.
- Update Open Pages - Updates all pages that are currently open.
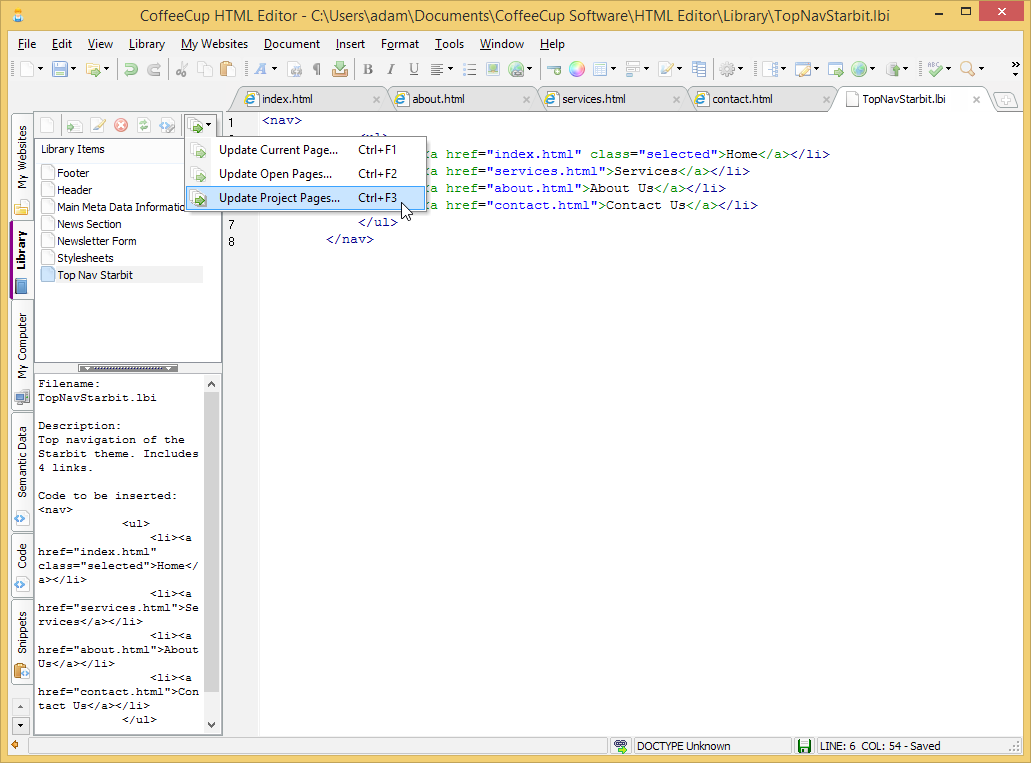
- Update Project Pages - This option updates all pages that use the library item.
You can locate this option under the Library tab, menu or by right clicking a library item. You will need to choose which option you would like to use by selecting one of the options explained above.
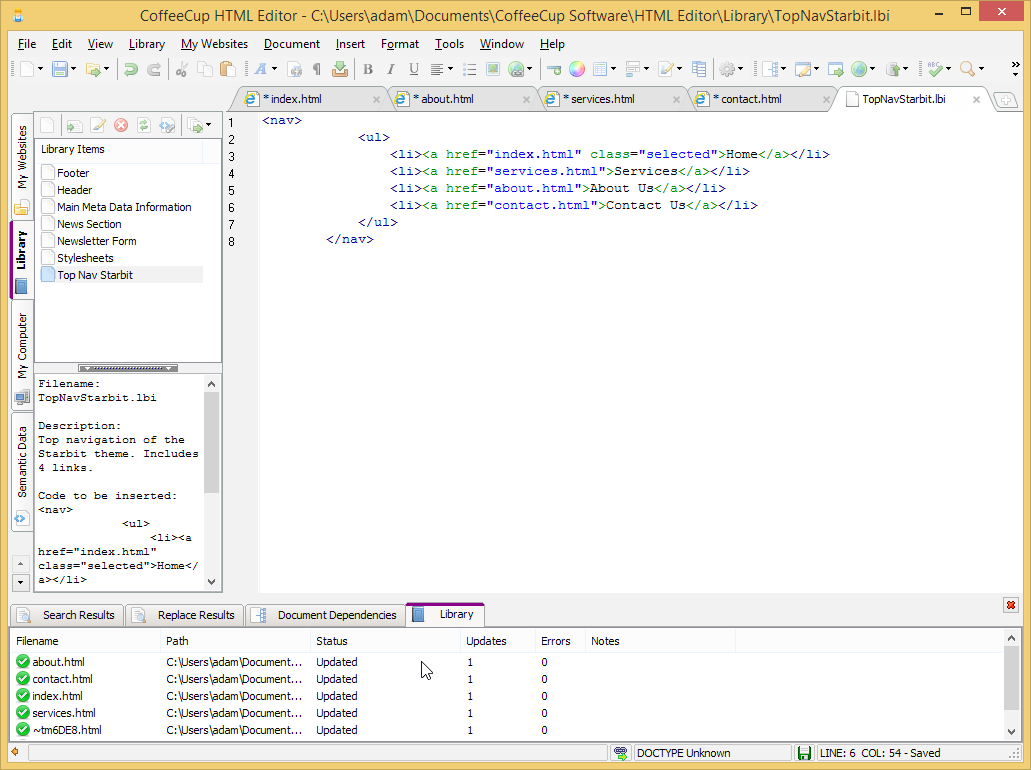
Once you have chosen an option, your page(s) will be updated, and the Results pane will display with the outcome of the library item updates. This pane will provide you with the page name of all the pages that the library was found on. You will also see the path to that page, status and notes on the status.

Importing Library Items
You can import library items Dreamweaver (™) or any other program that uses the .lbi format by going to the Library menu and select Import Library Items. You can then select the library items that you want to import, and they will be copied to your Library folder
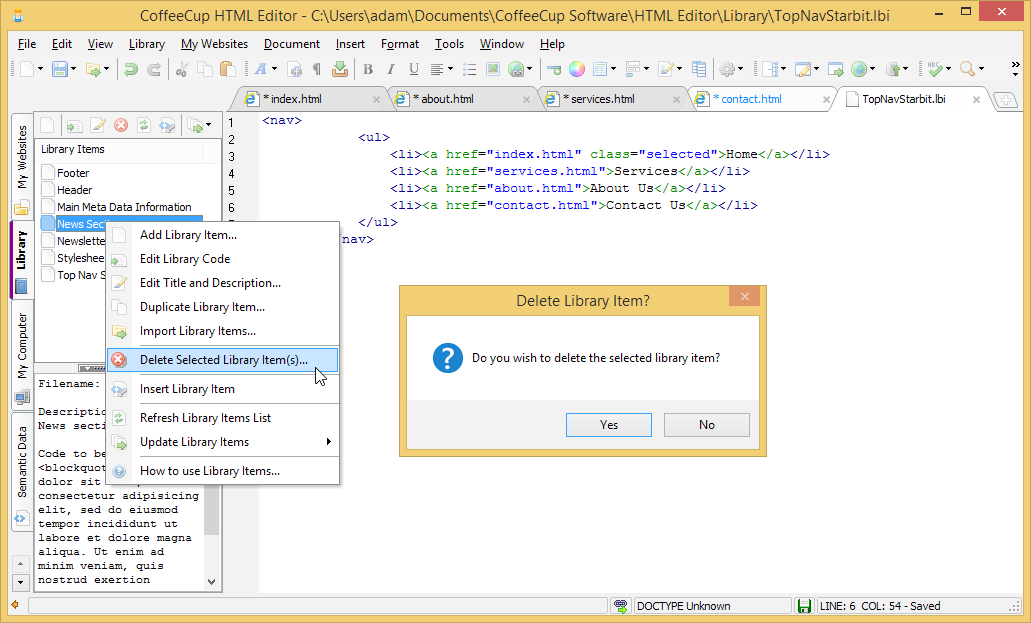
Deleting Library Items
To delete any library item, simply select it from the list and click Delete. It is important to note that this does not remove any library items that have been inserted into any page. You are simply deleting the library item from your list. When you delete a library item, you will also need to update each page that has the referenced library item on it and remove it from the page.
Library Preferences
To aid you with with keeping your pages and library items in sync, we have added a few preferences under the Tools menu > Preferences.
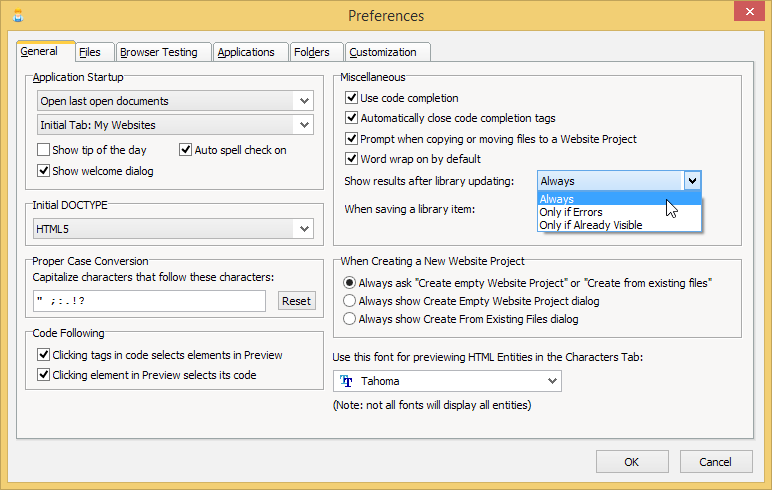
Show results after updating library: These options will control what you see when you update your pages. By default we show the results. If there are any errors, they will be displayed in the Library Update Results at the bottom of the editor.
- Always (this is the default)
- Only if Errors
- Only if Already Visible
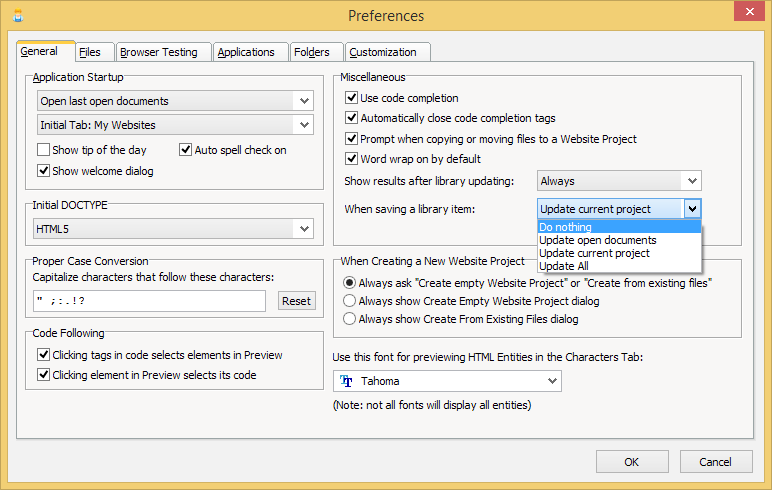
When saving a library item: These options will control what happens when making a change to the markup of any library item. The process can be automated by setting the option to Update Current Project or left to manual by selecting Do Nothing.
- Do nothing (this is the default)
- Update open documents
- Update current project
- Update all open and current project
Other Information
How to Backup your Library Items:
Library item files are global and can be used within any document or Website Project. You will find these items saved here at:
- Windows Vista/7/8: C:\Users\[username]\Documents\CoffeeCup Software\HTML Editor\Library