

Testing PHP Files with Site Designer’s Live Preview
If you’re developing PHP pages with Site Designer, you may want to test them locally before uploading them to a live server. Testing PHP locally allows you to verify functionality, debug scripts, and make changes quickly without repeatedly uploading files to a remote server. Good news is, you can test PHP files directly from Site Designer using Live Preview.
This allows you to run and preview PHP pages entirely on your local computer without exporting files to a remote server. In this article, we’ll show you how to set up your computer for PHP testing using a local web server and PHP, and then configure Site Designer to preview PHP files locally.
Requirements
Before starting, make sure you have the following installed:
- CoffeeCup Site Designer
- A web server installed and running using either XAMPP or stand-alone PHP.
- XAMPP installed and running
- A modern web browser
Set Up Your Local Computer for PHP Testing
To test PHP files, you’ll need a web server running on your computer with PHP installed locally. There are several ways to install the required components, including:
- Install a package such as WAMP or XAMPP, which includes all required components for PHP testing.
- Install the components separately (web server and PHP).
- On Windows, install WSL (Windows Subsystem for Linux) and run PHP in a Linux environment.
The best option depends on your testing requirements.
- If you only need to test PHP and do not require a database, you can install PHP and use PHP’s built-in web server.
- If you plan to test PHP with a MySQL database, installing a complete package such as XAMPP is usually the better option.
XAMPP runs on both Windows and macOS, whereas WAMP is Windows-only. Since Site Designer runs on both platforms, this guide will cover installation using XAMPP.
PHP Without a Database
If you’re testing PHP without a database, go here for instructions on installation and setup of PHP
PHP With a Database
If you need PHP and a MySQL database, go here for instructions on installation and setup of XAMPP.
Set Up Site Designer Live Preview for PHP Testing
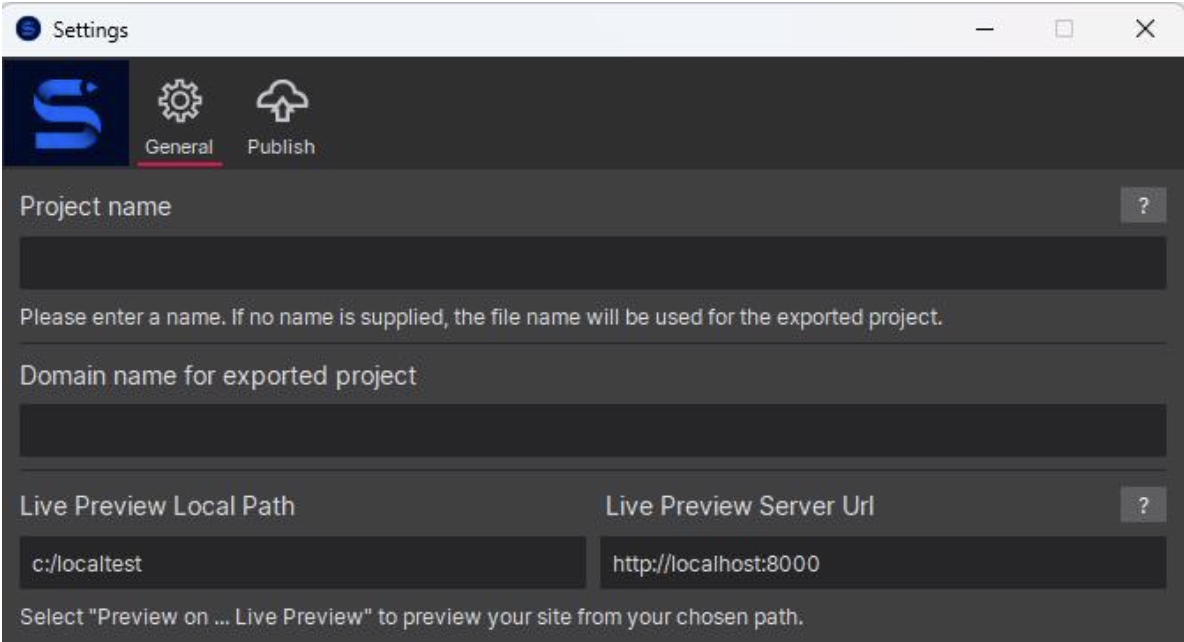
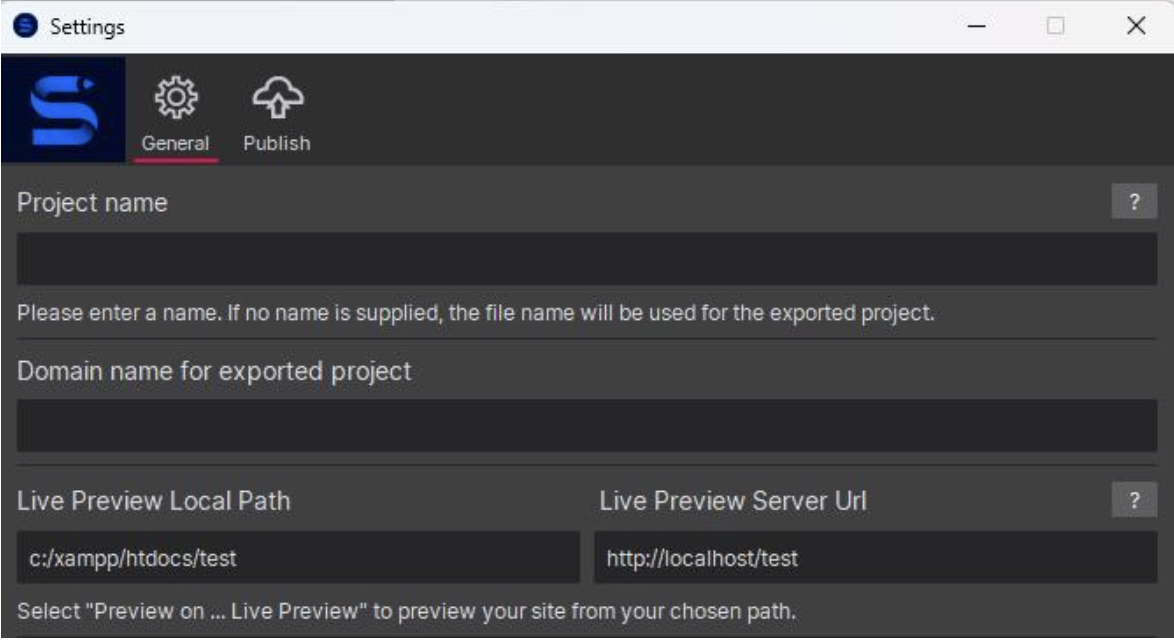
Once your computer is set up for PHP testing, start Site Designer and open Settings. You will see two fields related to Live Preview:
- Live Preview Local Path: Enter the folder on your computer where PHP files will be stored.
- Live Preview Server URL is the address that the browser will open during preview.
The Live Preview Local Path is the directory where your files will be placed for preview. This should be the directory you configured to serve PHP files during your PHP or XAMPP installation.
The Live Preview Server URL is the URL the browser should open on preview. To properly test a PHP file with Live Preview, the browser must open an http or https URL, not a local file path. This should match the URL configured for the web server running on your local computer.
Here’s a typical Settings example for a PHP installation without MySQL:
Here’s a typical example for an XAMPP installation with PHP and MySQL:
Helpful Examples
Most local installations use one of the following URLs:
- http://localhost/
- http://127.0.0.1/
- http://localhost/project-name/
Example: http://localhost/test.php
Preview a PHP File
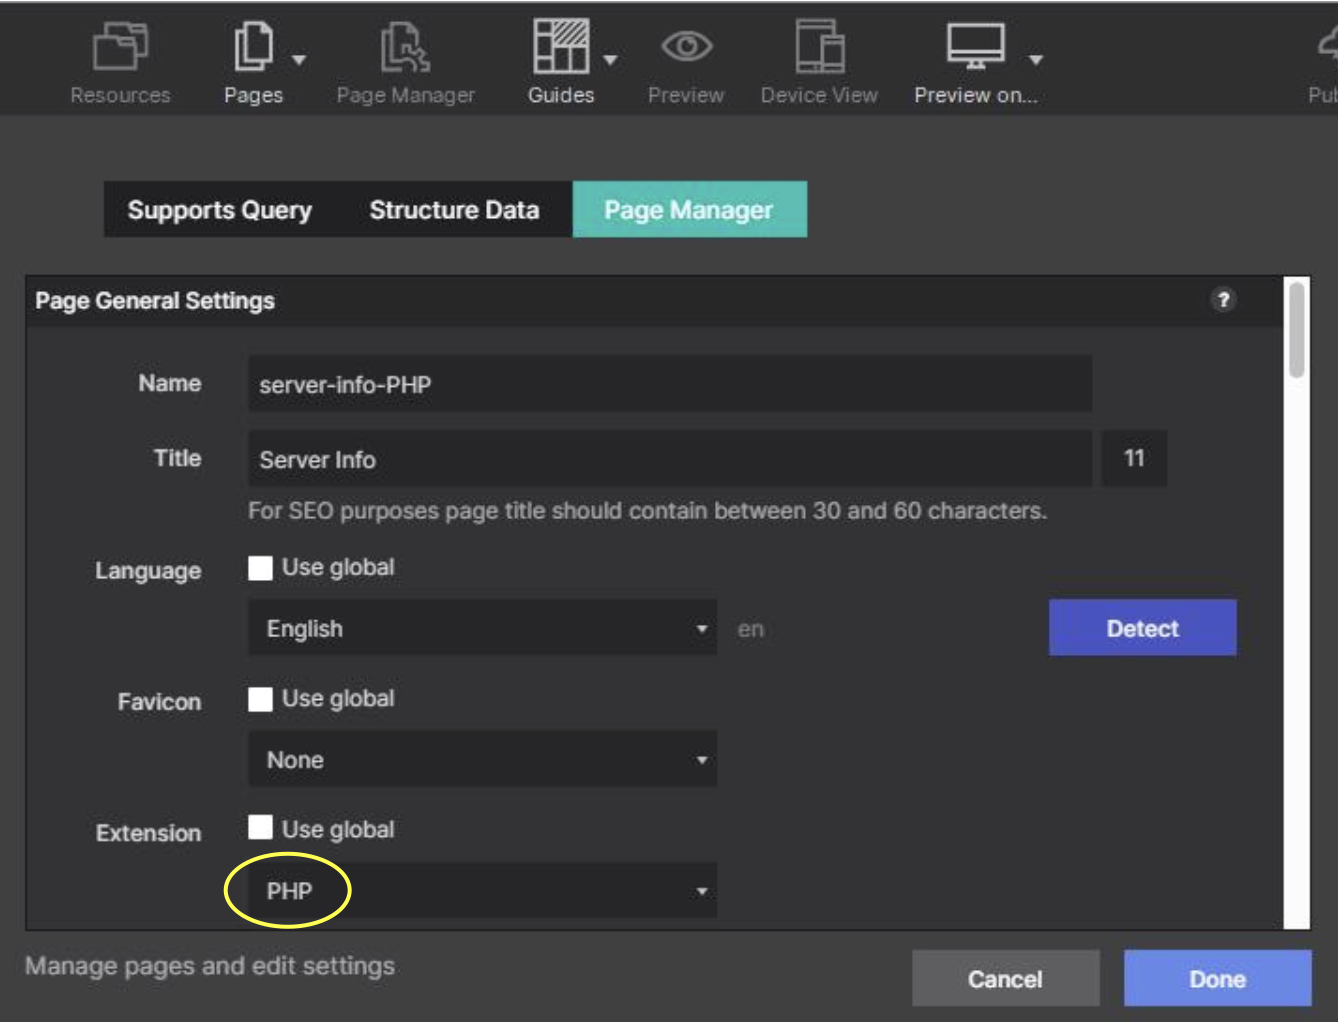
In Site Designer, create a test page and set the file extension to .php.
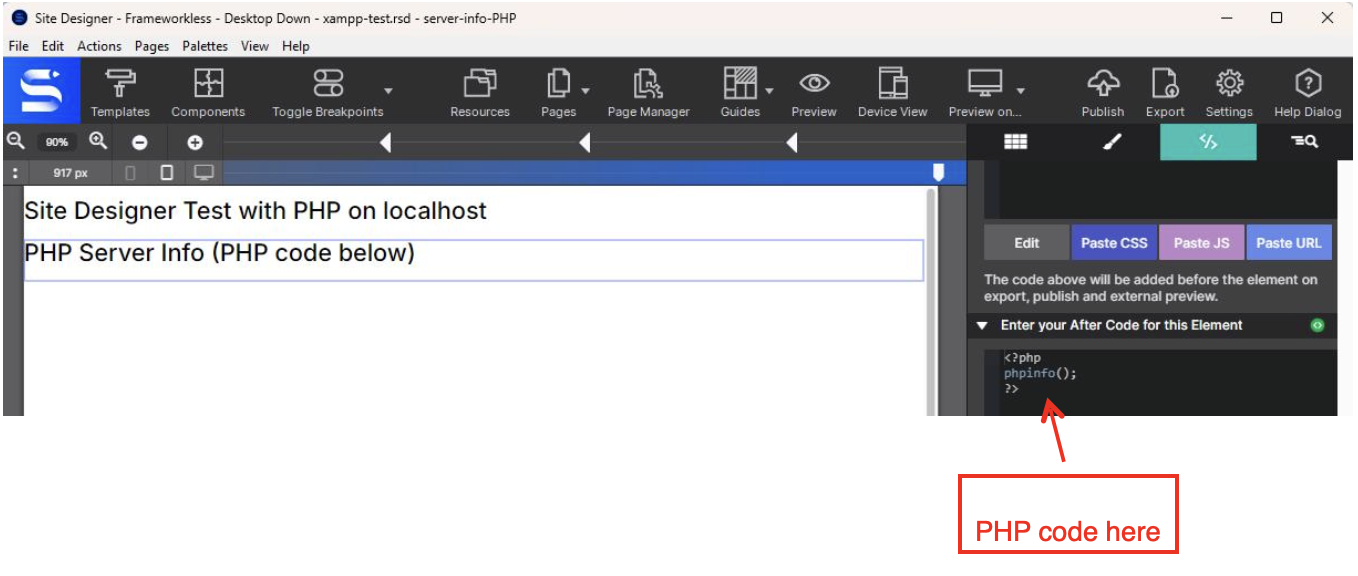
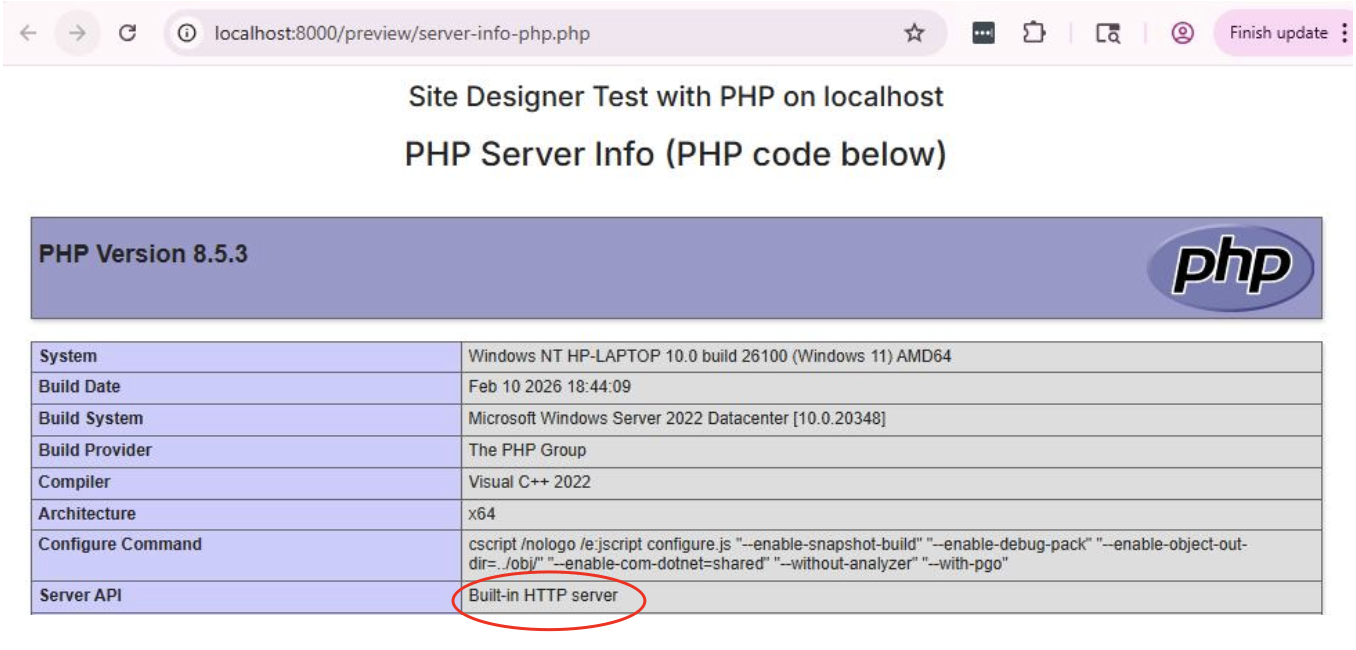
Add some PHP code. In this example, the phpinfo() function displays information about the PHP installation and configuration.
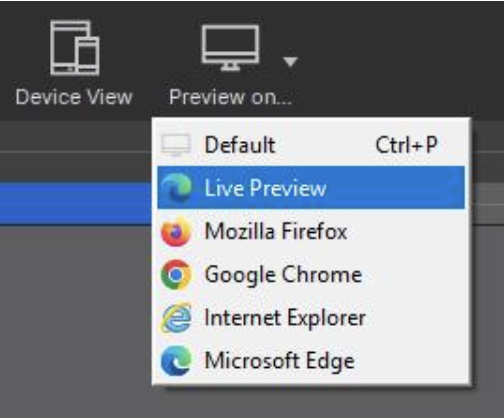
You can now preview the PHP page using Live Preview. Select Preview on → Live Preview.
The page opens in a browser using the URL specified in the Settings page for Live Preview Server URL.
If testing with PHP’s built-in web server, the php test page will look similar to this:
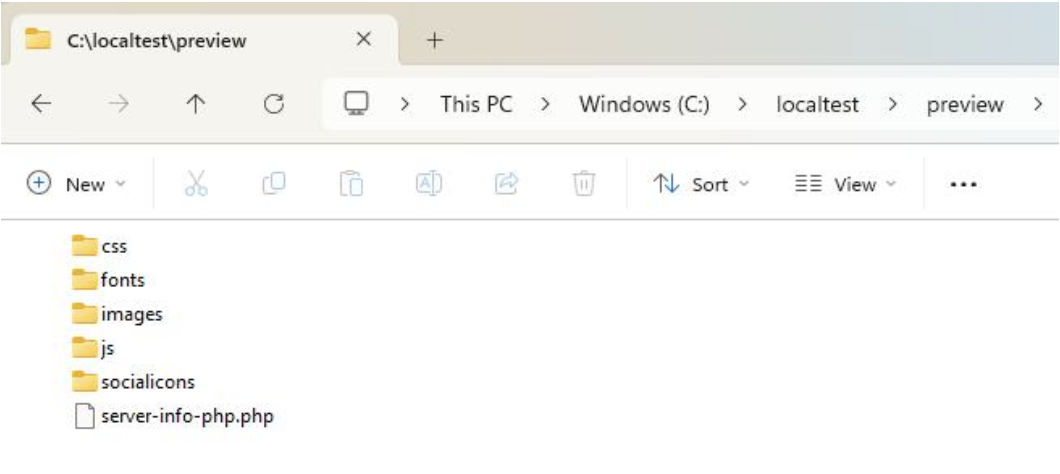
After previewing the page, you can see that the PHP file was placed in the folder specified in Settings → Live Preview Local Path.
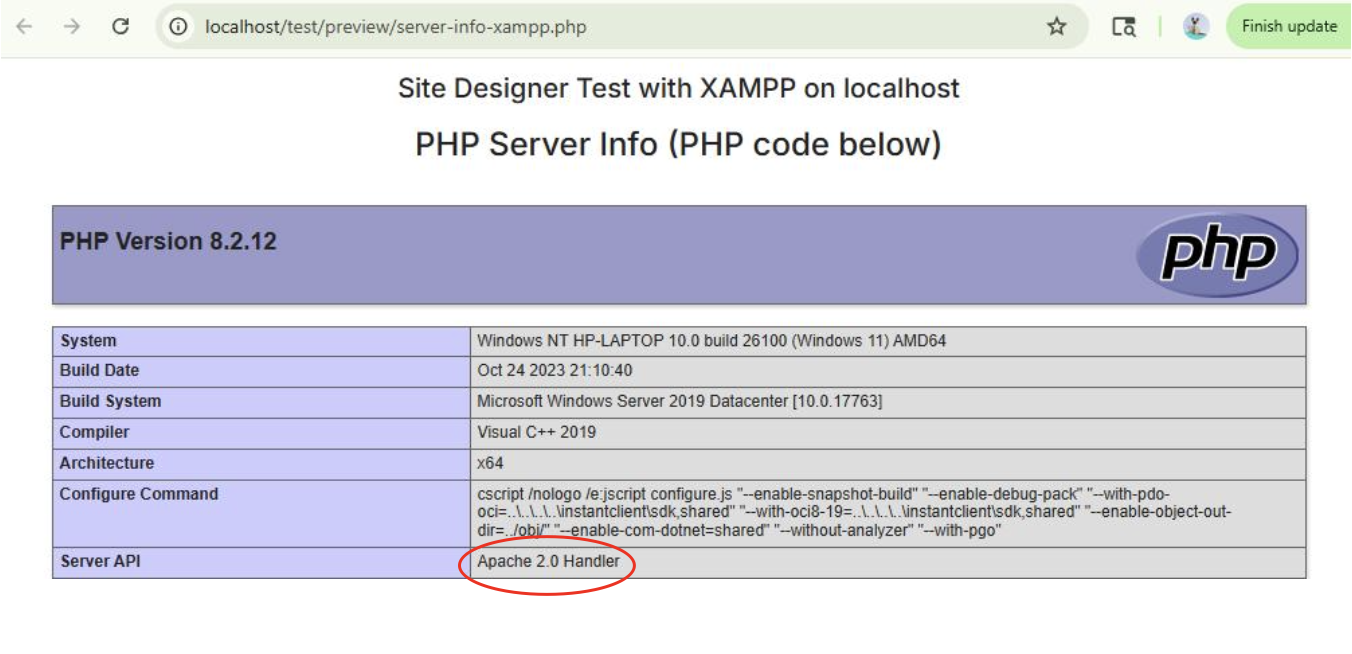
If testing with XAMPP, the php test page will look similar to this:
Troubleshooting
If Live Preview does not execute your PHP code:
- Make sure Apache is running in XAMPP
- Verify the file extension is .php
- Confirm the Live Preview Server URL uses http:// or https://
- Ensure the file is inside the web server directory (for XAMPP this is usually htdocs)
Conclusion
Once your local server and Live Preview settings are configured, you can easily test and preview PHP files directly from Site Designer. This allows you to verify PHP functionality and troubleshoot issues without uploading files to a remote server. Using a local testing setup can significantly speed up development and make it easier to refine your PHP pages before deployment.