

The Web Editor’s got a great menu with tools that will help you code faster and more accurately than ever before. To get to this window, go to View > Tags, Snippets, and Helpers.
Tags
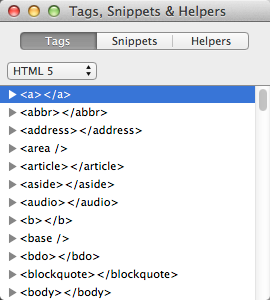
HTML is more advanced than ever before thanks to HTML 5, and it’s got a ton of tags you can use. We know that it can be hard to keep up with all of them, so we’ve included a list of more than 100 of them—and all of their available attributes—that you can easily pop into your code. Take a look at this window:
Using these snippets is simple! Let’s say you want to include an image in your HTML file but you can’t quite remember exactly what you need to type to make that happen, but you get the feeling that you’ll remember it when you see it. First, place the cursor in the HTML file where you want the code to be inserted (line 18 in this example.)

Now, find the <img> tag in the Tags window. You can click the arrow next to this tag to expand the list of its attributes:

To easily place this code in your document, double-click <img /> and then place the cursor inside the brackets. Now double-click src=”” to place the “source” attribute into your document. The Web Editor relies on you to provide the correct image name, but it’ll put the cursor within the quotes where you need to type it.

Simply provide the correct file name for the image and your image will be ready to go!

Tags for Other Coding Languages
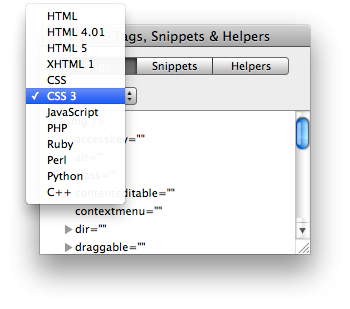
Don’t want to use HTML 5? Looking for HTML 4, CSS 3, or maybe even Perl code tags? The Web Editor’s got you covered.
Click the drop-down menu underneath the Tags button. So far we’ve been looking at HTML 5 tags, but you can also choose to display CSS selectors and properties, Javascript functions, and more. If you’ve forgotten the exact syntax of a certain bit of code you want to use, this is the tool for you!
Well, that’s about all there is to say about the tags menu. How could it get easier? Code snippets!
Snippets
Just when you thought that the Tags tool was the most useful thing you’d ever seen, along comes the Snippets. Tags are good for entering customized information, like an image that should only appear on one page, but snippets allow you to easily copy and paste code that will be used often.
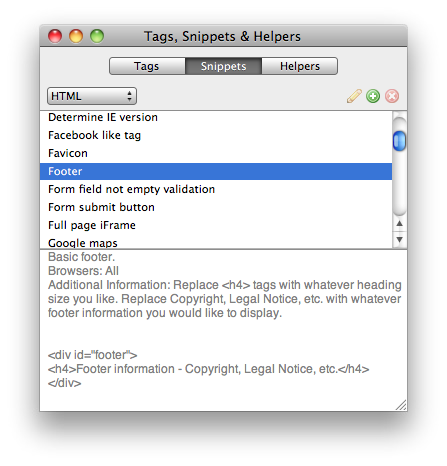
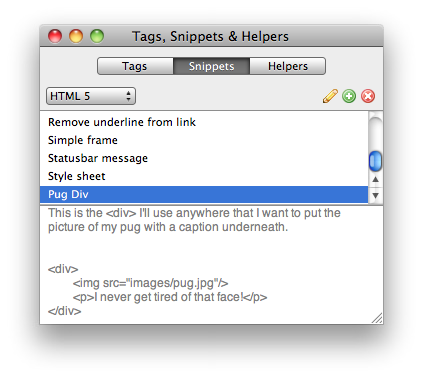
Let’s take a look at the structure of this window first. It’s split into three sections: The tools at the top, the chooser window in the middle, and the information window at the bottom.
There is another drop-down menu just like the one in the Tags tool that allows you to choose from a variety of coding languages like HTML, XHTML, and CSS. The options available for the chosen coding language will appear in the chooser window below.
Scroll through the list in the chooser window to see which code snippets are already available. If you click one, some notes about the snippet will appear in the information window, followed by the full content of the snippet. This is the chunk of code that will be inserted into your document.
To use a snippet from this list, first place the cursor in your document where the code snippet should begin (line 21 in this example.)

Now double-click the code snippet you want to place here. We’ll use the “footer” snippet:

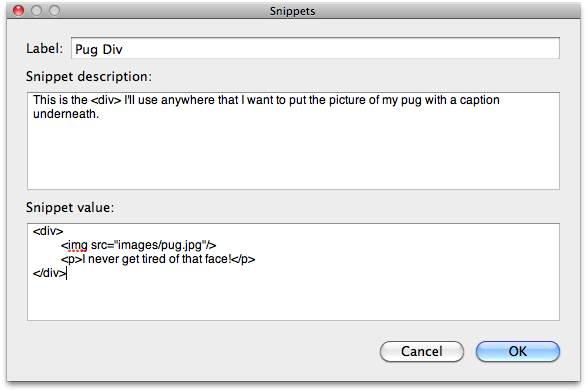
That’s all it takes to put a snippet into your code! But that’s not the only thing that makes this tool so useful. You can create your own snippets as well! To add your own snippet, click the green + icon in the top right corner of the snippets window. This opens a window where you can enter information about your new snippet. Just title it, add a description, and then put the relevant code in the “Snippet Value” box. Click OK when you’re ready to save it. You can always edit it later.
Now your snippet is in the list! You can double-click it to place it in your code.
To make changes to this snippet, click the pencil icon in the tools in the upper-right corner. If you decide you don’t want this snippet anymore, you can delete it by clicking the red X.
Helpers
Helpers are very similar to code snippets, but instead of just being a block of pre-existing code that is placed into the document, it’s a tool that generates the code for you after you fill out a brief form.

For example, double-clicking the Insert Link helper opens up a window where all the information necessary to provide a link in our document can be entered:
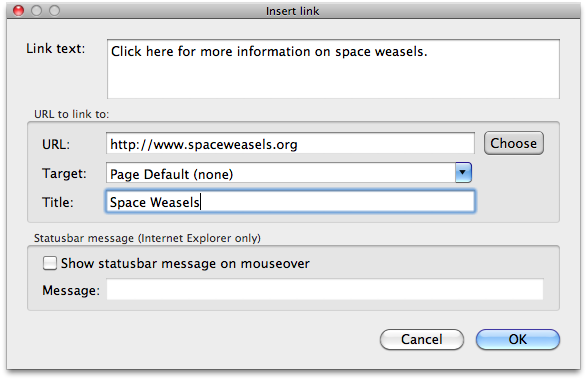
All helpers are different, but here’s a brief explanation of the different fields in this example:
- Link text: This is the text on the webpage that will be clickable
- URL: Where the visitor will be redirected when clicking the link
- Target: Chooses which window or frame the link will open in
- Title: This text appears in a floating box when the mouse hovers over a link
- Message: In Internet Explorer only, this message will display in the status bar at the bottom of the browser if the checkbox above it is selected
Here’s what our code looks like after clicking OK:

The helper automatically generates the code based on the information you provide and places it into the document wherever the mouse cursor is. Helpers make common tasks such as creating a link quick and simple.