

With Site Designer it is possible to construct stunning web forms that look good on any size screen or device.
Forms crafted in Site Designer are front-end designs. This means you will need to sync up a processing script for the form to function. Not code proficient? We’ve got you covered. You can generate a processing script using Web Form Builder that will work with your custom form design. The process is pretty quick and easy too! We’ll demonstrate how to do this using the stunning Roasters template.
The project files for Site Designer and Web Form Builder are available below. Now we’ve already done all the steps for you in these project files, however, below we’ll outline what actions were taken so that you can implement them with any other Site Designer forms you build.
![]() Web Form Builder Project. Roasters-Form.fb
Web Form Builder Project. Roasters-Form.fb
 Site Designer Project: Roasters-Example.rsd
Build a basic, unstyled form in Web Form Builder.
The first step is to build the basic layout for your form in Web Form Builder. Drag and drop in all the elements you need to collect the information from your audience. Your form doesn’t have to look fancy in Web Form Builder. Don’t worry about adding styles or tweaking spacing. The design part will be done in the Site Designer. All you need is a mirrored version for the processing script. Simply add the same fields that are listed in your Site Designer project.
While you create the form, please keep in mind these steps will only work with simple data collection forms. Advanced controls such as the Show Element property will now work for this.
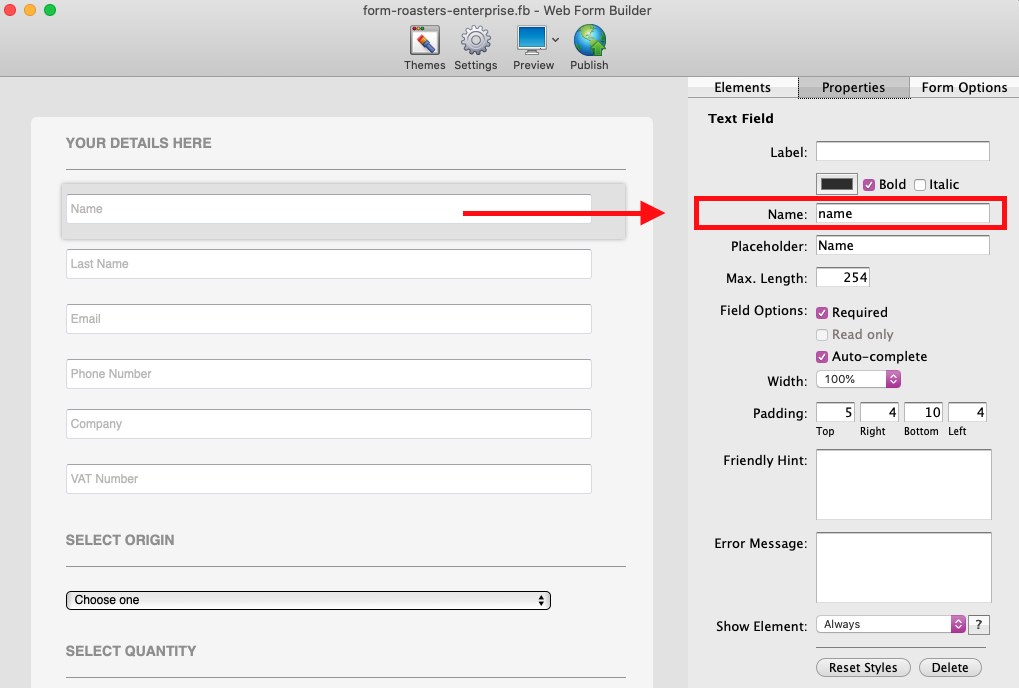
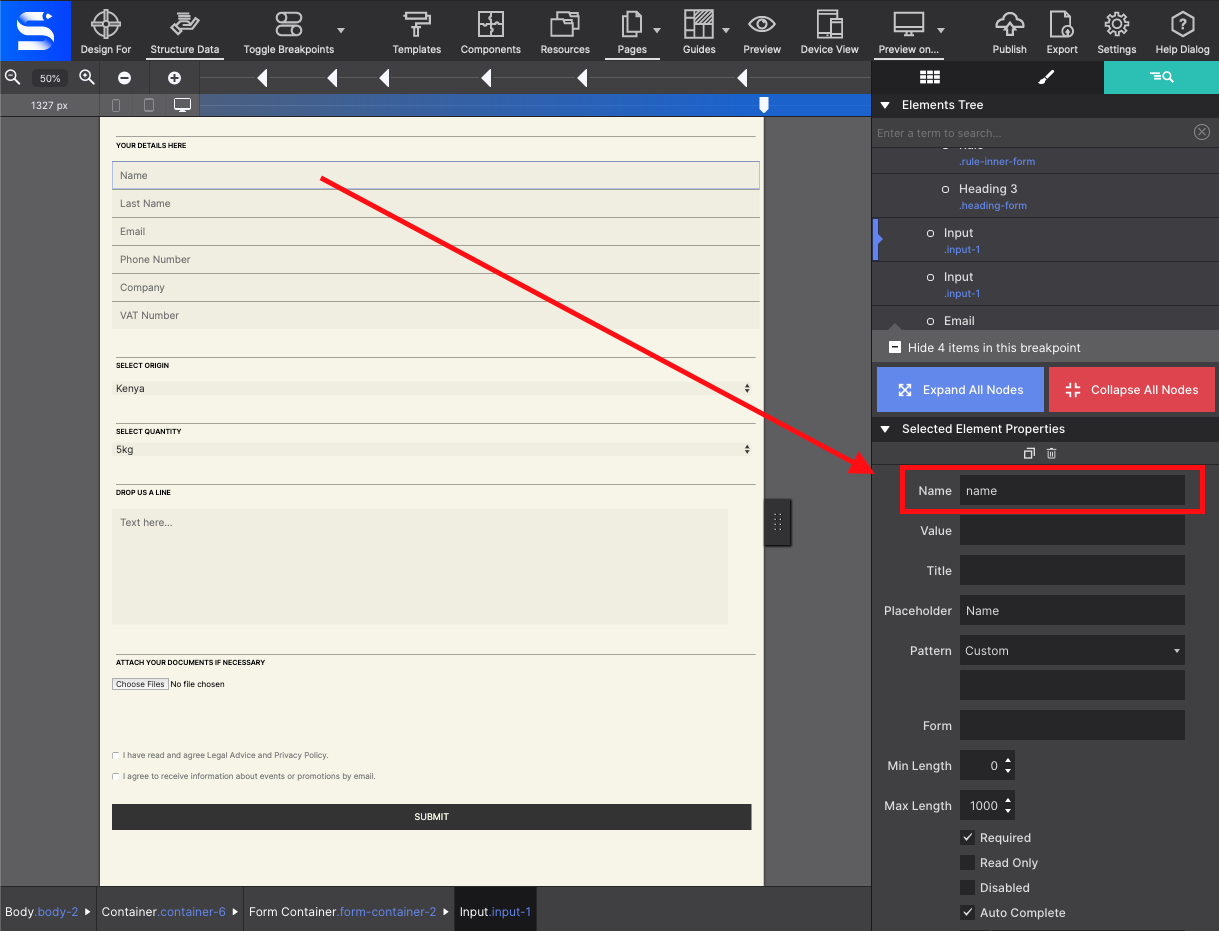
When adding entries in Web Form Builder, under Properties > Name you will enter a name value for the selected field. For example, the Text Field for name input box we use the value ‘name’. Do not use spaces in the name field.
For example, the form gets 11 elements added to it:
- A Text Field with the attribute name:
name - A Text Field with the attribute name:
last-name - A Email Address element with the attribute name:
email - A Text Field with the attribute name:
company-name - A Text Field with the attribute name:
vat-number - A Drop-Down field with the attribute name:
select-origin - A Drop-Down field with the attribute name:
select-quantity - A Text Area element with the attribute name:
textarea - A Upload File element with the attribute name:
upload-file - A Checkboxes element with the attribute name:
privacy-policy - A Checkboxes with the attribute name:
promotions-email
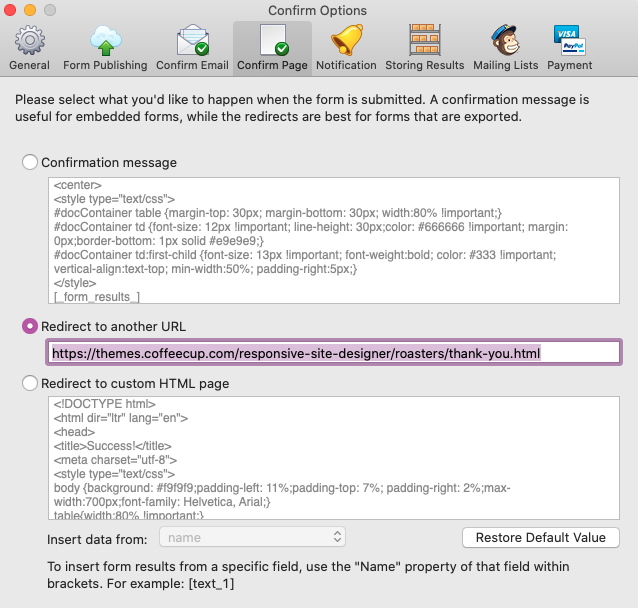
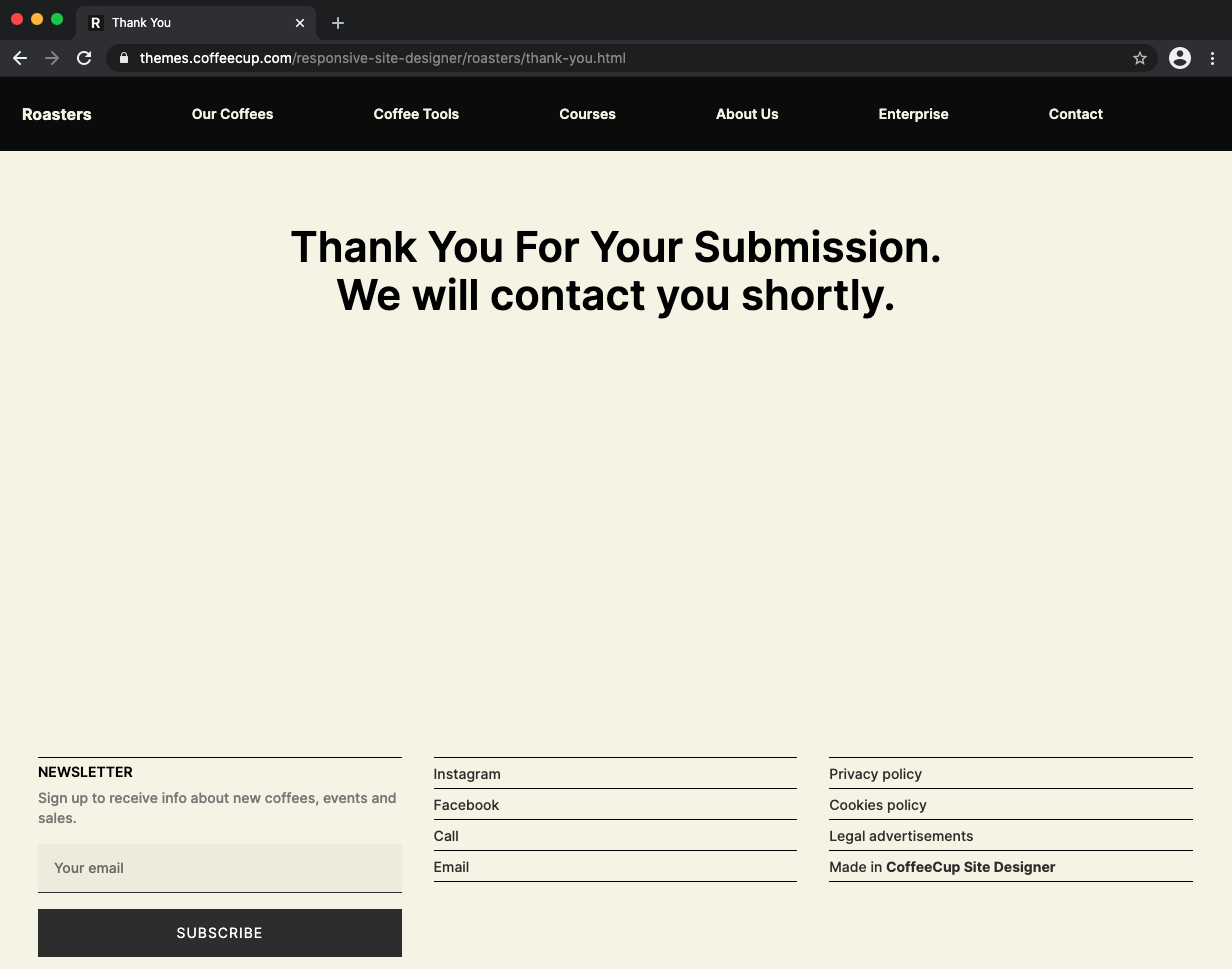
Next, go to Settings. Here you will configure what actions the form will take once someone submits the form. Under the Confirm Page section select the URL Redirection this way you can redirect your audience to a custom designed ‘Thank You page’ within your Site Designer project. Otherwise the user will be redirected to the Web Form Builder form page with no way back to the actual site.
In this example, we redirect to: https://themes.coffeecup.com/responsive-site-designer/roasters/thank-you.html
If desired, configure the Confirm Email and Notification to have the form send emails for each submission.
Lastly, you’ll need to publish your form to S-Drive (or to a third party server). To upload to S-Drive go to Settings > Form Publishing > then log into your CoffeeCup account. Then hit Publish in the top toolbar.
STEP 2: Craft a beautiful form in Site Designer
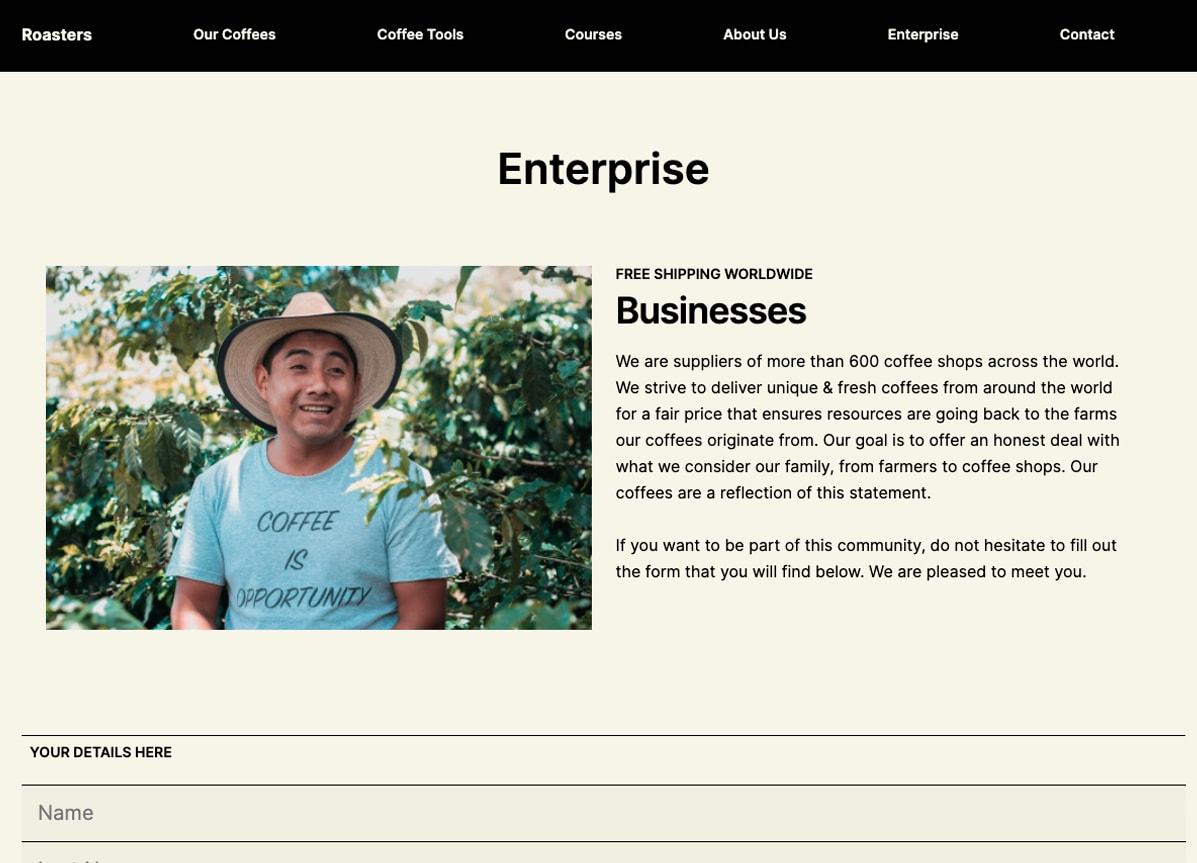
In the Roasters template you’ll find the stylish form on the enterprise.html page with the same exact form elements that Web Form Builder has. With Site Designer you can use the Styles pane to format the appearance of the form elements. Use background, apply effects, use mouseover controls — go wild! The app unlocks countless style controls so that you can build highly customizable forms that match your site.
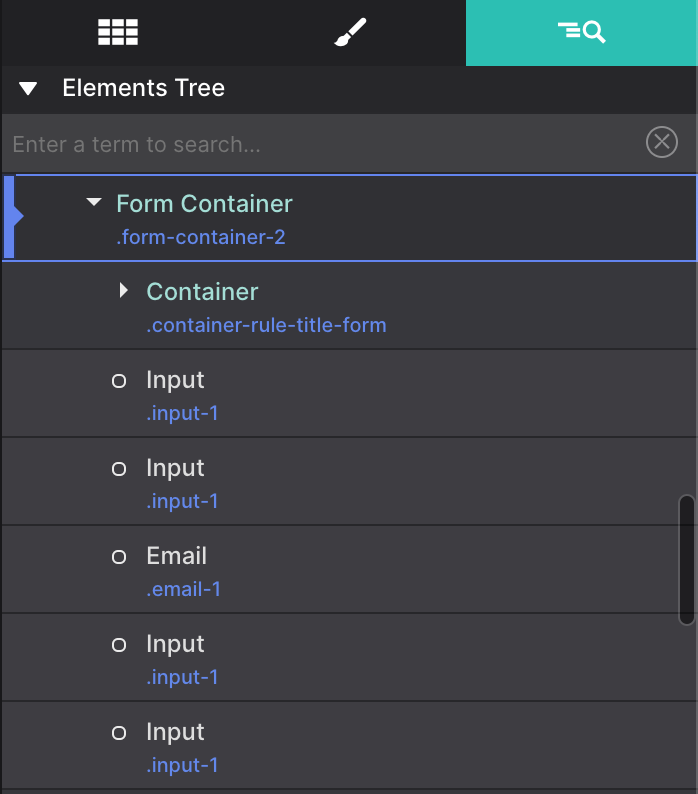
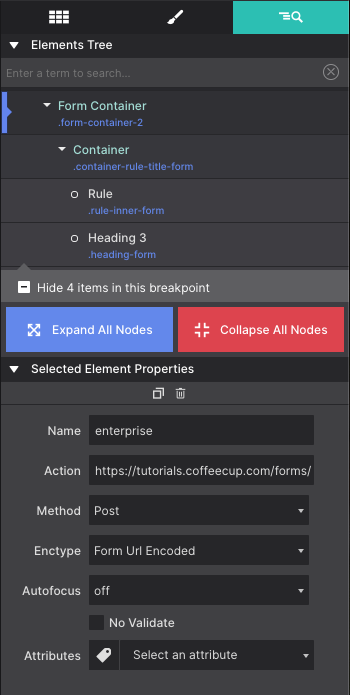
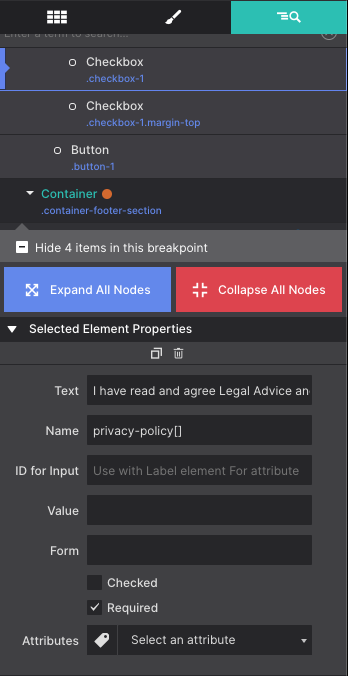
When crafting a form in Site Designer, the form elements need to be wrapped within a Form Container element. You can see this structure of elements on the Element pane > Element Tree.
STEP 3: Combine Site Designer with Web Form Builder’s script
From the Element pane > Element Tree setup the form endpoint options. Select the Form Container using the Element Tree and apply these settings:
- Action: You will need to use the published url from Web Form Builder. In our case that was https://tutorials.coffeecup.com/forms/roasters/.
- Method: Ensure it is set to
Post - No Validation: Uncheck this box. This makes the form in Site Designer to recognize the "required" field validation.
The name value attributes that were applied within the Web Form Builder name field will be added to the Site Designer form to sync them together. They must be entered into Site Designer exactly as you have formatted them in Web Form Builder. So watch out for capitalizations and dashes.
The selected element name value is entered in Site Designer under the Element pane > Selected Element Properties > Name.
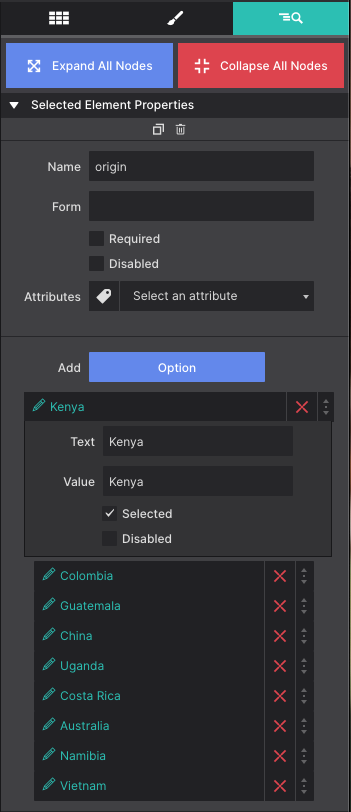
Fields that include options such as Drop Down and Checkbox elements, Values will need to be established in Site Designer to match every selection.
For example, the Drop Down for Origin offers a selection of countries to choose from. By default in Site Designer the options are using option1, option2, option3, etc... These values need to match the same as in the Form Builder. So the option Text ‘Kenya’ also needs the Value ‘Kenya’.
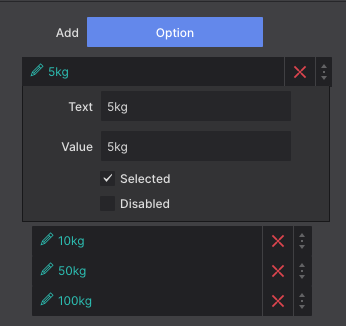
For the Select the Quantity drop down if the option text is "5kg", the Value should also be "5kg".
Finally, the Checkbox element names should include open and closed brackets at the end of their Name. For our example, the checkboxes should be formatted as "privacy-policy[]" and "promotions-email[]", with open/close brackets at the end.
Step 4: Publish the Site Designer Project
Now that the form is styled and configured to match the properties of Web Form Builder you are ready to publish! YAY! All you need to do is upload your Site Designer project to make your website and for live. Hit the Export button to upload to a third party hosting provider. To upload to S-Drive, go to Settings > Publish to enter your CoffeeCup details. Then hit the Publish button in the top toolbar.
Then you can try out the form and do a test run by filling it out. Once you submit your form you’ll be redirected to the custom Thank You page.
Form submission emails will be generated and submissions will be saved to the destination you configured in Web Form Builder (CSV file or to a MySQL database). If you have uploaded to S-Drive like we did, your for submissions may be accessed within your CoffeeCup S-Drive dashboard.
Get Site Designer Today!
Site Designer is the cutting edge solution for rapid, code-free, website design. The app provides a suite of layout and style controls so you can craft a website that stands out and helps your business grow. Purchase Site Designer and get free upgrades for one year plus discounted updates after that timeframe.
Do you enjoy the Roasters template? Get the full design and check out the full template collection within the Template Shop.