

Just a note before we get started: There are many different ways you can perform the functions we’ll explain in this tutorial. For example, to save your animation, you can:
- Go to File > Save
- Click the Save button in the toolbar
- Press Ctrl+S
All right, let’s get started!
Step 1: Add Your Images
When you start working on a new project, you should be prepared with all the frames you intend to use. This means you’ve already created each one in an image editor, such as Web Image Studio. You can learn more about preparing your frames in the Preparing Frames with Web Image Studio chapter.
To add them to your project, click the Add Images toolbar button. Locate the image files you want to use, select them all, and click Open. All your images are listed in the Animation Studio workspace.
Hint: Hold the Ctrl key while select more than one frame, or hold the Shift key to select an entire range at once.
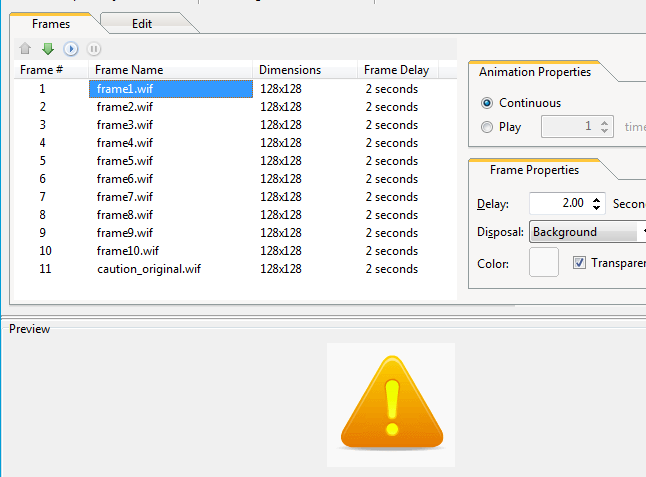
Click each frame in the list and look at them in the Preview pane to ensure that they’ve been added in the proper order. You can rearrange a frame by selecting it and clicking the Up or Down arrows.
Step 2: Set the Animation Properties
Choose what action you’d like your animation to take when it is finished displaying the final frame.
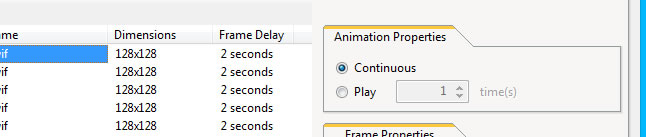
By default, your animation is set to Continuous, which means that your animation will loop repeatedly. However, if you only want your animation to play once, or want it to loop a specific number of times, select Play and choose the number of times the animation will loop before stopping on the last frame.
We want our caution symbol to animate on a continuous loop, so we’re going to leave this section set to Continuous.
Step 3: Set the Frame Properties
Each frame has its own set of frame properties. You can set a different delay time, disposal method, and background color for each one. You can also set the same properties for multiple frames at once by selecting them all and changing these properties.
Hint: Hold the Ctrl key to select more than one frame, or hold the Shift key to select an entire range at once.

You can learn more about these settings in the Animation and Frame Properties section.
We want our caution symbol to quickly animate the first six frames and pause briefly on the seventh frame. Therefore, the first six frames have been selected and given a delay of 0.20 seconds; the final frame has been selected by itself and given a delay of 2.00 seconds, as seen above.
The Disposal section configures what happens to the animation canvas immediately before the selected frame is displayed, or rather, which previous frames are “disposed” of. Because we want to clear the entire canvas before every frame is shown, every frame is using the Background disposal setting. (This is most likely the Disposal setting you will use most often.)
Since we don’t need a background color to show through the transparent parts of each image, we’re going to ignore that Color section, and check the box marked Transparent. This ensures that the animation we end up with will have the same transparencies as its frames.
Step 4: Last-Minute Touch-Ups
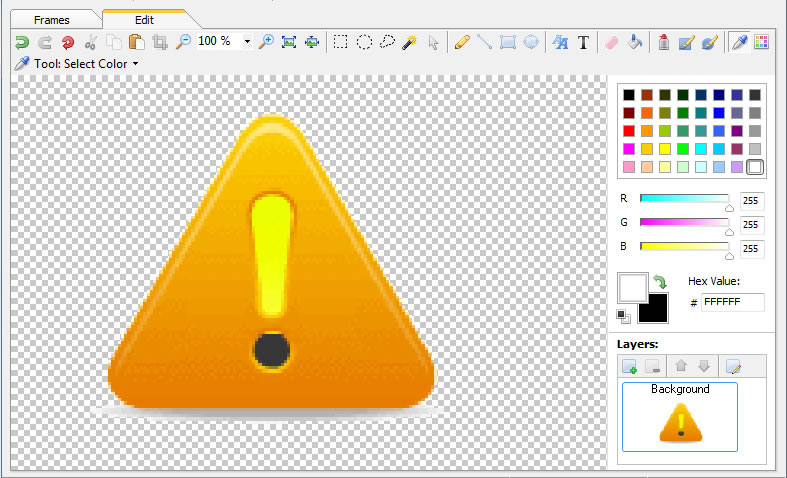
Oops! We just noticed that in frame 3, the dark grey dot at the bottom of the image still has a small bit of yellow in it! We can fix this quickly by selecting the frame and clicking the Edit tab. (You can learn more about the tools in this window in the Edit Tab chapter.) Let’s zoom in on this frame by clicking the Zoom In tool a few times.
We can click the Eyedropper tool, choose the dark grey, and draw over that yellow with the Pencil:
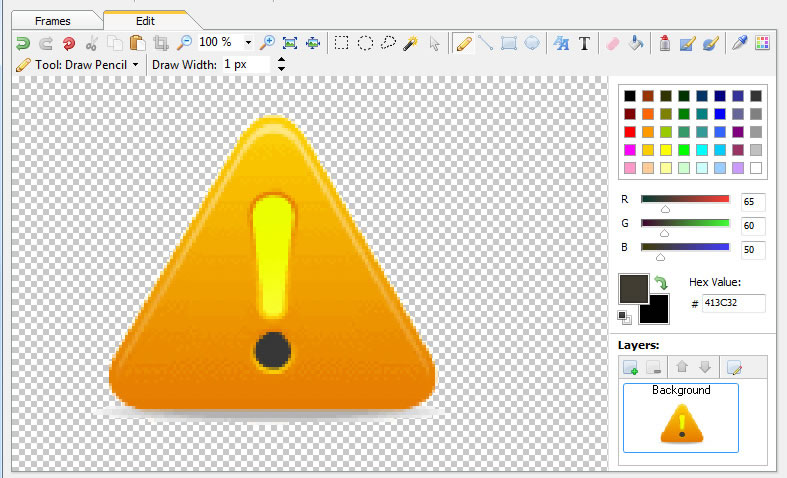
Now this frame is perfect! Click the Frames tab again and apply the changes to the image.
Step 5: Preview and Save the Animation
Now that everything has been configured, our animation is ready to be previewed. Click the Play button at the top of the Frames tab and watch your animation in the Preview pane below. To stop the animation and make more changes, click the Pause button.
However, that’s still a preview within the program. You can see how your animation looks in an actual browser by clicking the Preview toolbar button.
Now that you know what the saved animation will look like, you can make adjustments as necessary. Feel free to add, remove, rearrange, or edit frames, reconfigure animation properties, or change the properties of individual frames. You can always preview to see if you’ve perfected the animation.
When it’s ready to go, click the Save toolbar button. Give the project a name, such as Caution, and the project will be saved in the selected folder as Caution.cas. Your image will be saved into the same folder with the same name (in our case, Caution.gif). The CAS file has all your settings and content, so you don’t want to lose it! However, if you do, you can always open your GIF file in Animation Studio to recreate the project. You’ll just need to reconfigure all the settings.
That’s all there is to it! You’ve just created an animation in Animation Studio. Now take your GIF to the web and let it shine on the Internet.
If you’d like to work with some examples of animated images, check the /samples folder inside the Animation Studio folder. The “Caution” image can be found in this location.