

The CSS Menu Designer (now defunct) was included in the HTML Editor in versions 2011 and earlier but has been removed with the release of our new Responsive Menu Builder.
- Step 1: Before You Get Started
- Step 2: Opening the CSS Menu Designer
- Step 3: Opening a Previously Designed Menu
- Step 4: Designing a Menu
- Step 5: Inserting Your Menu
- Step 6: Positioning Your Menu
- Step 7: Adding Your Menu to Other Pages
Step 1: Before You Get Started
It is extremely important to remove any old menu code (DHTML or CSS) from your document before inserting a new menu. If you don't, your menu won't work! If you are creating your first menu, these instructions don't apply, so you can skip ahead to Step 2.
To remove your old code, first open the Code Editor and find the code you have to remove. The code will look different depending on whether you have inserted a CSS or DHTML menu.
Removing CSS Menu Code
Remove the following code from between your <head></head> tags:
<link rel="stylesheet" type="text/css" href="css/menu-menu.css" media="screen">css/menu-menu.css is the default name and location of the menu style sheet. If you have changed the name or location of this style sheet, this file path will reflect your changes. Next, remove this code from between the <body></body> tags:
<ul class="menu-menu"> <li class="first"><a href="page1.html">Menu Item 1</a></li> <li><a href="page2.html">Menu Item 2</a></li> </ul>This example contains just two menu items, but your menu may contain more. Just be sure to remove the <ul class...></ul> tags and all the code between them, and you'll be fine. menu-menu is the default name for the menu class. If you have changed the name of the menu, the name you specified will appear here instead. page1.html and page2.html are the links you specified for the menu items. Menu Item 1 and Menu Item 2 are the names you specified for the menu items.
Removing DHTML Menu Code
Remove the code between <script type='text/javascript'> and </script>. This code should be located just below the <body> tag.
Step 2: Opening the CSS Menu Designer
Now that you have removed your old menu code, the next step is to work with the menu you want to insert in its place. First, open up the CSS Menu Designer by going to Insert > CSS Menu Designer...
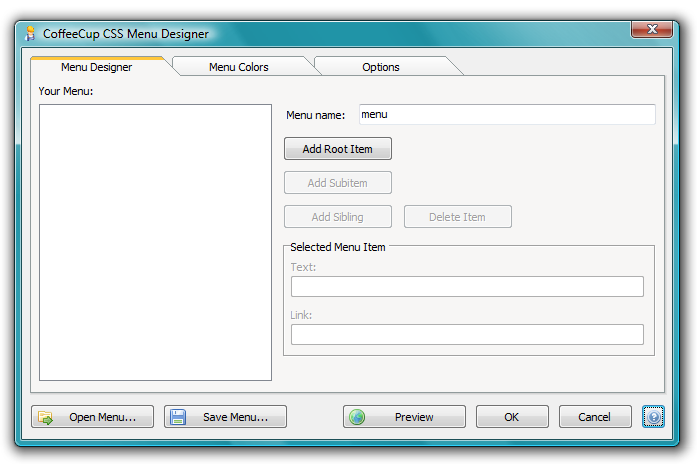
The options at the bottom of this window appear no matter which tab is selected. Here's what they do:
Open Menu
Click this button to open an existing menu.
Save Menu
Click this button to save your menu. We recommend you save frequently to prevent loss in case something happens to your computer while you are working.
Preview
Click this button to preview your menu in your default web browser.
OK
Click this button to insert your menu code into the current document. We'll talk more about this option in Step 5.
Cancel
Click this button to abandon any unsaved changes to your menu and exit the CSS Menu Designer.
The next step goes over the process of opening a preexisting menu. If this is your first menu, skip ahead to Step 4.
Step 3: Opening a Previously Designed Menu
If you have already designed a menu in the CSS Menu Designer or the DHTML Menu Builder and want to make edits to it, click the Open Menu button. This opens a window that allows you to browse your computer for the .mnu file for your existing menu.
For those of you who are switching over from the DHTML Menu Builder, you read right — you can open a menu created in the DHTML Menu Builder in the CSS Menu Designer! Just find and open the .mnu file for your DHTML menu. You can then edit it normally. When you save or insert your menu code, it will be converted to CSS.
When you find the file you want to open, select it and click OK. This opens the menu in the CSS Menu Designer.
Step 4: Designing a Menu
Now that we've covered the nuts and bolts of opening a menu, let's get down to business: designing it!
The CSS Menu Designer is broken up into three tabs: Menu Designer, Menu Colors, and Options. The Menu Designer tab is where you work with the structure of your menu; the Menu Colors tab is where you pick out your menu color scheme; and the Options tab is sort of the catchall section, where you can configure the rest of your menu options.
Let's go through each of these options and learn how they can help us design our menu!
Menu Designer Tab
First, take a look at the Your Menu section. This is where you can keep an eye on the structure of your menu.
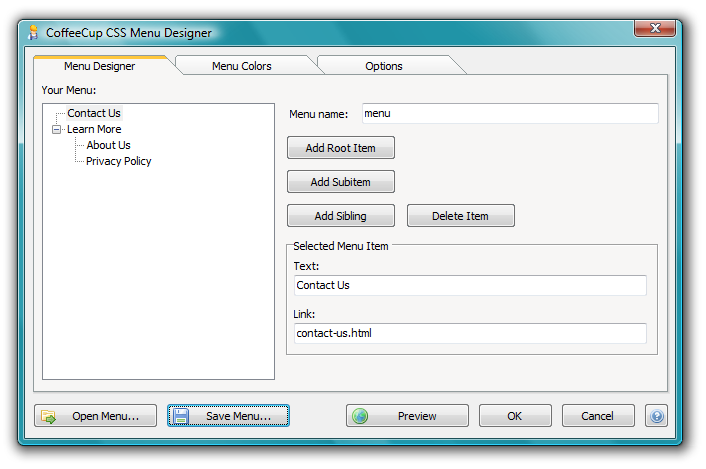
First, let's add a root item, which is a button in the main part of the menu. Clicking the Add Root Item button inserts a button called, by default, Untitled1.
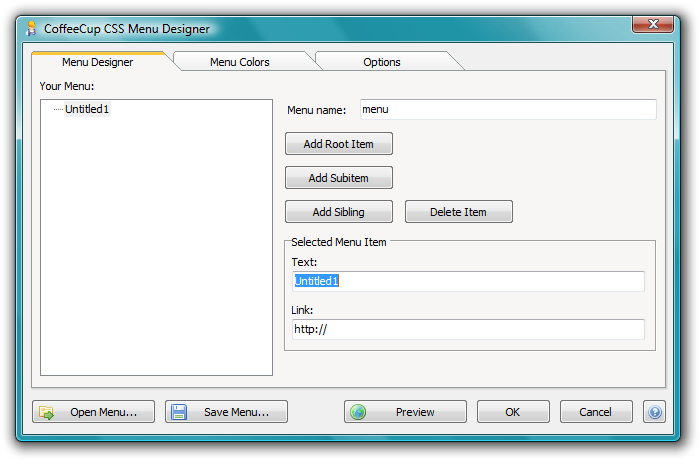
Let's change the text that appears on this button from Untitled1 to something a bit more useful. In the Text field, type Contact Us. Next, let's link this button to our contact us page, which, for the sake of this tutorial, we'll assume is contact-us.html. Type that into the Link field.
Note: We'll be using relative links in this tutorial. Not sure what relative links are? Definitely, definitely take the time to read Absolute vs. Relative Paths/Links.
Our first menu item is configured! Let's do another one. Click the Add Root Item button again, and name the new item Learn More. Don't assign it a link just yet — we're going to do something a bit different with this menu item.
Making sure that Learn More is selected in the Your Menu section, click the Add Subitem button. This adds an item that will appear underneath the Learn More menu item when your user clicks it. Name your subitem About Us, and link it to about-us.html.
Note: You can add a subitem that expands when a subitem is clicked, but any further subitems aren't allowed. This is because there's no navigational benefit to having subitems of subitems of subitems — plus it sounds really silly to say, "subitems of subitems of subitems" in tutorials ;)
Let's add another subitem to the Learn More item. You could select Learn More and click the Add Subitem button, or you could use a different method and click About Us and click the Add Sibling button. This adds another item on the same level as the selected item. Let's name this new subitem Privacy Policy and link it to privacy.html.
Here's how the Menu Designer tab looks after all these changes:
Let's switch over to the Menu Colors tab and customize our menu colors.
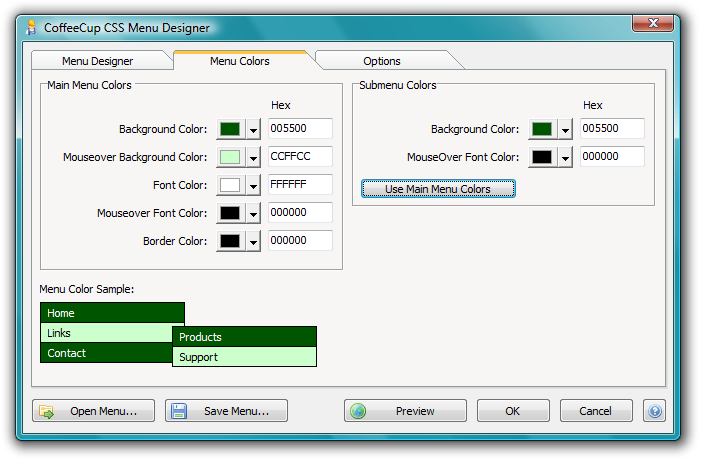
Menu Colors Tab
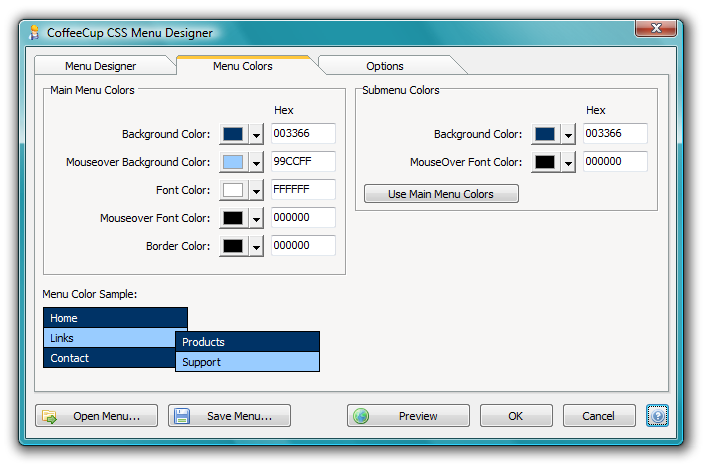
First, take a look at the Menu Color Sample area. This is where you can keep an eye on your menu color scheme. Next, let's take a look at what each of these options does.
Background Color
The background color of the menu.
Mouseover Background Color
The background color of the menu when the user holds their mouse over it.
Font Color
The color of the menu text.
Mouseover Font Color
The color of the menu text when the user holds their mouse over it.
Border Color
The color of the menu border.
Okay, now that we know what everything does, let's pick out some colors! How about a pretty dark green for the menu background? To change this, click the color swatch next to where it says Background Color, and select the dark green shade you want:
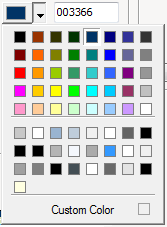
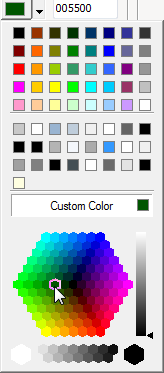
Hmm, looks like there isn't much choice in terms of dark greens, so let's click Custom Color. This opens a rainbow gradient where we can browse even more colors and adjust brightness.
Perfect! Next, let's use the same process to pick a light green for the mouseover color. The rest of the colors look good as is, but let's change the submenu colors to match our main menu colors. To do this, click the Use Main Menu Colors button. Right now, the Menu Colors tab looks like this:
Awesome! Let's switch on over to the Options tab to make a few more changes to our menu.
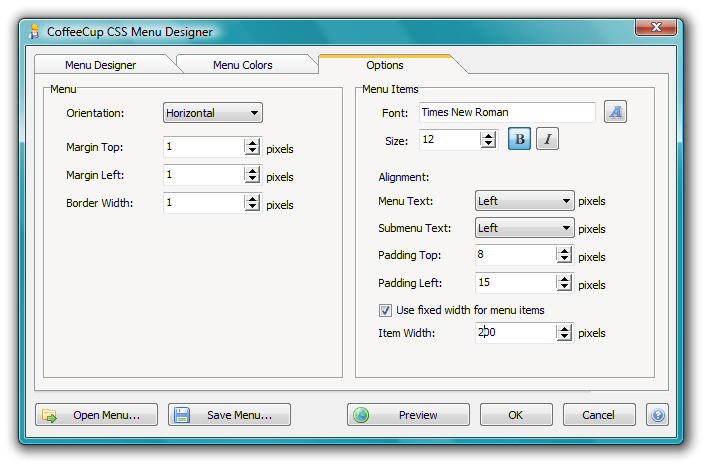
Options Tab

First, let's take a look at what each of these options does.
Orientation
Choose whether you would like a horizontal and vertical layout. For now, let's stick with a horizontal menu.
Margin Top and Left
Use these fields to set the top and left margin in pixels. A margin is the blank space surrounding the menu. When the margin is increased, more space will appear between the menu and the objects surrounding it. We'll keep the defaults for now, but if you decide you want to give your menu a bit more breathing room once you see it on your page, you can always reopen it and adjust these fields later.
Border Width
Use this field to set the width of the menu border in pixels. Again, we'll leave this as the default — why rock the boat?
Font Face, Size, and Style
Use this area to set the font and size of the menu item text, as well as whether it is bold or italicized. Let's work with these options after we get through these explanations!
Menu and Submenu Text Alignment
Use this area to choose how you want the text in the menu to be aligned: to the left, right, or center.
Top and Left Padding
Use these fields the top and left padding in pixels. Padding is the blank space inside the menu, between the border and the menu contents. When the padding is increased, more space will appear between the text and the border.
Use Fixed Width for Menu Items
Select this checkbox if you would like to use a fixed width for the menu items. This means the menu items will always be the same width, regardless of how long their content is. This is another option we'll work with.
Item Width
Set the width of your menu items in pixels here.
Okay, now that you know what everything does, let's make some adjustments! First, let's change the font face. Click the Font icon to open the Font window, which allows you to select which font face you would like to use. Let's choose a web-safe font, just so we know it will display correctly. How about Times New Roman? Select it from the list and then click OK.
For more information about web-safe fonts, read How to Change the Style of Text.
Next, let's change the size and style of our menu text. Since Times New Roman looks a bit small, let's change it to size 12, and make it bold by checking the Bold checkbox.
Finally, let's make sure our menu items have enough room for their text. Make sure Use Fixed Width for Menu Items is checked, and then change the Item Width to 200 pixels. That should be more than enough room.
Having made all these changes, the Options tab will look like this:
And that's it for customization! Let's insert our menu, shall we?
Step 5: Inserting Your Menu
To insert your menu, click OK. This opens two windows containing information about your menu code:
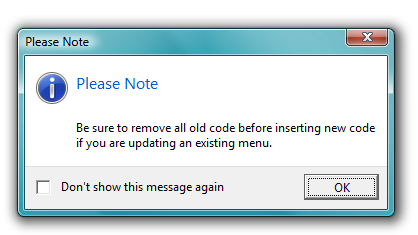
This window reminds you that you must remove all your old menu code before inserting new code. If you followed the instructions in Step 1, you don't need to worry about this window. Click OK. This opens the Save Menu window, which allows you to save your menu to work with it later.

Go ahead and click Save — you wouldn't want to lose all the changes you just made, right? This opens a window that allows you to choose the folder where your menu files are saved. By default, it will be saved into your Working folder or your Website Project.
Once you have saved your menu, the code will automatically be inserted into your page. The code for our menu looks like this:
<link rel="stylesheet" type="text/css" href="css/menu-menu.css" media="screen"> </head> <body> <ul class="menu-menu"> <li class="first"><a href="contact-us.html">Contact Us</a></li> <li> <a href="">Learn More</a> <ul> <li class="first"><a href="about-us.html">About Us</a></li> <li><a href="privacy.html">Privacy Policy</a></li> </ul> </li> The top part that comes before the </head> tag is a link to the menu style sheet, and the bottom part is the HTML code that is modified by the style sheet.
Note: Interested in learning more about what style sheets are and how they work? Check out the comprehensive CSS tutorial at W3Schools.
Switch on over to the Preview tab and see how your new menu looks!
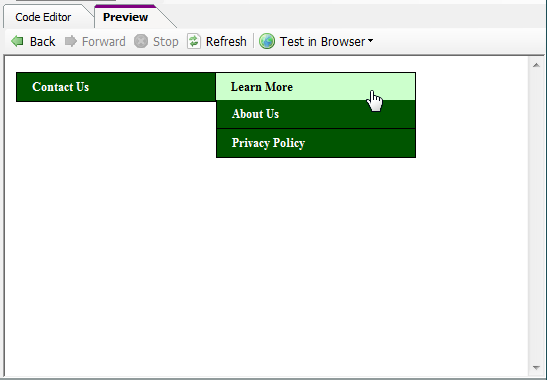
Pretty snazzy, huh?
Step 6: Positioning Your Menu
To change where your menu appears on your page, your best bet is to create a CSS class that specifies positioning, and then apply it to some <div></div> tags around your menu.
First, open up your menu style sheet. It should be called menu-menu.css. Next, insert this style rule:
.center { margin-left:auto; margin-right:auto; >}Next, return to your page code and place <div></div> tags around the menu code that appears between the <body></body> tags. The end product would look like this:
<div><ul class=”menu-menu”><li class=”first”><a href=”contact-us.html”>Contact Us</a></li><li><a href=””>Learn More</a><ul><li class=”first”><a href=”about-us.html”>About Us</a></li><li><a href=”privacy.html”>Privacy Policy</a></li></ul></li></ul>
</div>
Finally, add the class attribute to the opening <div> tag, and give it one of these values: bottom, center, justify, left, right, or top. For instance, if you wanted to center your menu, the opening <div> tag would look like this:
<div class=”center”>Step 7: Adding Your Menu to Your Other Pages
Using the Code Snippets function, you can easily add your menu to all the pages in your website. To do this, first select the code in your menu that appears between the <head></head> tags, which looks like this:
<link rel="stylesheet" type="text/css" href="css/menu-menu.css" media="screen">Next, use one of these options to save it as a snippet:
- Go to File > Save Selected Text as Snippet
- Click the Save Items icon in the Toolbar and select Save Selected Text as Snippet
- Right-click the text and select Save Selected Text as Snippet
This opens the Save Snippet window. Enter the name for the snippet in the Filename field. In this case, we'll call our snippet Menu Style Sheet. When you're done, click OK.
Next, highlight the menu code that appears between the <body></body> tags — <div> tags and all! — and create another new snippet. Call this one Menu Code. Now switch over to the Code Snippets tab, where you'll see your new snippets!
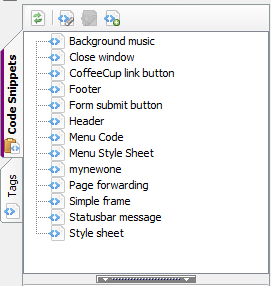
Now whenever you want to insert your menu into another page, just go to the Code Snippets tab and insert the snippets into the correct locations in your page.
Note: For more information about how to use Code Snippets, read Using Snippets.