

To set up custom error pages, click the Error Pages button in the toolbar. This opens the Custom Error Pages tab of the Advanced Settings window.
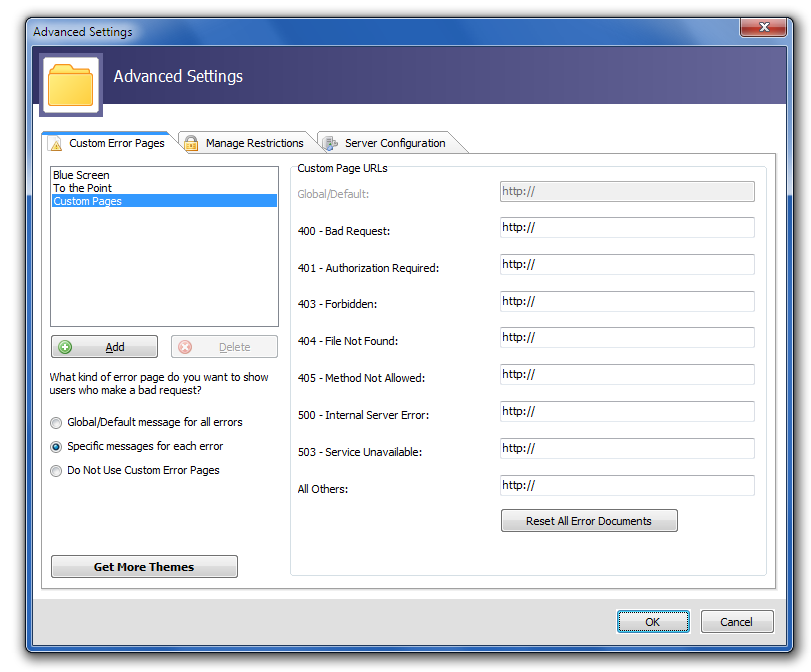
The first step is to decide whether you would like to redirect your users to one page for all error requests (in which case, you should select the Global/Default message for all errors radio button), or if you would like to assign a specific message to each error (Specific messages for each error radio button). Selecting either option means you have a choice: Are you going to use a custom error page that you designed, or are you going to use one of our cool predefined themes?
I Want to Use My Own Custom Error Pages
So you're the artistic type! You have designed your own custom error pages in a web design program like the HTML Editor or Visual Site Designer and uploaded them to your server. The next step is to make sure Custom Pages is selected in the list box in the upper left-hand corner, and then enter the URLs to those pages in the Custom Page URLs fields. When you're done, click OK. Now your users will be redirected to your personally designed error pages. Awesome!
I Want to Use CoffeeCup's Cool Predefined Themes
You can choose between the predefined theme that comes with the program, or any of the cool themes in our Theme Store. For more information about installing these themes, read How Do I Add Custom Error Page Themes I Have Downloaded From the CoffeeCup Theme Store?.
Next, just select the theme you want to use from the list box in the upper left-hand corner, and you're all done!