

In this article we will show you how easy it is to customize the images included within the Form Builder themes.
Step 1: Find Your Theme Files
This process differs slightly depending upon which O.S. you're using.
Windows
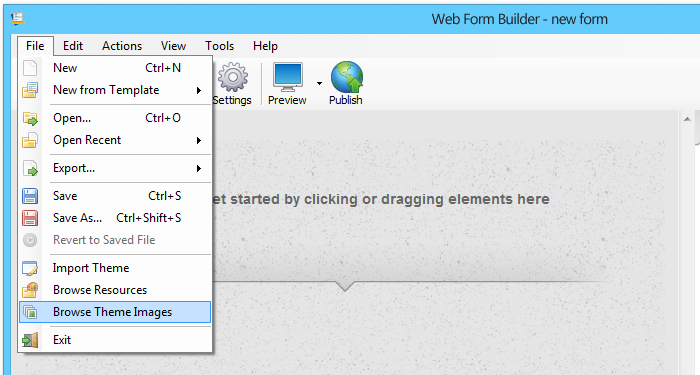
Create a new form using the theme you'd like to customize in Web Form Builder. To find the images for that theme, go to File > Browse Theme Images.
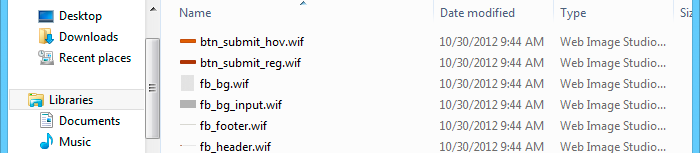
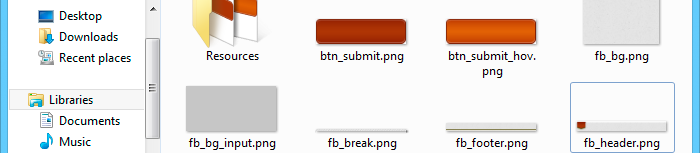
This opens an Explorer window with the theme's images in it. Click the Resources folder to show all the WIF files for each image. Leave this window open, because you'll need to drag files into it later!
OS X
Create a new form using the theme you'd like to customize in Web Form Builder. To find the images for that theme, go to File > Browse Theme Images.

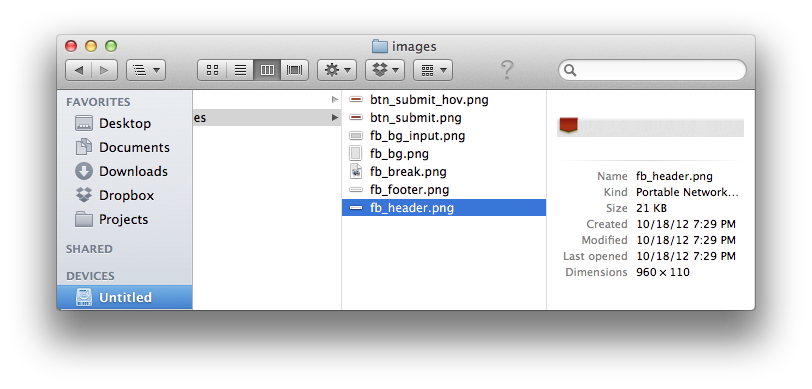
This opens a Finder window with the theme's images in it. Click the Resources folder to show all the WIF files for each image. Leave this window open, because you'll need to drag files into it later!
Step 2: Open a Theme Image
For this example, we will customize the header image located in the Academic theme. Double-click the file called fb_header.wif and it will open in Web Image Studio.

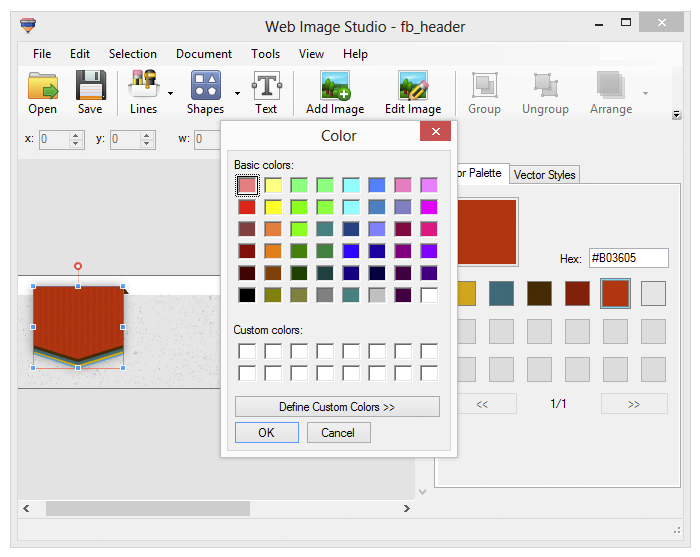
Step 3: Select an Object
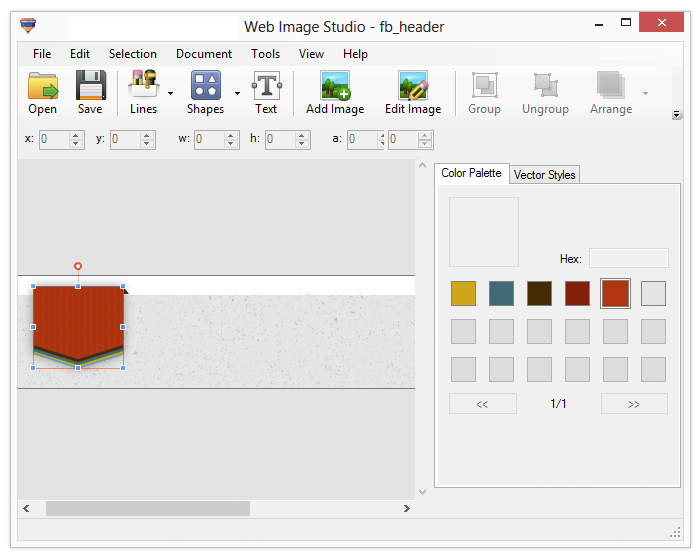
Step 4: Select a Color
You will see that the 5th color box is currently selected. Double-click it to open the color picker. This will allow you to change that color to something else.
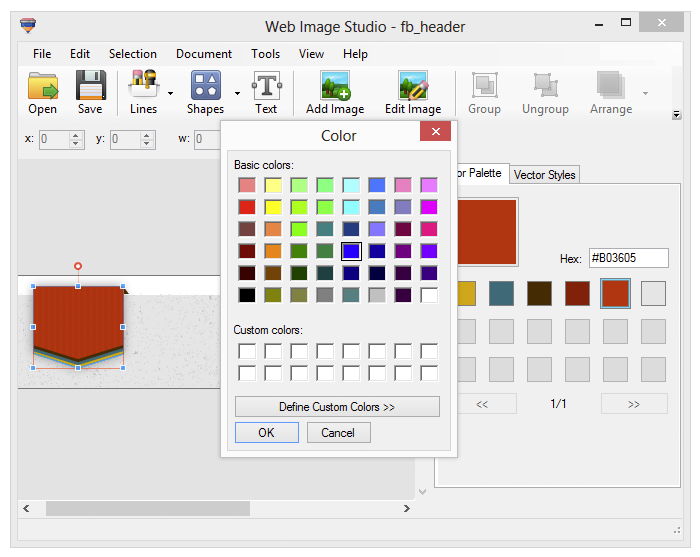
Step 5: Change the Color
Now pick blue and click OK.
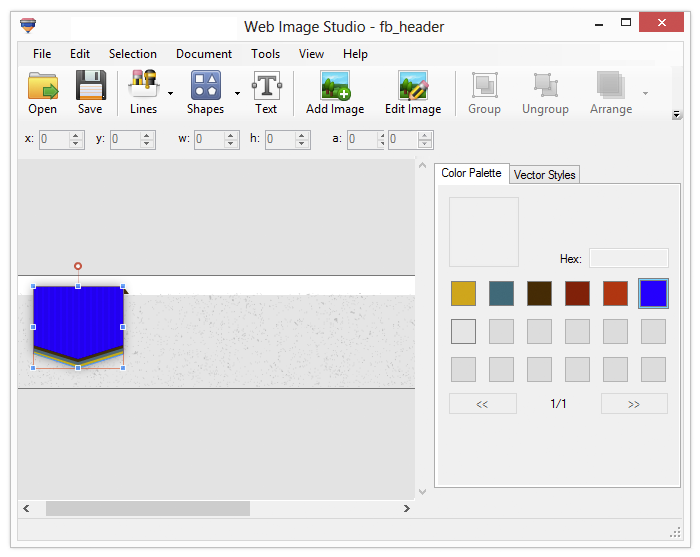
Your header is now blue!
Step 6: Save Your Image
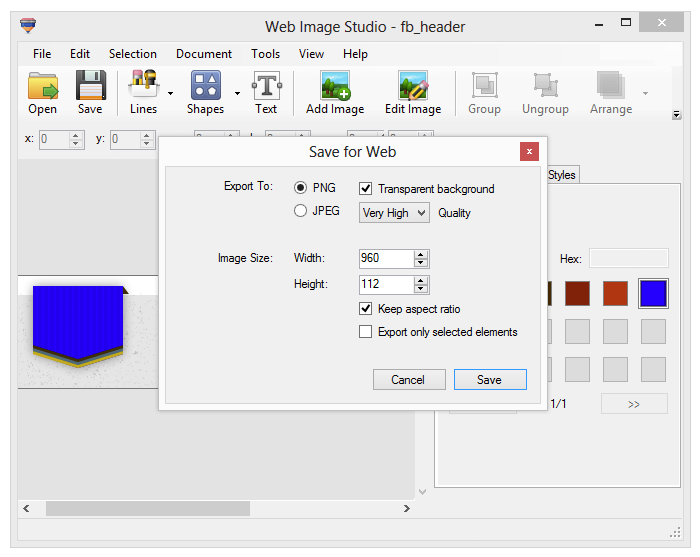
Now you need to save your header image for use in Web Form Builder. To do that, click the Save for Web toolbar button located in the upper-right-hand corner. Save the image with all the default settings. You can customize them if you wish, but for this example we are just going to use the defaults. Save the image into a folder that you will remember.
Step 7: Copy the Modified Image Over the Theme Image
Remember that theme images window you left open in Step 1? Here's where you use it. This process differs slightly depending upon which O.S. you are using.
Windows
Open the folder that contains the image you just saved in Web Image Studio. Right-click the image file and choose Copy.

Go to the window you left open in Step 1. Right-click in the white space below the PNG images (not the Resources folder) and choose Paste. You will be prompted to overwrite the existing file. Do it!
OS X
Open the folder that contains the image you just saved in Web Image Studio. Right-click the image file and choose Copy "fb-header.png".

Go to the window you left open in Step 1. Right-click in the white space below the PNG images (not the Resources folder) and choose Paste Item. You will be prompted to overwrite the existing file. Do it!
Ta-da! You're done! Your new image appears when you apply the theme in Web Form Builder.
You can even go one step further and create new themes using these customized graphics. Read this article to find out how.