

Connecting the Architek Site Designer contact form with a Web Form Builder script.
Web forms are one of the most common features of a website due to their ability to connect you with your audience. Site Designer offers the ability to create beautiful form designs that match the look and feel of your site and content while connecting to your own processing script.
However, if you’re not proficient with PHP scripts, or working with an agency with a preferred backend script, making your web form work can be tricky. Luckily, you can use CoffeeCup Web Form Builder to generate the processing codes for you.
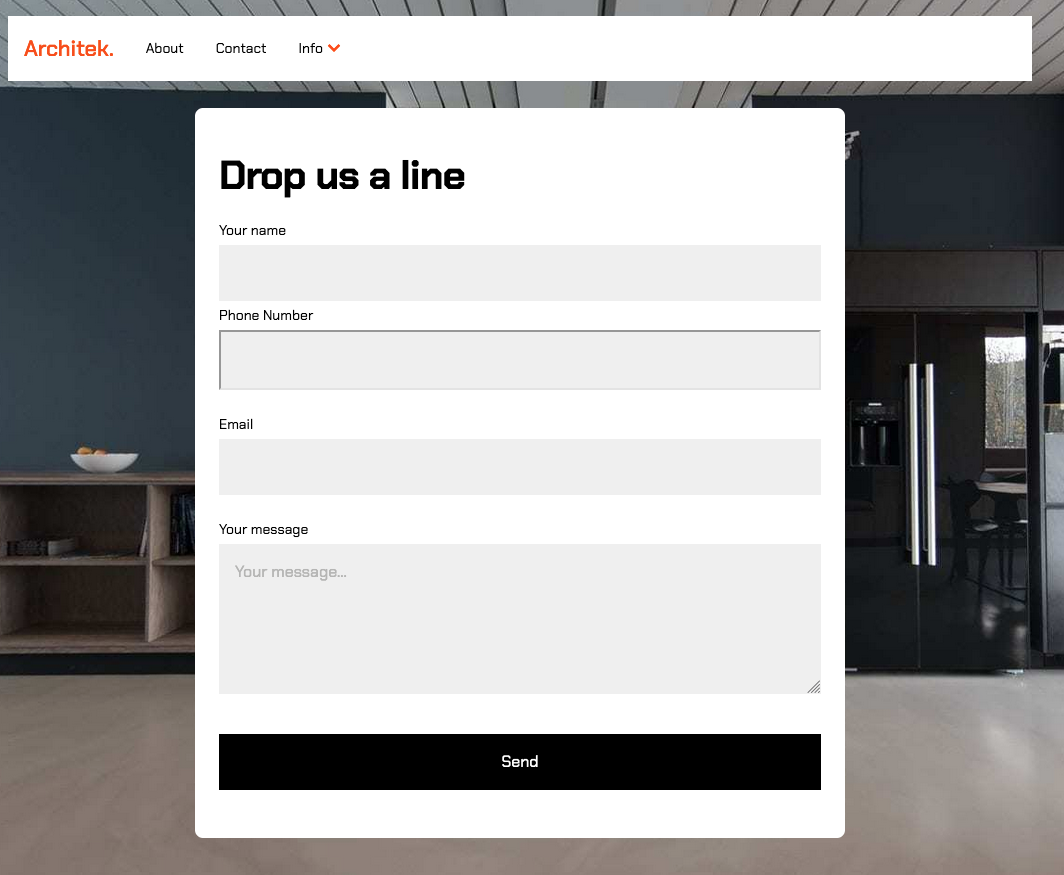
The Architek template features a cool, customizable form. In this tutorial, we will show you how to sync it up with Web Form Builder.
Customizing the Architek Form
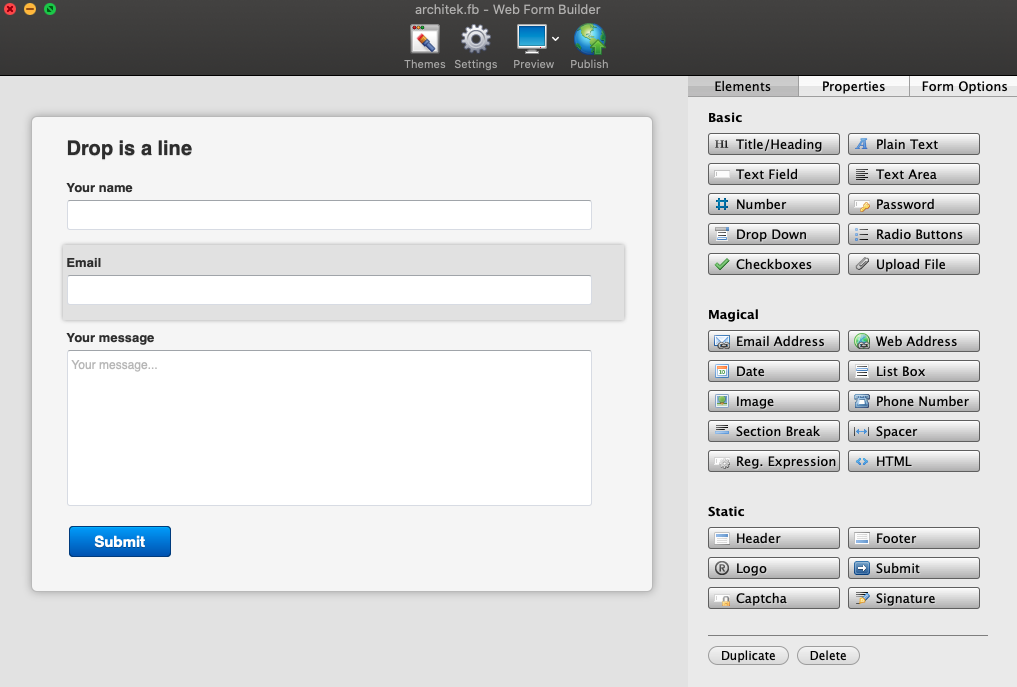
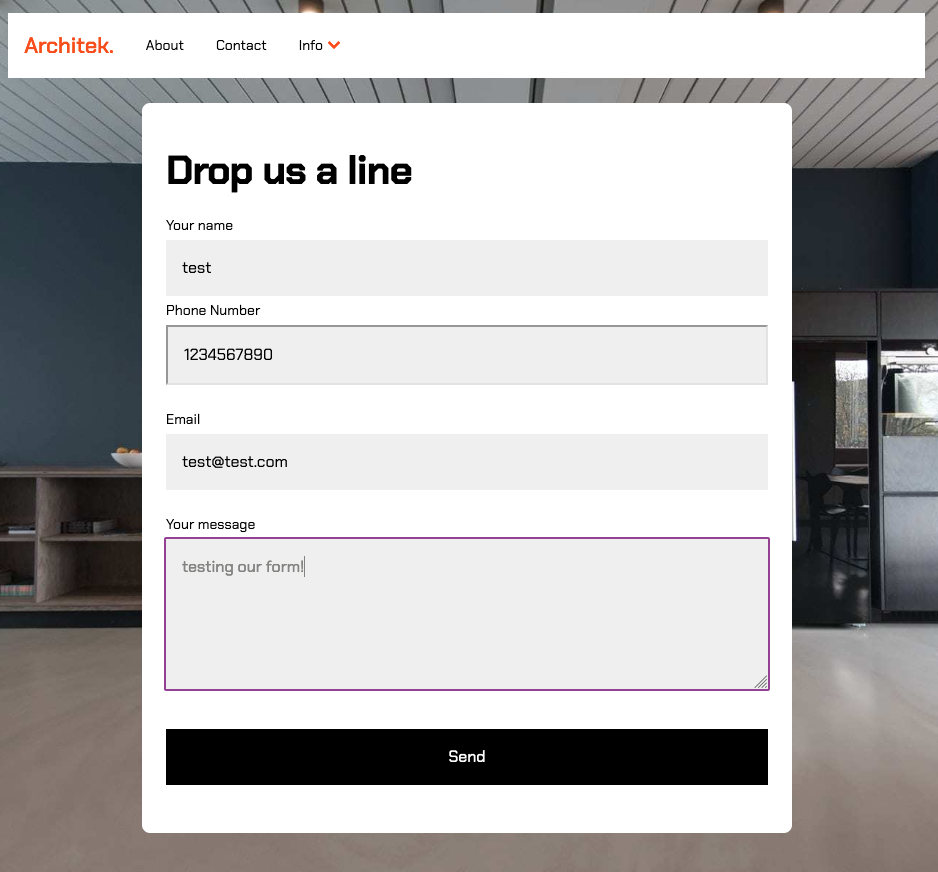
The Architek template features the form on the Contact page which you may access from the Pages toolbar icon. The form is made up of three elements:
- Input element
- Email element
- Text Area element
Each of the elements also has a Label element to indicate what you are collecting.
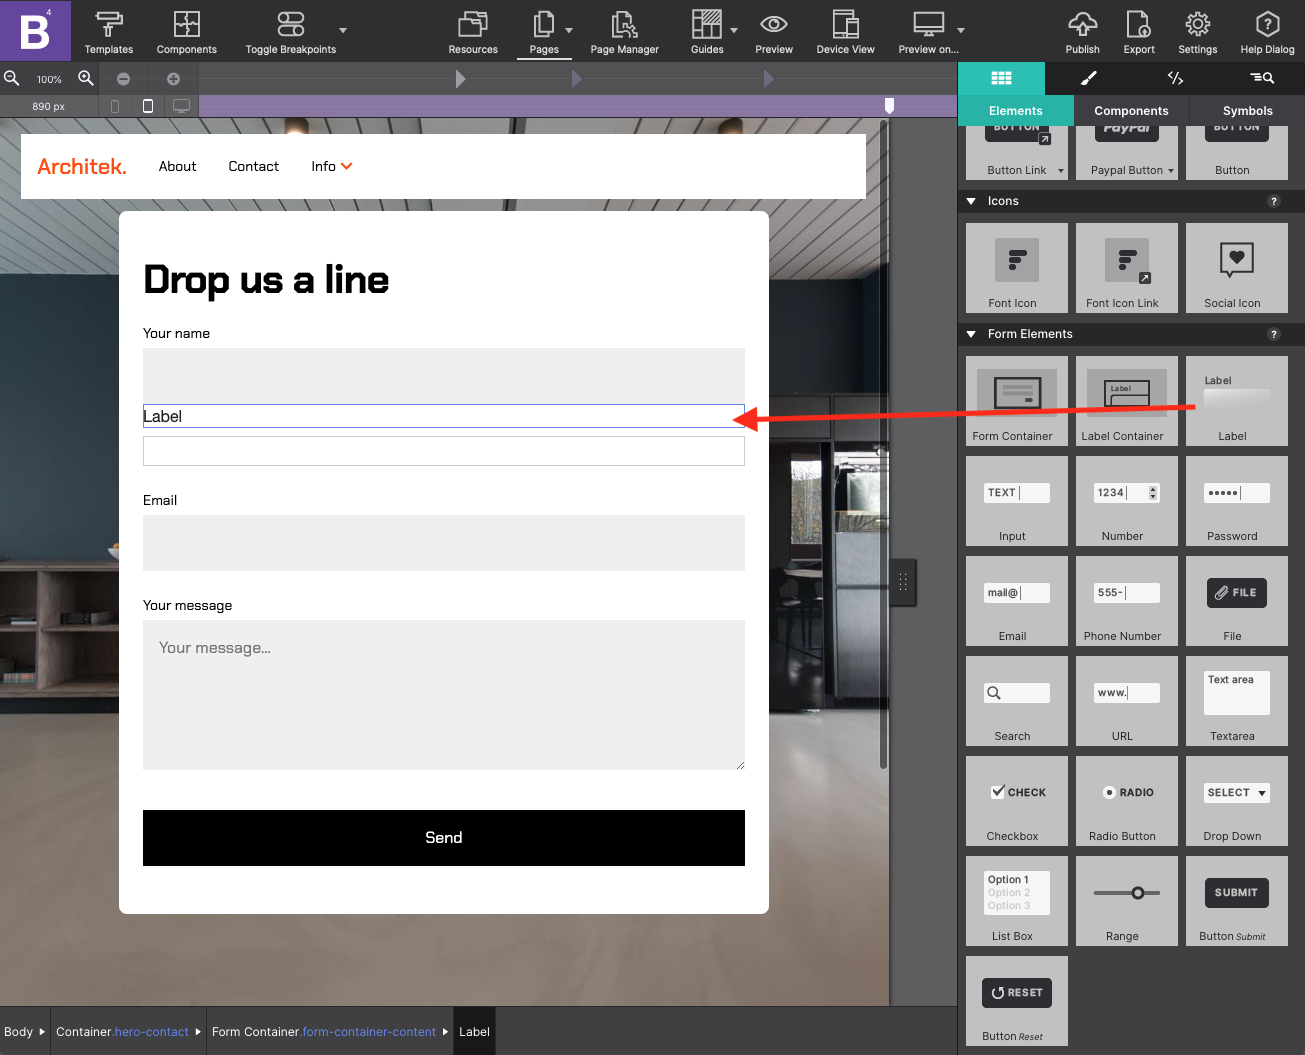
The form is 100% customizable, so you can add or remove elements you don’t need as well as change its appearance. To practice this, go to the Content pane and under the Form Elements section add a Phone Number element and a Label element. You can drag and drop onto the canvas or click to add it into place.
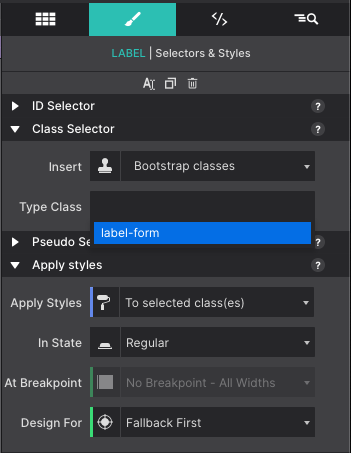
With the Label element selected, go to the Styles pane to adjust its appearance. From the Styles pane > Type Class > if you put your curser in the box, the class name label-form appears. This indicates the other form labels use this class name for their styles. If you select it, the new label will take on the styles of the other form labels so they instantly match.
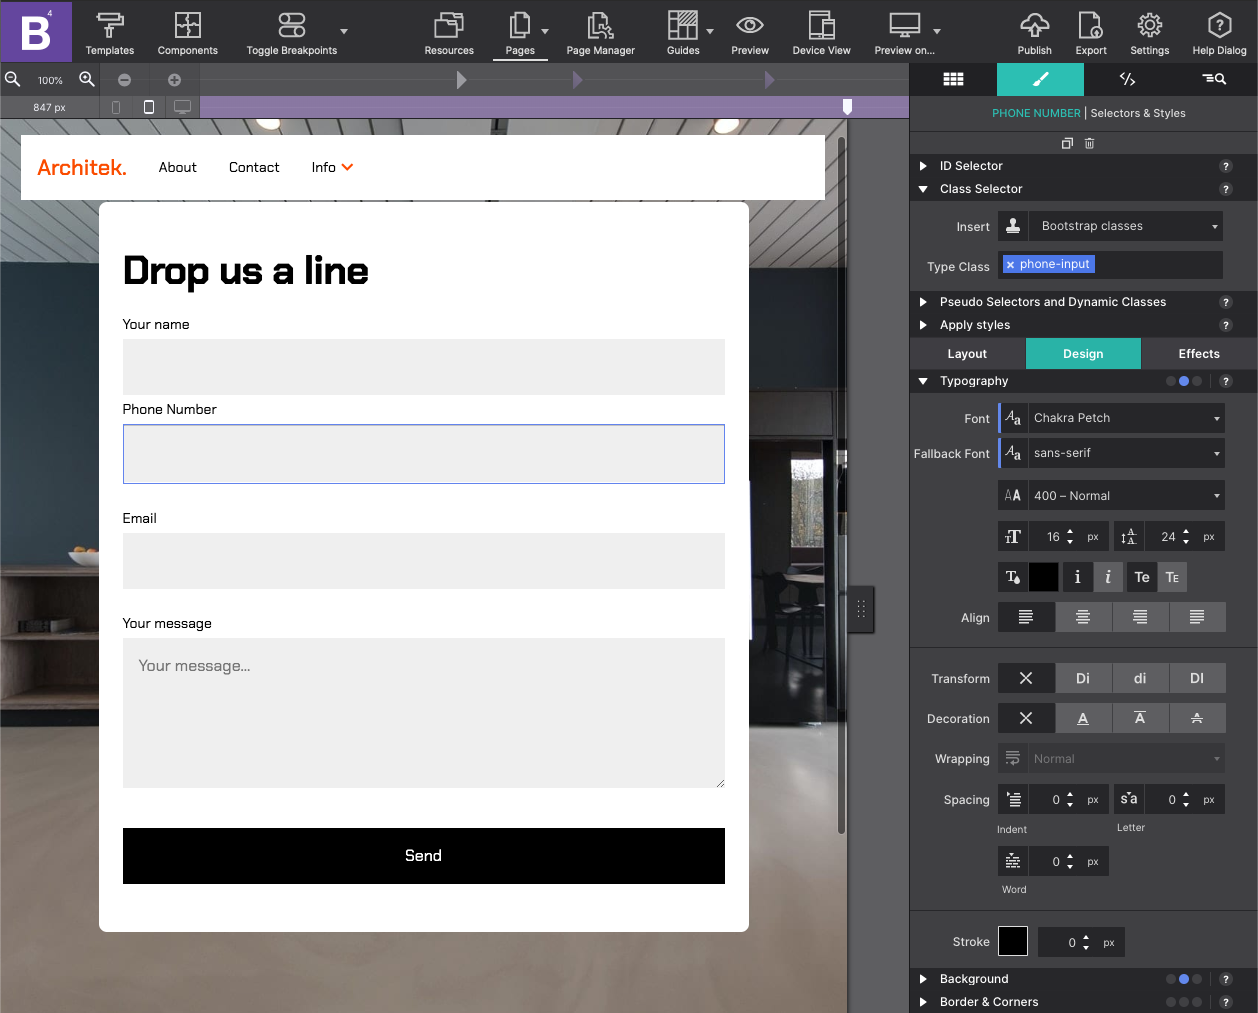
Next to style the Phone Number element. Looking at the other elements I can see they have the following styles applied:
- Font: Chakra Petch
- Fallback Font: Sans-serif
- Background Color: #d6d6d6
- Background Color Alpha: 0.40
- Dimensions Padding: 16px all four sides
With the Phone Number element selected I will add a class name phone-input and apply the formatting above so that the new element matches the others. Lastly, double click on screen to change the Input label to say Phone Number.
Sync with Web Form Builder
With the Site Designer form in place, the next step is to launch Web Form Builder to generate the form script. The Architek design includes a pre-made Web Form Builder project to get your started. Upon opening you will notice the same elements in the form that were within the Site Designer project.
You will need to replicate the changes made to the Site Designer form by adding a Phone Number element to the canvas. The styles here don’t matter as we are simply using Web Form Builder to generate the processing scripts.
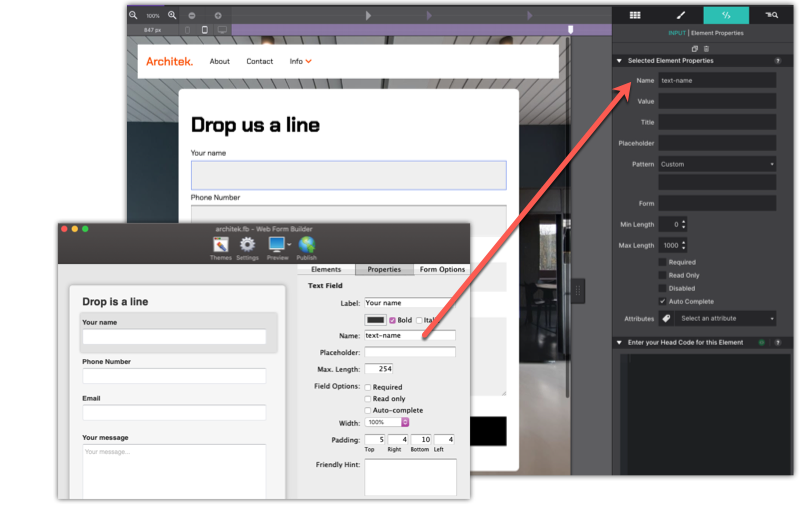
Next, we will need to make sure the Web Form Builder elements share the same Name Property on Site Designer.
You will notice on Web Form Builder, under Properties > Name each element has a designation. You will need to be sure that all the Site Designer elements match their counterpart’s Name field. These field must match. A slight typo could throw it off and break the form script.
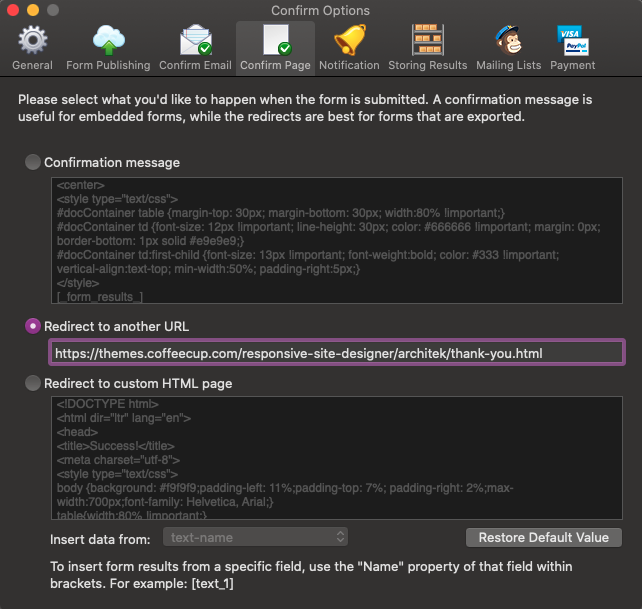
Now let’s dig into the Web Form Builder settings and configure how the form works. From the Settings toolbar icon, select Confirm Page. By default the Confirm Message will be selected. This will redirect the user to a thank you page with a copy of the form submission. However, if you have created a custom form thank you page, you can link to it from the Redirect to URL box.
Under Notification and Confirm Email, you can configure who should receive the form data once it has been submitted.
With your email settings configured, you’re ready to upload! Use the File > Export > Manual Server set up to upload the files to a third party server. You will need to upload all the files to a directory on your server. Be sure to copy the location of the files that you choose.
If you are uploading to S-Drive go to Settings > Form Publishing to configure your account details.
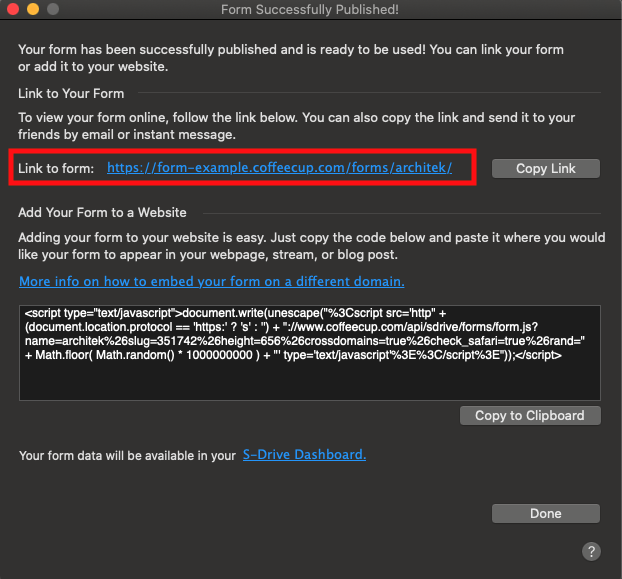
Once you have uploaded your Web Form Builder project you will need to copy the URL of the upload location. For example, we uploaded our form to: https://form-example.coffeecup.com/forms/architek/
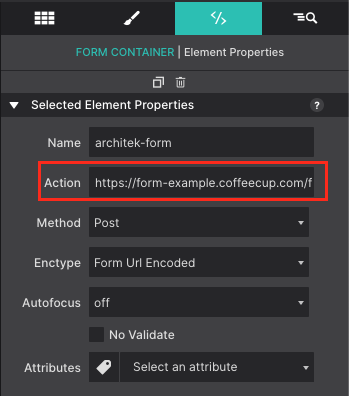
This form URL will be added to the Site Designer. Using the Inspector pane in Site Designer locate and select the Form Container and go to the Element pane. The URL will be added into the Action box.
Publish your Site Designer project and try it out! https://themes.coffeecup.com/responsive-site-designer/architek/contact.html
Custom Thank You Page
Want to use a custom thank you page? That is easy to configure too! In Site Designer design a fancy Thank You page that matches your website. Copy that page URL and paste it into Web Form Builder under Settings > Confirm Page > URL. Now when the form is uploaded, the user will see a stylish form confirmation and feel confident in who they sent their information to.
Level up with the Site Designer help guide.
Site Designer gives you the power to work with CSS visually. These code-free controls allows you to experiment with new styles and layouts without having to be a pro at hand coding. Discover the power of Site Designer and start dragging, droppping, clicking, and sliding your way to an epic website.