

Here is a look at our Welcome Screen. Easily choose to create a project and much more with just a click.
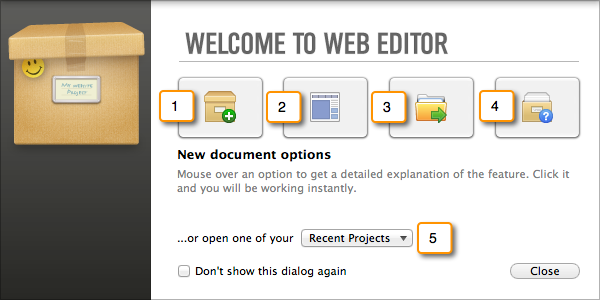
1: Create Empty Project
Create a Web Editor project and a basic directory structure in your local system, starting with an empty HTML and CSS file. You will be asked to name your project when you close it.
2: New Project from Theme
Create a new Web Editor Project starting from one of our cool Themes, creating an awesome website will never be easier!
3: New Project from Files and Folders
Select a name for your project, then choose files or folders from your local system and you will create a new Web Editor project with all required directory structures.
4: Open our Sample Project
In our Sample project you will find a website that will introduce you to some basic Web Editor features which will prove useful when creating your site. You will be asked to name your project when you close it.
5: Open on of your Recent Projects
When you select this dropdown you will find a list of recent projects that you have opened. This is a quick and easy way to open your current project and get to work!
Here's a quick overview of the major features of the Web Editor workspace:
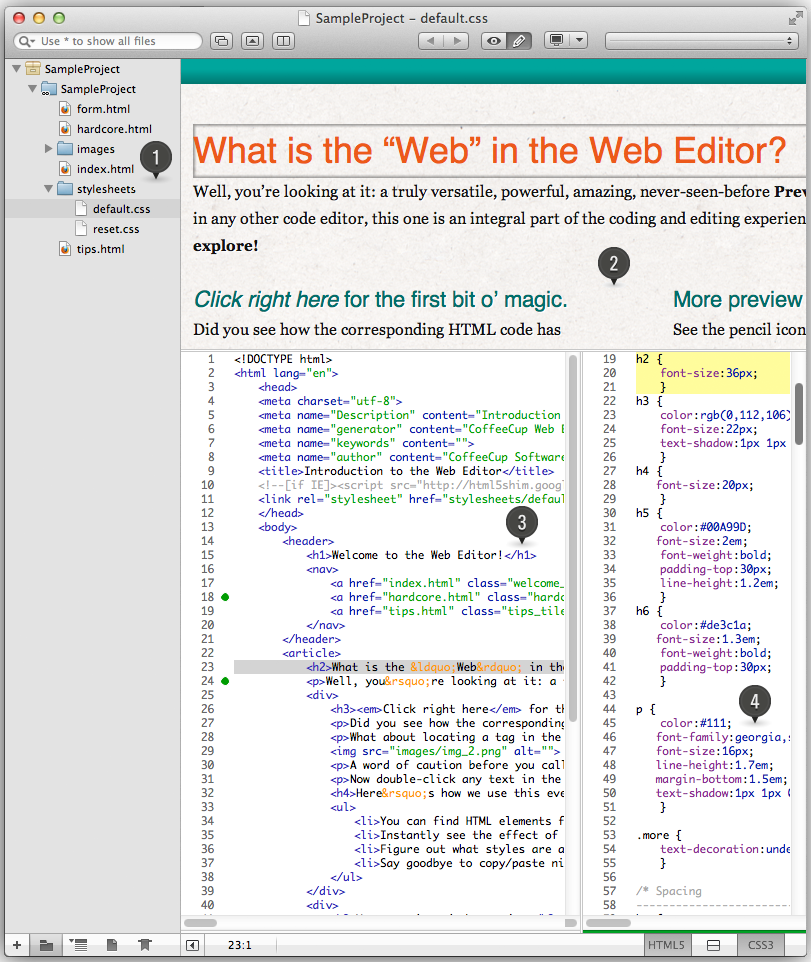
1. Project Explorer
Displays all open projects and their files and folders, and bookmarks, depending on which view is selected at the bottom.
2. Preview Pane
Displays a preview of the currently selected file as it will be seen on the web.
3. Left/Top Editor
Displays the currently selected text document for editing.
4. Right/Bottom Editor
Shows a second currently selected text document which may be related to the file that is open in the main editor.
The Project Explorer
The leftmost column of the Web Editor is called the Project Explorer, and it’s an easy way to keep up with and organize all the files, folders, and bookmarks that are currently open. Here’s what a typical Project Explorer pane might look like in a relatively simple project:
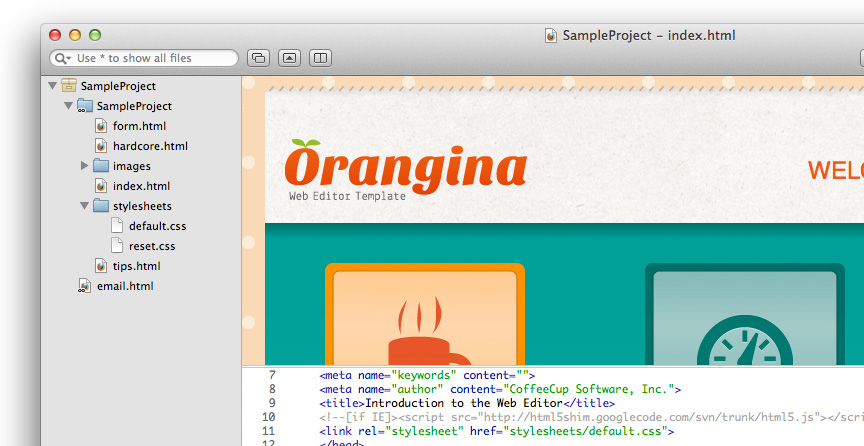
Each item in this pane (except for bookmarks) represents an actual file or folder found on your hard drive. If you hold the mouse cursor over any non-bookmark item in this pane, the full path to the file or folder will pop up. This is the quickest way to determine where an item is stored on your hard drive. You can also right-click an item and select “Show in Finder” to go straight to the containing folder.
There are several different types of items displayed in this pane, depending on the selected view:
- Project: The beige icon represents a project, and everything in its tree is part of that project. Each of these icons represents a different project, so you may have several project icons onscreen at once.
- Folders: The blue icons represent folders where files can be stored.
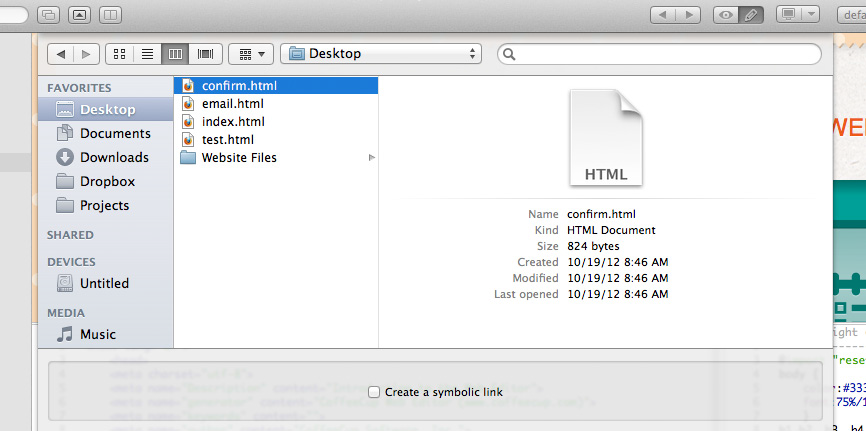
- Referenced files/folders: Indicated by a chain icon in the bottom-left corner (as seen on the icon for contact.html).
- Regular files: Everything else in a project—HTML, CSS, PHP, JPG, TXT, etc.!
- Regular files: Everything else in a project—HTML, CSS, PHP, JPG, TXT, etc.!
- Bookmarks: Saved references and comments for a specific line of a specific file.
Each Project icon refers to a .weproj file on your hard drive. (That’s the extension for a Web Editor file, which keeps track of all the files in the project.) Within each project is a referenced folder (“Website of the Year” in our example) where all non-referenced files in your project are organized.
You don’t need to put all your files in this referenced folder, though. The Project Explorer lets you include files and folders that are located anywhere on your computer, which is what references are used for.
There are two different methods that the Web Editor uses to organize content, and there are several ways to add this content to the project:
- Regular files/folders: Copy content into the project folder on your computer’s hard drive. This can be accomplished in two ways:
- Click-and-drag content directly into the project using the Finder
- Right-click a destination folder and choose Copy/Link Existing File or Folder… to choose content to add.
- Referenced files/folders: Use the “Add File to Project” feature. There are three ways to do this:
- Go to File > Add File to Project
- Right-click the project icon and choose Add File to Project
- Click the auxiliary menu (the + icon) on the bottom left corner of the window and choose
Add File to Project
The Web Editor has a powerful external synchronization feature which ensures that the project’s folder tree exactly mirrors the folder tree on the hard drive. Because of this, when you copy content into one of the project’s folders in the Finder, it automatically appears in the corresponding folder within your project. Therefore, changes made to content in the Web Editor will also happen on the hard drive!
Very important: If you delete content from the project folder, it will also be removed from the hard drive. Please ensure that you actually want to delete the content before taking this action!
Referenced files/folders
Referenced files don’t actually need to be located within the project’s folder on the hard drive. These are the files that have the little “chain” icon in the bottom-left corner that indicates that the Web Editor is “linking” to them:
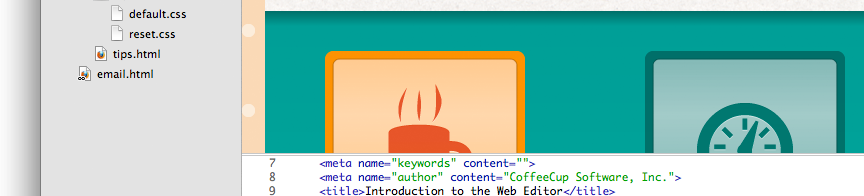
Because this icon represents a link to where the file or folder can be found on the hard drive, this content can be stored anywhere.
Please note that you can right-click and delete the reference to a file or folder, removing it from the project, but this action will not delete the actual content.
Deleting and Repairing References
The Web Editor synchronizes all changes to files and folders in the project. This means that if you move or delete a referenced file, the Web Editor highlights the content in red, letting you know that something needs to be corrected. In the following example, we moved “contact.html” to a different folder with the finder:

The Web Editor no longer knows where “contact.html” is, or what the reference should lead to. Rightclicking this red file name reveals two choices:
- Delete Reference
- Repair Reference…
If you’ve removed this file, or you don’t need it in the project anymore, choose Delete Reference. But if you’ve made a mistake or moved a file and just need to remind the Web Editor where it is, choose the Repair Reference… option. This allows you to locate the file so it can be used in the project again.
Please note that the file located to repair the reference must have the same file name as the reference itself. This means that if you renamed the file, you’ll need to change it back or add it again to use it in the project.
Making Copies
If you’d like to add content to a specific folder in the project tree, you can either choose to make a new copy of an existing file/folder or use a symbolic link.
Right-click a folder in your project and choose Copy/Link Existing File or Folder.
From this window, you can choose any file or folder on your computer and click Open. The content will be copied into the folder that you originally right-clicked.
Unsaved Files
If a file has been modified but not saved, its icon will appear darker than normal, like index.html appears here:

This lets you know that the file needs to be saved. You can do so by selecting the file and pressing Cmd+S or by going to File > Save.
Non-Project files
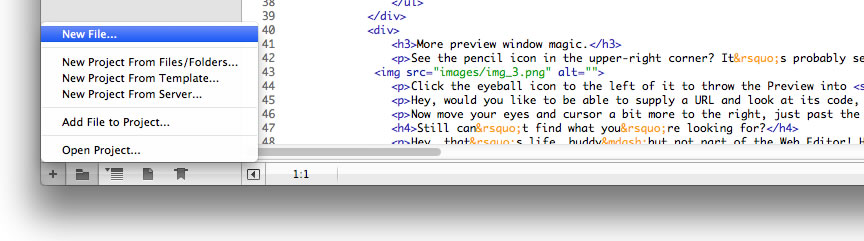
If you open a file without linking it to a currently opened project, the file will be placed in the Non- Project Files category. Files in this section can be added to a project by saving them to a folder used by a project.
When you create a Quick File using File > Quick File or the Cmd+N shortcut, a new HTML file will appear in the Non-Project Files category. Quick files don’t actually exist on the hard drive yet, so they must be saved to be used in a project. You can either save these files to a folder on the hard drive used by a project, or you can save them anywhere you like on the hard drive and add them as a reference later.
Bookmarks
If you are using any bookmarks, they will appear below all the other open files in the Project Explorer.
The Auxiliary Menu
The last thing we need to discuss in the Project Explorer pane is the bottom panel with six little icons that look like this:

Clicking the + button in the left corner opens a menu where you can quickly choose some of the most commonly used functions of the Project Explorer:
Show the Project navigator: Clicking this button displays the text documents that are currently available to be worked on. This is an easy way to get a list of files if your project has lots of folders and non-text files.

Show files ordered by type: Click this button to display all files ordered by type, organized by project. This is a great way to display all of the images, CSS files, or any other file type that are available if you are looking to move content from one project to another.

Show files currently open: Click this button to display a list of all files in all projects that have been opened during the session. With large projects, you can quickly find files you worked on recently.

Show the Bookmarks navigator: Display all the bookmarks that have been set in all projects.

And finally, this button collapses the Project Explorer, giving you more room for the other panes in the Web Editor. You can always expand the Project Explorer by clicking the right arrow in the bottom left corner of the window.

Well, that’s enough about the Project Explorer. Let’s talk about the Preview pane.
The Preview Pane
The Preview pane’s function is pretty straight-forward: Show you what the code you’re working on looks like in a browser window!
It’s extremely useful to have this feature right on the screen, because it updates itself each time you make a change to the code. This way you can see whether the code you’re entering results in what you’re actually intending to create. You can choose to use the Preview pane in Browse Mode or Edit Mode.
In addition to showing a preview of the currently selected document, the Preview pane is used to display any selected graphics. For example, if you click a JPG file in the Project Explorer, it’ll appear in the preview pane.
Browse Mode
To switch to Browse Mode, click the toolbar icon that looks like an eyeball:

This mode turns the preview into a fully-functional browser window, allowing you to click links and go back and forward in your browsing history using the navigation buttons.
Edit Mode
To switch to Edit Mode, click the toolbar icon that looks like a pencil.

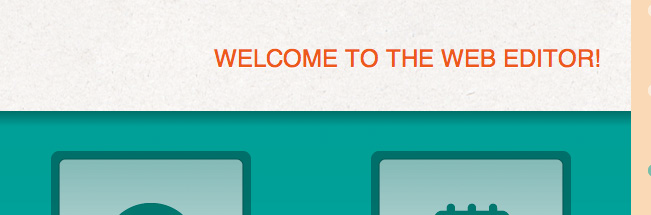
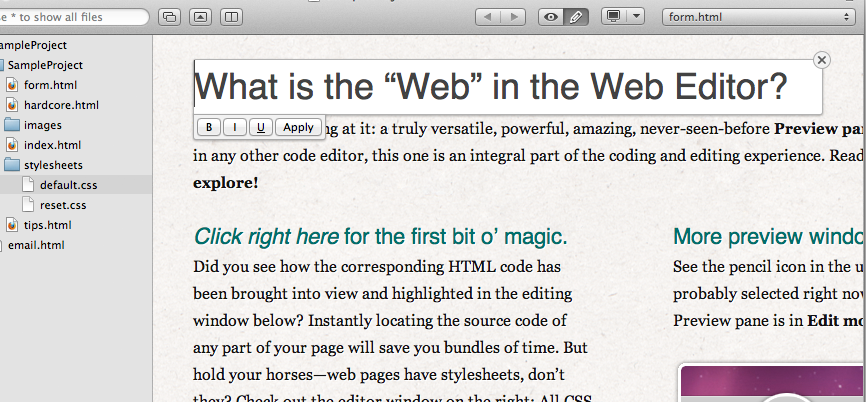
When using the Web Editor in Edit Mode, you can click an element of the webpage and the corresponding code is highlighted in the editor panes. For example, we’ve clicked the orange header text in the preview pane:
And the corresponding line of HTML has been automatically highlighted in one editor…

…and the relevant CSS in the other editor!

This is a powerful function: If you have a complicated webpage and you don’t want to hunt through your code for a long time trying to find which line of code matches up with an element on the page, you can simple click it in the Preview pane and the element’s code will be appear before your eyes. Sound useful? You bet it is!
You can even do the opposite: Click the code in one of the editors and the element it defines or styles will be highlighted in the preview pane! How cool is that?
Editing Text in the Preview
While still in Edit Mode, you can double-click any text in the Preview and edit it right there, styling it as you go:
Click B to bold the selected text; click I for italic text; click U to underline the text. If you’re happy with your edits, click the Apply button. The X to the right deletes the entire element.
Right clicking a selection reveals tons of other options, too. You can look up the definitions of words, do a Google search with the selected text, check spelling, transform the text, have the words read aloud, and much more.
Other Preview Tools
There are a couple tools above this window that can help you organize the preview pane in the way that works best for your workspace. By default, the preview pane appears at the top of the screen, but you can use these tools to customize its position and size.
The Pop-Out button pops the preview pane out of the main window altogether. If you’ve got a twomonitor setup, try running the Web Editor on one monitor and the preview on the other.

The Collapse button collapses the preview pane. This temporarily hides it so you’ve got more room onscreen for the editors. When you’re ready to expand the preview pane again, just click it again.

The Arrangement button toggles between display arangements. The preview pane is at the top of the window by default, but this tool lets you place it to the left of the editor. This can be useful if you’re working on a very long webpage. Click this button again to switch back to the original arrangement.

To the right are two more useful items: the Browser Preview button and the Related Files drop-down.
Clicking the Browser Preview button open the currently selected webpage in your preferred browser, so you can see exactly how your webpage looks in specific browsers. You can configure the preferred browser in the General tab of the Preferences window, or by clicking the arrow next to the browser preview button and choosing Set Preferred Browser.
Click the down arrow to select from a list of installed browsers to preview with. It’s a good idea to check to see how your work renders in as many browsers as possible, so before you send your final upload, test with every browser in this list. Again, choosing Set Preferred Browser allows you to pick which browser is used by default when clicking the browser preview button.

The Related Files drop-down menu allows you to choose from a list of files that are referenced by the document being displayed in the left/top editor.

The Editors
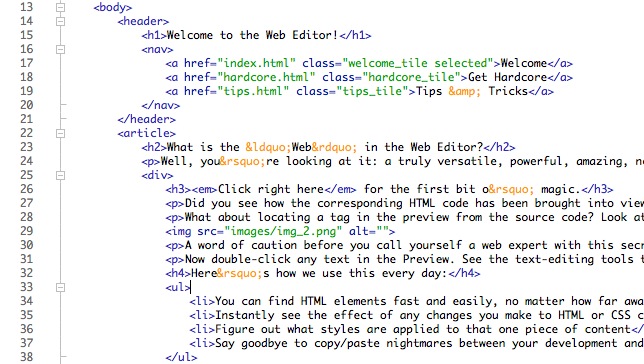
Ahh, finally—the code editing panes! We’ve made it to the keystone of the application. This is where you’ll do the vast majority of your HTML, CSS, PHP, and/or C++ coding, as well as any other text-based programming language you which to use the editor for. Heck, you can even use it just to edit plain ol’ text files!
The first thing that you’ll notice is that each line is numbered. This is helpful when using bookmarks to flag certain lines of code in documents, and is even more helpful when two or more people are collaborating on a single file and need to refer to a certain line. Some languages, like PHP, will even return error codes that reference specific lines, helping you to locate a syntax error with ease. Line numbers are also necessary when approximating the number of lines in a closed block of code.
Code Blocks
Speaking of blocks of code, look at that margin between the line numbering and the actual code. This area is called the gutter, and those lines, pluses, and minuses indicate what we refer to as blocks:

Blocks appear around every open and corresponding close tag that span more than one line (in this example, <div> and </div>.) The box with a minus sign on line 17 is an indicator that the line is the beginning of an open block, and the small dash on line 20 is the end of the open block. You can click the minus to fold the block, and the Web Editor will display only the first line of this section

See how the numbering jumps from 17 to 21? That’s because lines 18, 19, and 20—all parts of this <div> block—have been collapsed. They’re still there, but the Web Editor is temporarily hiding them. You can click the plus sign that now appears in the box to unfold these hidden lines.
You can also toggle whether a line is foldable by clicking its line number to highlight the entire line and going to Edit > Blocks > Toggle Foldable or pressing Cmd+K. This way you’ve got complete control over which chunks of code can be folded.
You can also move selected blocks of code up and down in the document. Just highlight an entire section of code, then click and drag it into position with the mouse. Because this can sometimes be messy, you can also use these keyboard shortcuts to do the same thing:
- Ctrl+Cmd+Up arrow: Move the selected code up by one line
- Ctrl+Cmd+Down arrow: Move the selected code down by one line
By now you’re probably wonder why there’s so much text coloring going on in the editor pane. Hey, it keeps you organized and increases the likelihood that you’re writing a syntax-error-free document! Let’s talk a bit more about those colors.
Code Coloring
Notice how certain sections of the code are color coordinated?
Each color corresponds to a specific type of element of the document you’re working on. This example uses the classic color scheme for HTML documents. You can customize color schemes for specific types of files in the Colors tab of the Preferences window.
Once you become familiar with the color scheme you’re using, you’ll immediately notice if something isn’t colored correctly. For example, the values for all HTML tags in the example above are green. If you’re entering a value and it’s not green, you’ll start looking for something you missed—a bracket, a quote, a semicolon, etc. When your syntax is correct, all color coordination will be correct as well.
Code coloring can also help you immediately identify what kind of document you’re working on. For example, you might be working on a PHP file that is mostly composed of HTML code. The HTML might confuse you if it wasn’t using the PHP color scheme that reminds you that yes, you are in fact working on a PHP file.
The Coordinates Box
Just below the left/top editor is a little box with a pair of numbers in it. It looks like this:

These are the coordinates of where the cursor is placed. In this example, the cursor is on line 7 on the 39th character from the gutter.
The Right/Bottom Editor
Yep, you’ve got two editor windows, so you can have two documents open simultaneously. This is helpful if you’re working on two related documents, like an HTML file and a CSS file. You can edit the content (HTML) in one, work on the style (CSS) in the other, while both affect the Preview pane in real time. This HTML-CSS-Preview round trip is exactly what makes the Web Editor so powerful!
You can click a style or script file in the Project Explorer to open it in the right/bottom editor, or you can click an element in the Preview pane while in Browse mode to open its content and style files in both editor panes simultaneously.
If you want to easily switch between the files that are referenced by the document in the currently selected editor, you can use the Related Files drop-down menu found in the upper-right corner of the window. It looks like this:

This menu lists all the documents that relate to the currently selected document. For example, any CSS, JavaScript, or PHP files referenced by the currently selected HTML file appear in this menu. Likewise, any documents that reference a currently selected CSS or JavaScript file appear in this menu. Just choose a file from the list and it’ll open.
Note: If the selected document has not been saved since new references were included, they won’t appear in the Related Files drop-down menu. You’ll need to save the document for referenced files to appear in the list.
The Editor View Picker
One more thing before we move into a swift tutorial! There’s a little tool in the bottom-right corner of the Web Editor window. Here’s what it looks like:

The left box displays the file type that is open in the left/top editor; the right box displays the file type that is open in the bottom/right editor. The middle box is a toggle for how these two boxes are oriented.
In fact, this entire section is one giant button. click the left box and only the left/top editor will be displayed; click the right box and only the right/bottom editor will be shown. Click the middle box, and both will be displayed, but they’ll toggle between vertically stacked or side-by-side arrangements. This is exactly why we keep referring to this editor panes as left/top and right/bottom.
Okay! We’ve discussed everything you see in the standard Web Editor workspace! Makes a lot of sense, doesn’t it? Now that you’re familiar with each pane, button, and menu, let’s try some tutorials.