

The groundwork for any exceptional animation is the quality of its frames. Without great frames, your animation won’t look good. Therefore, it is of utmost importance to prepare your frames before adding them to your animation.
Though Animation Studio’s Edit tab gives you a range of drawing tools to make changes to the frames of your animation, it’s a raster editor. This is because each frame is in the GIF format. This means that you edit pixel-by-pixel—which is great for doing last-minute touch-ups or for creating simple graphics on the fly, not not necessarily ideal for making all the changes to each frame that will result in the illusion of movement.
This is why we’ve created Web Image Studio, an ultra-easy way to edit graphics with great results. Now you have all the tools you need to take an existing image and turn it into a fantastic animation.
The secret is that it is what is known as a vector editor. This means you’re not looking at one flat image that’s merely a collection of images. Vector graphics are a collection of points and instructions that tell the program displaying them how to draw the graphic. This means you can enlarge them, change colors, bend lines, and more without any impact on the quality of the graphic.
Let’s take a look at the original frame of our Caution graphic from the tutorial.
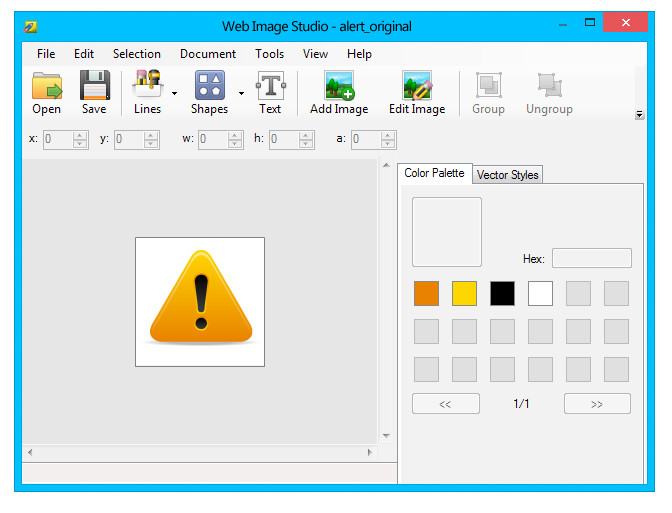
What you are looking at is a WIF file. This is the vector format that Web Image Studio uses to give you full control over every CoffeeCup graphic. (We sell more than 1500 of them in our store—all fully customizable!)
Our goal is to create an animation that looks like the exclamation point is filling up with black liquid from bottom to top. Therefore, we already have our final frame—totally filled!
Because that exclamation point is made entirely of vectors, we can select the whole thing just by clicking the dot, then holding Shift and clicking the line:
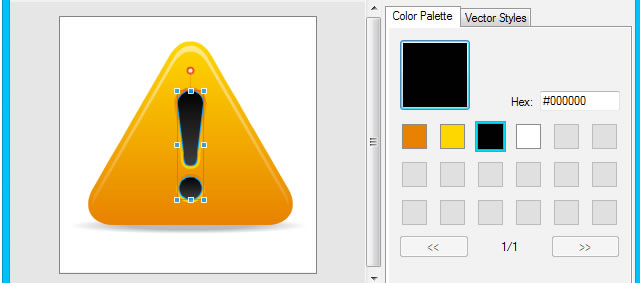
You can see that the dot and line are now outlined in blue, indicating that it is selected.In addition to this, a red box is shown around all selected elements. Also notice that the black square on the right is selected. This is because these two elements only use the color black.
Since we have our ending frame (totally filled), we need to create the first frame (totally empty) and each of the in-between frames. Click the black square and select the color yellow:
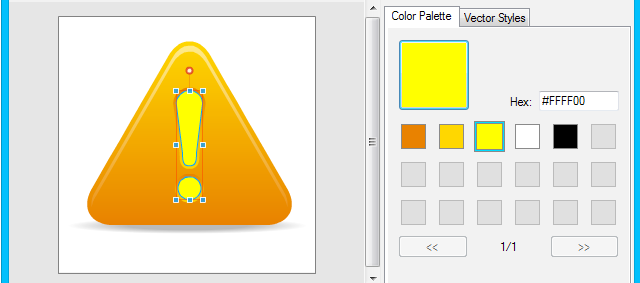
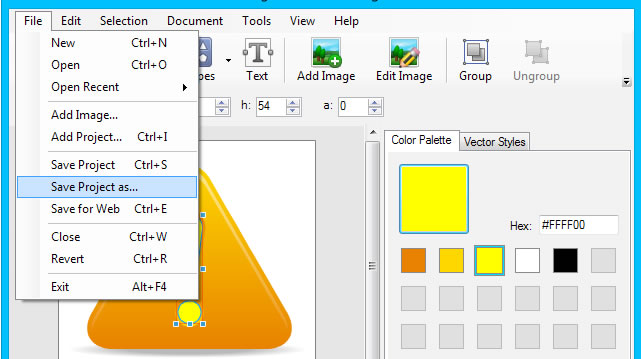
That was easy! Now that our starting frame has been created, we need to export it for use in Animation Studio. Go to File > Save Project As… and giving it an appropriate file name, such as “frame2.wif”.
Now we want to create the second frame in the animation, where the exclamation point begins to fill from the bottom with black. Select only the dot, then click the Vector Styles tab to the right.
There are many tools here, but what we want is for the dot to smoothly fade from black to white, which we can accomplish using a linear gradient. Click the Fill tool and choose Linear gradient from the drop-down. The color box below will have two tabs along its bottom; click the left tab, then click the Color box and choose black. Do the same for the right tab, but choose white instead.
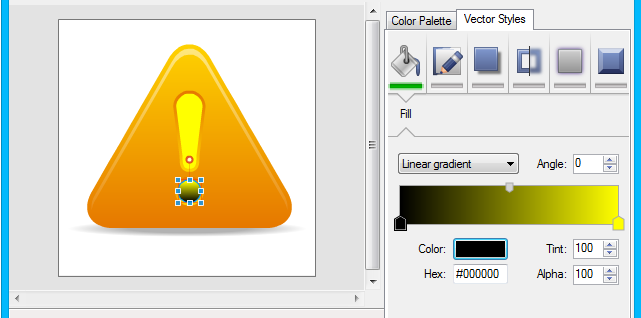
Nice! Frame 2 is done already! Save it just like before, but give it a different name.
By using a combination of solid fills and linear gradients, and by adjusting the tabs of the gradients to control how the gradient is drawn, we can create 9 more frames to complete our animation:

And you’re done! Now you have 11 frames that animate this caution symbol’s exclamation point. Now you can follow the steps in Chapter 3 using your prepared frames. It’s a good rule of thumb to create more frames than you need, because you can always throw out frames that aren’t necessary and adjust the speed of the animation with each frame’s delay property.
This is only the beginning of what’s possible with Web Image Studio. Because WIF files are so easy to tweak and customize, they’re the ideal format for creating animations that do just about anything you can dream up.
If you don’t have Web Image Studio, you can read more about it on our website.
Need graphics? We’ve got tons of them! Take a look in our store and see which ones you like.