

We’ve covered a lot of ground so far. We looked at the editor’s main features and breezed through an in-depth quick-start guide to help get moving with the program. But there’s a lot of other stuff you can do with the HTML Editor that we’ve haven’t mentioned.
How to Add an Image to Your Page
There are two different methods of adding an image to your page: Using the Insert Image window and using the Resource browser. The Insert Image window is a good choice if you want to specify image attributes and/or create a thumbnail version of the image. The Resource browser is best if you want to skip all that stuff and just add an image to your page.
For a more detailed explaination, check out adding images to your page.
Inserting a Polyfill
A polyfill is a browser fallback created in JavaScript or CSS, which allows certain functionality that work with modern browsers to also function with older ones. To get started, go to Insert menu > Polyfill and select the polyfill or JavaScript that you would like to include, and the available versions for that will appear, allowing you to select which CSS or JS file you would like to use. CSS files are placed inside <head> of the section of your website, whereas other file types can go in either the <head> or end of the <body> sections.

Using Fonts
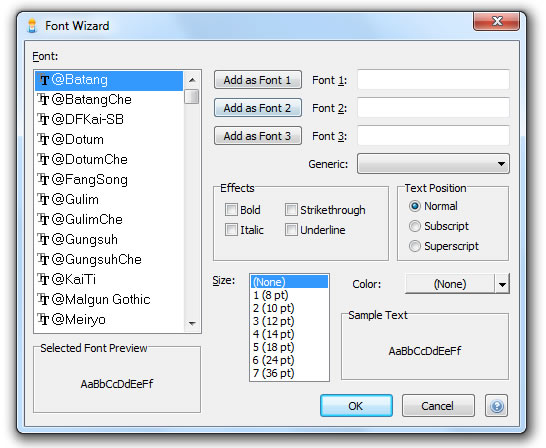
Fonts
Select the font you want to use from this list, and then apply it to your text using one of the three Add as Font buttons to the right.
Why are there three font boxes? Well, just like fonts, not every computer is created equal. Your computer might have some crazy-funky-fresh font installed that’ll look just perfect on your website, but that same font might not be installed on someone else’s computer. When that happens, the other person’s Web browser defaults to a default to a generic font (usually Arial or something similar). This can mess up the appearance of your website, with words running out of boxes, elements getting pushed out of the way of marauding text, and other such chaos that basically messes up your entire website.
Arial
Impact
Arial Black
Times New Roman
Courier New
Trebuchet MS
Comic Sans MS
Verdana
Georgia
So, if web-safe fonts are so, well, safe, then why doesn’t everyone use them? Frankly, because they’re kind of boring. Fortunately, the HTML Editor gives you three choices. For Font 1, use your first-choice font. Go as funky and crazy as you want, and if the font happens to be installed on your visitor’s computer, awesome! If not, the browser can just look for the second font you specified. Make Font 2 and Font 3 web safe, and you’ll be golden. For extra security, you can also select a generic font, which always displays correctly, from the Generic drop-down list. Generic fonts are totally no-frills, but you can rest assured that they’ll always work, even in the very, very rare instance when a web-safe font might not.
By specifying multiple fonts, you can tell the browser to first try a fancy, non-web-safe font. That way, you can make sure that your website will look good whether you’re using a cool, custom font or a secure, web-safe font.
Effects
Select from bold, italic, strikethrough, or underline.
Text Position
Select whether your text will appear normally or as a subscript or superscript.
Size
Select a font size from 1 (8 pt) to 7 (36 pt).
Color
To select a color for your text, click the color swatch. This opens a drop-down list of 40 basic colors. If you see a color you like, click it. If you want to see even more colors, click More Colors. This opens a rainbow gradient that allows you to adjust brightness and select from a wider range of colors.
Step 4
When you’re done formatting your text options, click OK. All the code will automatically be added to your page for you!
How to Use Links
How important are links? Wicked important — it’s no exaggeration when we say that without them, the Internet as we know it wouldn’t exist.
This section will teach you the basics about absolute and relative links, and then walk you through the process of adding links your pages in the HTML Editor.
Absolute vs. Relative Links
One of the most common things newcomers to HTML get confused about is linking to other pages and sites, especially when absolute and relative paths come into play. But worry not! Creating links — relative and absolute alike — is actually fairly easy. Read on, and by the end of this article, you’ll know the difference between these two types of links, as well as when and how to use them.
When you create links using the Website Projects tool, it automatically creates valid relative links for you — one less thing to think about! Of course, it’s still important to understand how this all works.
First off, as you may or may not know, you would use the following code to create a link in HTML:
<a href="linkhere.html">Click Me</a>linkhere.html is the page you want to link to, and Click Me is the blue, underlined link the page shows.
In the example above, we used a relative path. You can tell if a link is relative if the path isn’t a full website address. (A full website address includes http://www.) As you may have guessed, an absolute path does provide the full website address. Here are a few examples of relative and absolute paths:
Relative Paths
- index.html
- /graphics/image.png
- /help/articles/how-do-i-set-up-a-webpage.html
Absolute Paths
- http://www.mysite.com
- http://www.mysite.com/graphics/image.png
- http://www.mysite.com/help/articles/how-do-i-set-up-a-webpage.html
The first difference you’ll notice between the two different types of links is that absolute paths always include the domain name of the website, including http://www., whereas relative links only point to a file or a file path. When a user clicks a relative link, the browser takes them to that location on the current site. For that reason, you can only use relative links when linking to pages or files within your site, and you must use absolute links if you’re linking to a location on another website.
So, when a user clicks a relative link, how does their browser know where to take them? Well, it looks for the location of the file relative to the page where the link appears. (That’s where the name comes from!) Let’s get back to our first example:
<a href="linkhere.html">Click Me</a>This link points to a filename, with no path provided. This means that linkhere.html is located in the same folder as the page where this link appears. If both files were located in the root directory of the website http://www.website.com, the actual website address the user would be taken to is http:// www.website.com/linkhere.html. If both files were located in a subfolder of the root directory called files, the user would be taken to http://www.website.com/files/linkhere.html.
How about another example? Let’s say our http://www.website.com domain had a subfolder called pictures. Inside the pictures folder is a file called pictures.html. The full path to this page would be http://www.website.com/pictures/pictures.html.
Still following along? Good. Let’s say in this pictures.html file, we have a link:
<a href="morepictures.html">More Pictures</a>If someone clicked that link, where do you think it would take them? If you said http://www.website. com/pictures/morepictures.html, you’d be right! You probably know why it would take them there: because both files are saved in the pictures subfolder.
Now, what if we wanted to use a relative link to show a page in another folder? If you want to link to a file in a subfolder of the current folder, provide the file path to that file, like so:
<a href="/pictures/tahiti-vacation/tahiti.html">Read about my Tahiti vacation.</a>In this example, you’re telling the browser to look in the current folder (pictures) for a subfolder (tahiti-vacation) that contains the file you want the user taken to (tahiti.html). You can link to as many subfolders as you need using this method.
What if you want to link to a file in a folder above the current folder? You have to tell the browser to move up one folder in your relative link by putting two periods and a slash (../) in front of the filename or path:
<a href="../about.html">Learn more about my website.</a>When the browser sees ../ in front of the filename, it looks in the folder above the current folder. You can use this as many times as you need to.
You can also tell the browser to look in a subfolder of the directory above the current one. Using the same example website from above, let’s say we wanted to create a link that would take the user to a page called stories.html located in another folder called stories. This folder is located in the root directory, one folder up from the current folder, pictures. Here’s how a relative link to this file looks:
<a href="../stories/stories.html">Read Stories</a>Now, let’s talk about absolute paths. Like we mentioned earlier, absolute paths provide the complete website address where you want the user to go. An absolute link would look like this:
<a href="https://www.coffeecup.com">Click here to visit CoffeeCup Software.</a>You must use absolute paths when linking to another website, but you can also use absolute paths within your own website. This practice is generally frowned upon, though. Relative links make it easy to do things like change your domain name without having to go through all your HTML pages, hunting down links and changing the names. As an added bonus, they force you to keep your site structure neat and organized, which is always a good idea.
Adding a Link to Your Page
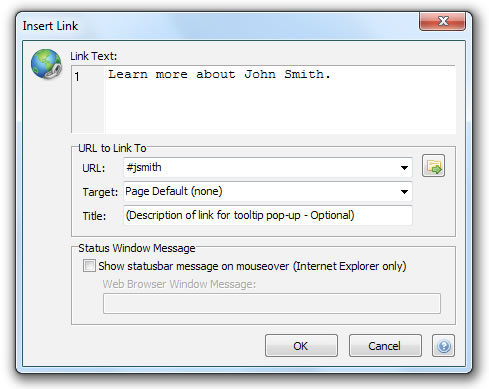
To open the Insert Link window, go to Insert > Link.
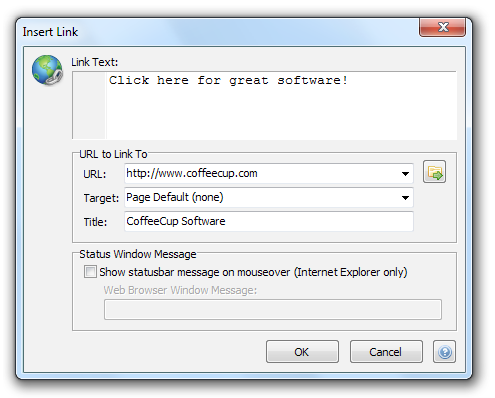
Let’s go over what each of these fields does.
Link Text
The text your user will click. By default, link text is blue and underlined. In the example given in the image above, the link text would look like this on your webpage:
Click here for great software!
URL
This is the location where your visitor will be taken when they click the link text. If you are linking to an external website, you must include the full link, including http:// and www, if applicable. The example in the image above links to an external website, https://www.coffeecup.com. If you are linking to a page or document in your website, you can use a relative link by clicking the file icon to browse your computer for the desired page. You should make sure the file is located in your Working folder or your Website Project to make sure it is referenced correctly.
Target
This is the frame you want the link to open in, and is only necessary if you are using frames or if you want to open the link in a new window. To open the link in a new window, select New Browser Window (target="_blank").
Title
This is a description of the link that appears as a tooltip when your user holds their mouse over the link. It’s totally optional, but it is a nice source of information for your users.
Show statusbar message on mouseover
If you check this box, a description of the link will display in the statusbar at the bottom of the web browser screen when your user holds their mouse over the link. This option is only enabled in Internet Explorer, so it’s best to use a title instead if you want to provide this additional information.
Web Browser Window Message
If you do decide to use a statusbar message, type it in this field.
When you’re done filling out all this information, click OK. The code will automatically be inserted wherever your cursor was positioned on your page. You can move it around by selecting it and dragging it to the desired location on the page.
Adding an Email Link to Your Page
To open the Insert E-mail Link window, go to Insert > E-mail Link.
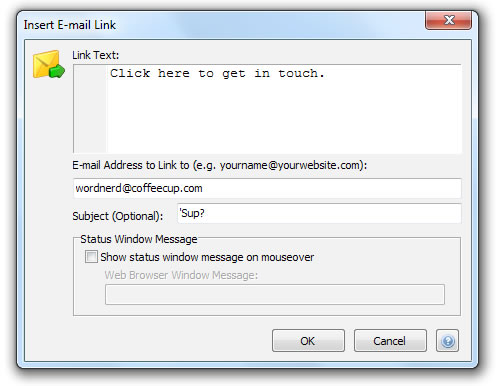
When your user clicks on this link, their default e-mail client (Thunderbird, Outlook Express, etc.) will open with this email address in the To: field.
Link Text
This is the text your user will click. By default, link text is blue and underlined. In the example above, the link text would look like this on your webpage:
Click here to get in touch.
E-mail Address to Link To
This is the email address that appears in the user’s default email client when they click the link text.
Subject
Any text entered in this field automatically appears in the Subject field in the user’s email client.
Show statusbar message on mouseover
If you check this box, a description of the link will display in the statusbar at the bottom of the web browser screen when your user holds their mouse over the link. This option is only enabled in Internet Explorer.
Web Browser Window Message
If you do decide to use a statusbar message, type it in this field.
When you’re done filling out all this information, click OK. The code will automatically be inserted wherever your cursor was positioned on your page. You can move it around by selecting it and dragging it to the desired location on the page.
Linking to a Downloadable Document
Follow these steps to add a link to a downloadable document on your page.
This tutorial assumes you are working with Website Projects.
Step 1: Locating the File
First, go to the My Computer tab and select the file you want to add to your Website Project.
Step 2: Adding the File to Your Website Project
Right-click the file you want to add to your project and select Copy File to Project > [Folder], where Folder is the folder where you want to store the file. In this tutorial, we’ll add the file to the Website Project root folder, but you may want to store your downloadable files in a special subfolder. This opens a window confirming whether you want to copy the file to your Website Project folder. Click Yes.
Step 3a: Linking to the File From Your Website Project
There are two methods you can use to link to your file. The first is from inside your Website Project. To do this, go back to the My Websites tab, where you’ll see the file you just added to your Website Project. Right-click it and select Insert as Link Into Current Document. This inserts the HTML code for a link to this document on your page. In this case, the link would look like this:
<a href="newsletter.pdf"></a>Next, enter the link text you want the user to click between
<a href="newsletter.pdf">and
</a>The final code might look like this:
<a href="newsletter.pdf">Our PDF newsletter.</a>Step 3b: Linking to the File Using the Insert Link Window
The second method is to use the Insert Link window. Follow the instructions provided in Adding a Link to Your Page, only instead of choosing an .html file, select the file you added to your Website Project. In this case, it will be the newsletter PDF.
When you’re done filling out all this information, click OK. The code will automatically be inserted wherever your cursor was positioned on your page. You can move it around by selecting it and dragging it to the desired location on the page.
A note about PDFs and other downloadable files you may wish to add: Most of the time, PDF files will open automatically. This is because almost all visitors already have the Adobe Acrobat Reader installed, and, depending on the browser, the PDF file will either open directly in the browser or in a separate reader window. Additionally, anyone visiting your site with Internet Explorer will be able to open files created in any Office application (Word, PowerPoint, Excel, etc.) directly in the browser.
To ensure that your users download the file, you can also put a small reminder somewhere on the page that says something like, “Right-click and select Save Link As... to save this to your computer."
Linking to Different Parts of the Same Page
You’ve been designing your site and have figured out that a page can be as long as necessary. This is great, but it can be a pain when you’re dealing with longer pages. Help out your visitors by providing links that quickly take them to specific locations on the page. Here’s how:
Step 1: Create a Target
The first step is to set a target. The target is the place on the page where you want the user to be able to jump to. To insert a target, go to Insert > Target. This opens the Insert Target window.
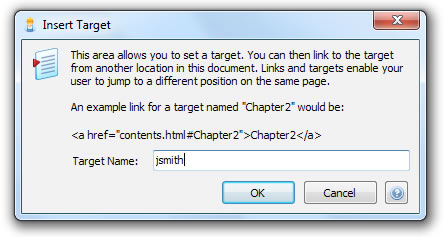
Enter a name for the target in the Target Name field, and then click OK. This inserts the code for the target on your HTML page. In this example, the target will be an employee profile for John Smith on our About Us page, so we’ll name the target “jsmith". The resulting code looks like this:
<a name="jsmith"></a>Step 2: Position the Target
Since our target is associated with John Smith’s employee profile, let’s move it to the same location as his profile on the HTML page. To do this, just click and drag the target code to the desired location.

Step 3: Link to the Target
Now that our target is in position, let’s return to the top of the page and create a link to it. To do this, create a new link using the options described in Adding a Link to Your Page.
Once in the Insert Link window, instead of linking to a URL or a page in your Website Project, instead enter the name of your target preceded by a pound sign (#). In keeping with our example, we’d type “#jsmith" in the URL field and “Learn more about John Smith" in the Link Text field.
When you’re done, click OK. This inserts the link code in your page, which, in our example, would look like this:
<a href="#jsmith">Learn more about John Smith</a>And that’s it! Now you can look in the Preview pane to see your link and target in action.
How To Create a List
Lists are a great way to present your information in a more organized, eye-catching way. Sure, you could use plain text to get your point across, but lists are much easier and faster to read. Follow these steps to learn how to create a list in the HTML Editor:
Step 1
To open the Insert List window, go to Insert > List.
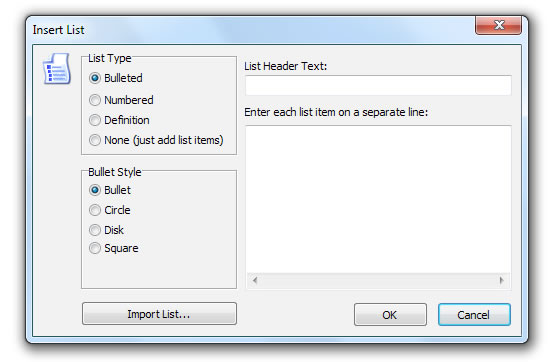
Step 2
The Insert List window allows you to select what kind of list you want to add and to configure its items and title. Let’s take a look at what each of the available options can do:
List Type
Select the type of list you want to create. Your options are bulleted, numbered, definition, and none, which is just a list of items with no special formatting. Here’s how each of the different list types look:
Bulleted List
- This
- is
- a
- bulleted
- list
Numbered List
- This
- is
- a
- numbered
- list
- This is a definition list
- Notice anything different?
- Definition lists contain a term on top...
- ... and a definition below it.
- They are best used for...
- ... lists of definitions!
Bullet Style
This option is only available if you create a bulleted or numbered list, and it allows you to choose the style of the bullets or numbers. Here’s how the different bullets and numbers look:
- Bullet
- Circle
- Disc
- Square
- Uppercase
- Roman
- Numerals
List Header Text
This is the title of your list, and it is only available if you create a bulleted or numbered list.
List Item Field
This is where you enter your list items. Put each separate list item on its own line.
If you are creating a definition list, each typed item is a definition title (e.g. “This is a definition list"). To add definitions, switch to the Code Editor and type them between the corresponding <dd> tags.
-
Import List
If you have already formatted a list and just want to import its contents, click this button. This opens a window that allows you to browse your computer for a text file containing your list. You can only import lists in .txt format. When you find the file you want to import, select it and click Open. The contents will be inserted in the List Item field.
Step 3
When you’re done configuring your list items and options, click OK. The code will be inserted in the page for you.
How to Use Snippets
If you’ve ever been frustrated at having to type the same piece of code over and over, you’ll love snippets. A snippet is a piece of code stored in the HTML Editor that can be used and reused as many times as you need. You can save snippets of HTML, JavaScript, DHTML, Perl, or any other scripting language. The HTML Editor comes with several built-in snippets and gives you the option to create your own.
Viewing Snippets
To see a list of available snippets, open the Snippets tab in the Resource browser on the left-hand side of the program. When you select a snippet name from the top pane, the code will appear in the bottom pane. All the built-in snippets come with a detailed HTML comment explaining what the code does.
Inserting Snippets
Use any one of the following options to insert a snippet into your page:
Snippets Tab 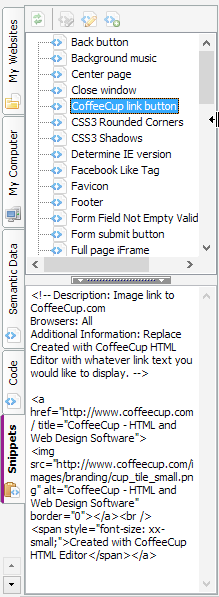
- Double-click its name
- Drag it onto your page
- Select it and click the Insert Item Into Current Document icon in the Snippets toolbar
- Right-click it and select Insert Item Into Current Document
Creating Snippets
To create a snippet, highlight the text you would like to save as a snippet and go to File > Save Selected Text as Snippet. This opens the Save Snippet window.
Save Snippet Window 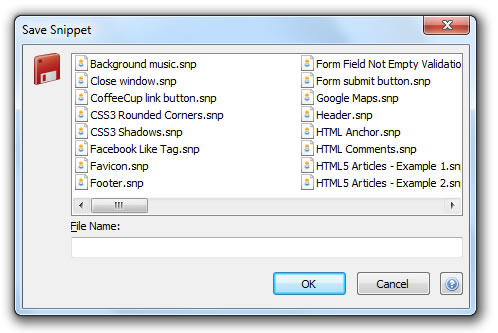
Name the snippet and click OK. The new snippet will be added to the list in the Snippets tab.
You can also add a new snippet by right-clicking a snippet and selecting New Snippet. This opens a new tab in the HTML Editor workspace. When you are done entering the snippet text, save the document normally. This opens the Save Snippet window.
Editing Snippets
To edit an existing snippet, right-click it and select Open in New Window. This opens the snippet code in a new tab in the HTML Editor workspace. Edit it and then save it normally.
Deleting Snippets
To delete an existing snippet, right-click it and select Delete Snippet. This opens a window asking if you are sure you want to delete the snippet. If you change your mind about deleting the snippet, click No.
Refreshing the Snippets Tab
If you have added, edited, or deleted a snippet but haven’t seen the changes in the Snippets tab, click the Refresh icon in the Snippets toolbar. This refreshes the area so you can see the most up-to-date snippets.
How to Add Flash Elements Created with a CoffeeCup Flash Program
Follow these step-by-step instructions to add a Flash element created in one of CoffeeCup Software’s Flash applications (Photo Gallery, Web Form Builder, etc.) to a page created in the HTML Editor. You should have both applications open.
In this tutorial, we will add a Gallery created in Photo Gallery to the HTML Editor page, but the process is the same for all our Flash applications.
Step 1
Save your Flash element to the same folder where the HTML page it will appear on is saved. This should be in the Working folder or Website Projects folder you specified in the HTML Editor.
This step is very important! If you don’t save the files associated with your Flash element in the same folder as the HTML file where it appears, the element will not display correctly — or at all.
Step 2
Saving opens the Files to Upload window, which lists the files you must upload in order for your Flash object to display correctly, as well as the HTML code you must paste on every page where you want the object to appear.
Files to Upload Window 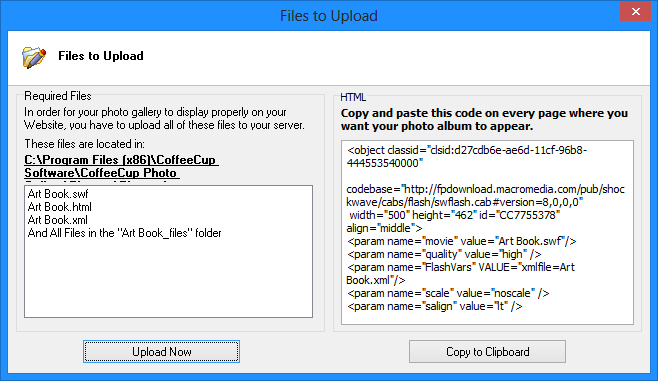
Copy this code to your Windows clipboard by clicking the Copy to Clipboard button.
Step 3
Open the HTML Editor page where you want the Flash object to appear, and paste the code between the ‹body› tags.
HTML Editor Window 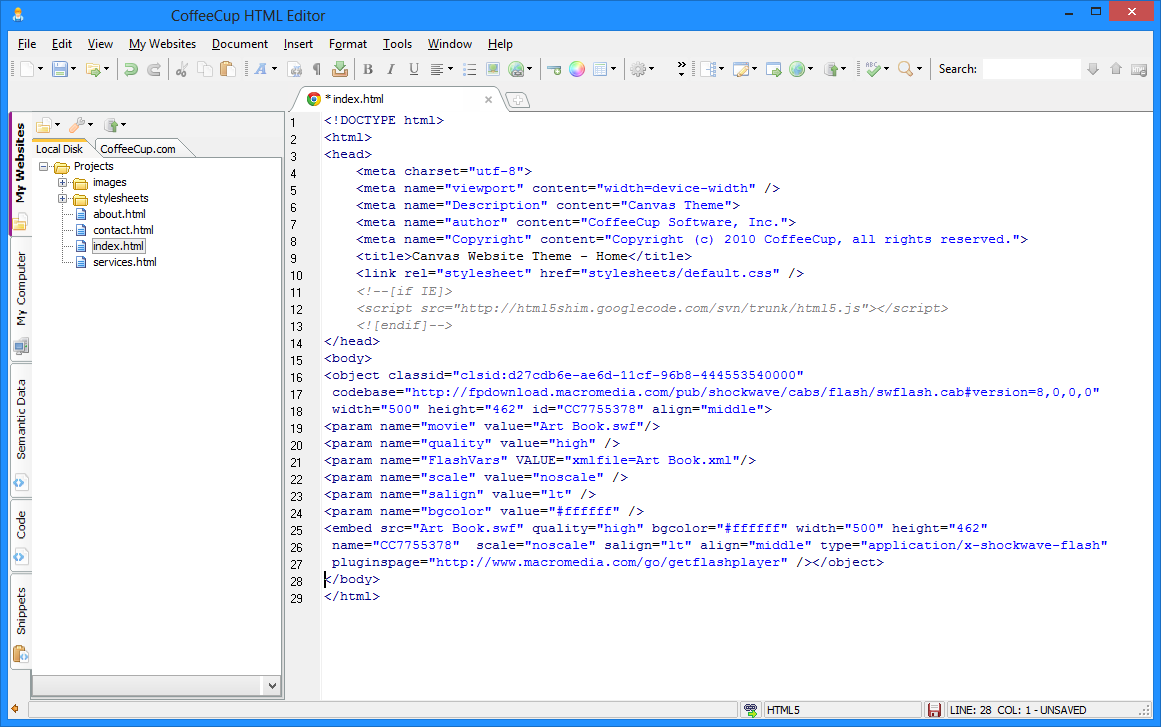
Step 4
Upload your changes to your server, making sure you include the files associated with your Flash element as well as the page containing the code.
How to Use the “Open From Web" Function
With the HTML Editor, you can import published webpages from the web and open them in the program. To do this, go to File > Open From Web. This opens the Open From Web window, which allows you to enter the URL of the page you wish to open and to specify options for saving this file to your computer.
Open From Web Window 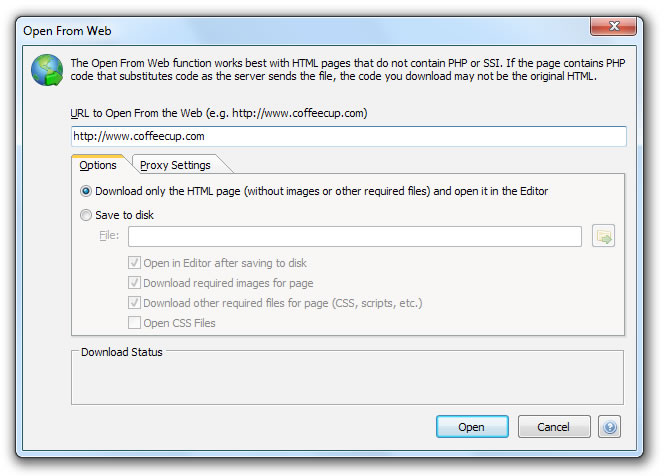
A few notes about this function before we describe how you use it. First, it can only be used to download one file at a time. If you want to download multiple files from a website, you may want to use an FTP client such as Direct FTP or Free FTP to download several files at once.
Second, this option works best if you are downloading an HTML page that does not use PHP or SSI, because scripting languages like these can add code to a published page. As a result, you may not download the correct HTML.
Finally, if the page doesn’t load correctly, the server may be responding slowly. In this case, repeat the Open From Web function.
All right, now that you know what this function can and cannot do, let’s get started! The first step is to enter the URL for the exact webpage you want to download. For instance, say you wanted to emulate the oh-so-snazzy design of the CoffeeCup About Us page. You would have to type that entire URL into the URL to Open From Web field. If you tried just using https://www.coffeecup.com, you’d get the CoffeeCup Software homepage — still snazzy, but not the page you were looking for.
Once you’ve entered the URL of the page you want to download, it’s time to choose where you would like to download the file and what parts of the page you would like to download. That’s where the Options tab comes into play:
Open From Web Options Tab 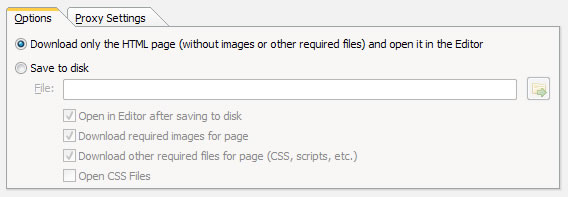
Download the HTML Page (Without Images or Other Required Files) and Open It in the Editor
This option downloads only the HTML from the page. That means any images, CSS, JavaScript, and anything else associated with the page won’t be downloaded. This option also does not save the file to your computer. Instead, it just opens the HTML in the Editor. This helps if you want to edit the raw structure of the page right away. Once you’re done making your edits, you can save the file normally.
Save to Disk
This option saves the page to a location you specify on your computer. To specify a location, click the Browse icon and choose the folder where you want the file saved. If you choose to save to disk, you can also use the provided checkboxes to:
- Have the page automatically open in the Editor after it has been saved to your computer
- Download images that appear in the page
- Download related files such as CSS and scripts
- Open related CSS files in the HTML Editor
These options come in handy if you want to work with more than just the page HTML.
The last step is to switch over to the Proxy Settings tab, where you can enter proxy information.
Open From Web Proxy Settings Tab 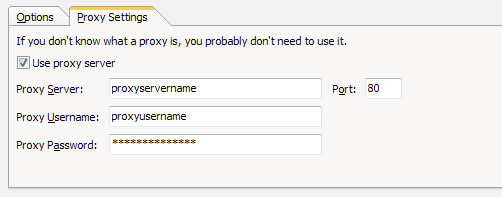
To be honest, if you aren’t sure whether you should use this information, chances are good that you don’t have to. If you want to be extra-sure, contact your hosting provider, and they’ll be able to give you a definitive answer.
Once you’ve configured all your settings, go ahead and click Open. You can track the progress of your download in the Download Status area at the bottom of the window. When it’s done, edit your newly downloaded files normally.
How to Use Bookmarks
Maybe it’s the last place you left off editing, a portion of the page where you make a lot of changes and updates, or a design element you want to run by a client — for whatever reason, you need to come back to a certain part of your code at another time. This is where bookmarks come in handy. These unobtrusive tools mark places in your code so you can return to them whenever you need to.
Bookmarks appear as green book icons labeled with a number in the gutter, the area on the left-hand side of the code that also contains line numbers and symbols representing paragraph breaks.
Bookmarks 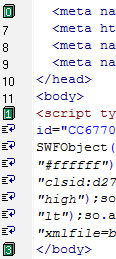
Setting Bookmarks
To set a bookmark, go to Document > Set Bookmark and select which bookmark number you want to set. You can set up to 10 bookmarks per document.
Visiting Bookmarks
To visit a bookmark, go to Document > Go to Bookmark and select the bookmark number you want to locate.
Resetting Bookmarks
There are two methods for resetting bookmarks. If you want to reset an individual bookmark, just set the bookmark number in another location. For instance, if you were using Bookmark 0 to mark your meta tags but wanted to use it to mark your footer HTML, just position your cursor at your footer HTML and set Bookmark 0 using one of the methods described above.
You can also clear all of your bookmarks at once. To do this, go to Document > Clear All Bookmarks.
How to Use the Code Cleaner
If you’ve ever tried to edit someone else’s code, you know how much of a hassle it can be to pick through a style that isn’t your own. Reformatting can be a pain, but with the HTML Editor’s Code Cleaner, it’s a breeze. The Code Cleaner filters through source code, restyles it to fit your personal taste, and weeds out pesky errors in the document. If you have trouble loading a document in a browser, running the Code Cleaner may be able to find the problem for you.
Here’s how to use the Code Cleaner:
Step 1
Go to Tools > Code Cleaner… This opens the Code Cleaner window, which allows you to set your code cleaning preferences.
Code Cleaner Window 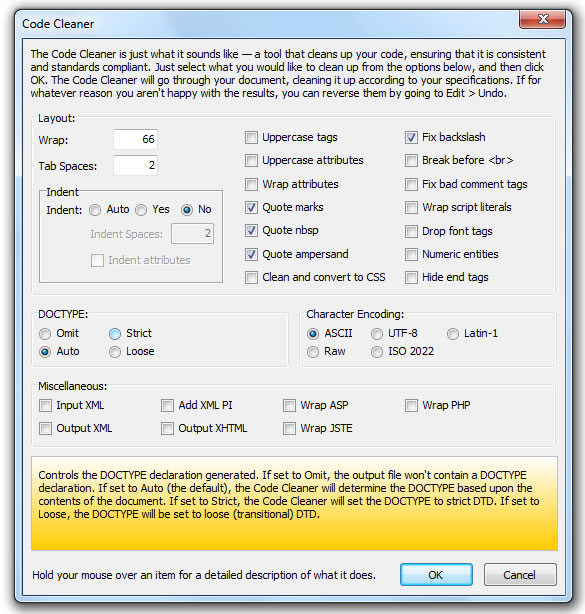
Step 2
To view detailed descriptions on how a given option works, place your mouse over that option and read the description in the yellow pane at the bottom of the window. You can also switch to the Document and ASP and XML tabs to see more options.
Step 3
Select all the attributes you would like to apply to your code, and when you’re done, click OK. This starts the code cleaning process.
If you change your mind about the edits the Code Cleaner made, you can undo them by going to Edit > Undo. You can always rerun the Code Cleaner using different settings until you are satisfied with the results.
How to Use the Find and Replace Tool
If your site has more than one page — like pretty much every website ever — then you know that making a global change can be pretty difficult. For example, say you want to replace every instance of color="red" on your website with color="black". Whether you had to change this on 5 or 500 pages, locating every instance of that code would get old fast. What’s a webmaster to do? Well, with the HTML Editor’s Find and Replace tool, global changes like this are easy. Just follow these simple steps:
Step 1
Open the Find and Replace window by going to Edit > Replace…
Find and Replace Window 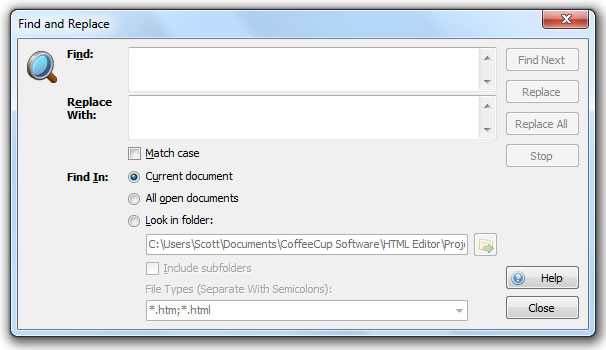
Step 2
Enter the text or code you want to find in the Find field, and then enter its replacement in the Replace With: field.
Step 3
Specify where the changes need to be made. Choose Current Document if you only want the changes to apply to the document currently open in the HTML Editor, and choose All Open Documents if you want the changes to apply to all the documents currently open in the HTML Editor. If you want to change all the files in a given folder, choose Look in Folder and then click the folder icon to browse your computer for the desired folder.
Use the Look in Folder option with caution, because you won’t be warned before changes are made to your code. To be safe, make backups of all your files before you make these changes. Also note that this feature will only work on files that have previously been opened in the HTML Editor.
Step 4
Click Replace All, and let the HTML Editor do the rest!
How to Create a Custom Toolbar
Everyone loves a toolbar. Why spend time digging around in menus when you can accomplish a task with the click of a button? Well, with the HTML Editor’s customizable interface, you can get create a toolbar that contains the icons you use all the time with no superfluous elements. Follow these steps to create your own toolbar:
Step 1: Open the Customize Window
Go to Tools > Toolbars and Menus > Customize. This opens the Customize window, which lists the toolbars in the program and allows you to create a custom toolbar or customize the main toolbar, which appears across the top of the HTML Editor workspace.
Customize Toolbar Window 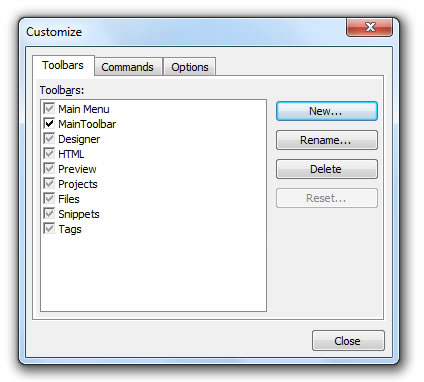
Step 2: Create a New Toolbar
Click New. This opens the Add Toolbar window. Type a name for your new toolbar. In this tutorial, we’ll call ours My Toolbar.
Add Toolbar Window 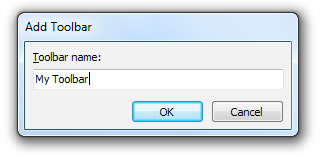
When you’re done, click OK. The new toolbar will be added to the Toolbars list.
Customize Toolbar Window 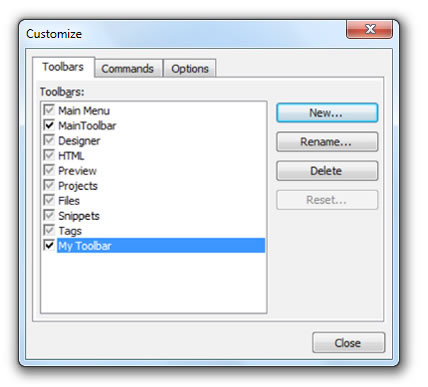
You’ll also see a tiny, blank toolbar just to the left of the Customize window.
Blank Toolbar 
The next step will show you how to fill that toolbar up with helpful icons!
Step 3: Add Icons to Your Toolbar
To add buttons to your toolbar, switch over to the Commands tab.
Commands Tab 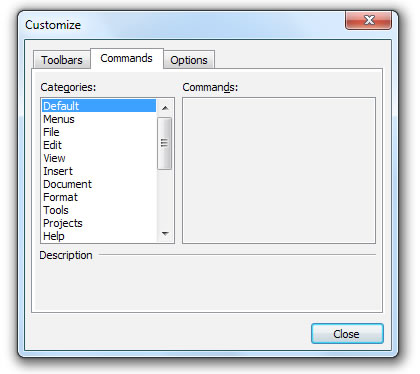
The Categories list contains broad categories of individual commands. You can’t add these to a toolbar, but you can select them to view the commands they contain. For our toolbar, let’s add some basic commands from the File menu. Click File to display these commands in the Commands list.
Commands File List 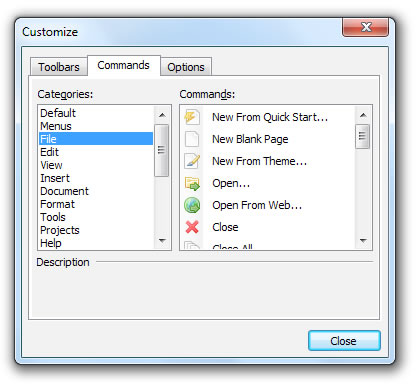
Let’s add New Blank Page to our toolbar. To do this, just click and drag New Blank Page onto the toolbar. When you see the little plus sign, let go of the mouse. This adds the icon to the toolbar.
Blank Toolbar New Page 
Awesome! Let’s add a few more icons — how about Open, Close, and Save?
New Toolbar Additions 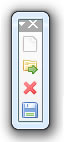
Looks good!
Step 4: Change the Orientation of the Toolbar
Say you wanted your toolbar to be horizontal instead of vertical. No sweat! Click one of the sides with your mouse and drag further to the side, or click the bottom and drag the bottom of the toolbar up.
Toolbar Orientation 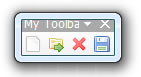
You can have your icons stacked or all in a line — it’s up to you!
You may notice that the titlebar text (“My Toolbar") doesn’t display fully. That’s because your custom toolbars only take up as much space as they need, which helps conserve space.
Step 5: Adjust Additional Toolbar Options
If you want to work with more toolbar options, switch over to the Options tab.
Customize Window Options Tab 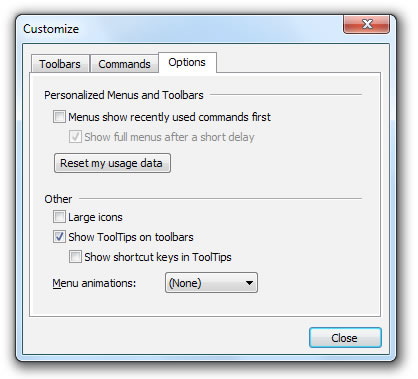
Menus show recently used commands first
This option puts the most recently used commands at the beginning of your custom toolbar.
Show full menus after a short delay
This option causes the drop-down menus in your custom toolbar to appear after a short delay.
Reset my usage data
Clicking this button resets your usage data so your commands appear in the order you originally specified instead of being ranked in order of use.
Large icons
Select this checkbox to increase the size of the toolbar icons. Large toolbar icons look like this:
Your New Toolbar! 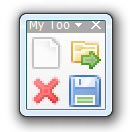
Show ToolTips on toolbars
This option displays ToolTips when you mouse over toolbar icons. ToolTips state what the icons do.
Show shortcut keys in ToolTips
Select this checkbox to display keyboard shortcuts in the toolbar ToolTips.
Menu animations
Select the desired menu animation from this drop-down list. Your options are Random, Unfold, Slide, or Fade. For now, let’s leave these options alone—our toolbar is spiffy enough as is.
Step 6: Dock Your Custom Toolbar
You may notice that your custom toolbar is free-floating. However, you can dock your toolbar in several locations in the workspace: at the top, along the left or right side, or on the bottom. To do this, just click and drag the toolbar to the desired location. Once you have docked it, you can change its position by clicking and dragging the solid or dashed lines in the toolbar.
Docked Toolbar 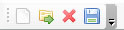
Step 7: Further Customize Your Toolbar
You also have the option to add or remove buttons right from inside the toolbar. To do this, click the downward-facing arrow:
Editing your Toolbar 
Uncheck a selection to remove it from your menu. You can re-add it by reselecting it from the list.
Step 8: Remove Your Toolbar
If you decide you don’t want your toolbar to display in your workspace, but you don’t want to delete, it, you can remove it by clicking the X in the upper right-hand corner.