

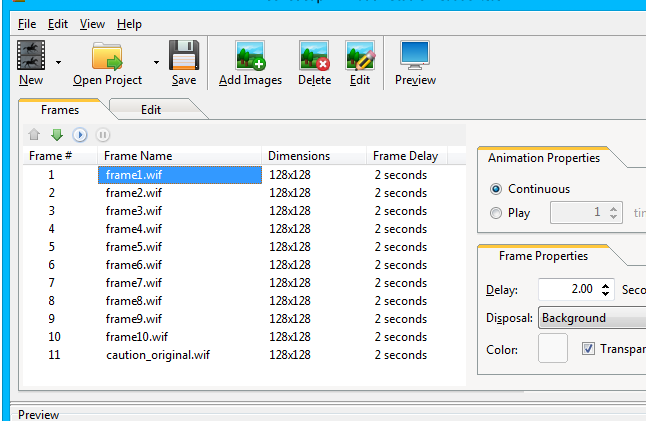
Everything you need to successfully create an animation is located in the Frames tab. It’s basically the focal point of the entire program. First, let’s take a look at the frame list in the left pane.
Along the top of this tab, there are four tools:
- Move Up: Move the selected frame up one position in the list
- Move Down: Move the selected frame down one position in the list
- Play: Play the animation in the Preview pane
- Pause: Stop the animation when is is playing
This pane also has four columns of information:
- Frame #: The position of the frame in the animation.
- Frame Name: The name of the frame.
- Dimensions: The width and height, respectively, of the image, in pixels.
- Frame Delay: The amount of time that the frame is displayed.
By default, frames use the file name of the image as their frame name. However, you can rename each frame to whatever name you like without changing the file name of the image on your computer. To rename a frame, right-click it and select Rename Frame or press Ctrl+R.
Animation and Frame Properties
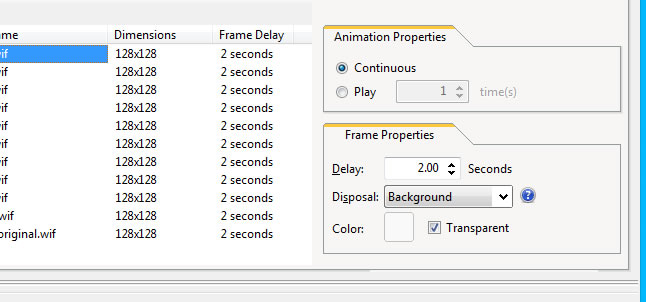
Animation Properties
This section configures the looping behavior of your animation.
- Continuous: The animation will loop forever.
- Play: The animation will play the indicated number of times.
Frame Properties
Each frame has its own set of properties that are configured in this pane.
- Delay: The amount of time, in seconds, that the selected frame(s) will be displayed.
- Disposal: Defines how the frame will be disposed of when the next frame is shown.
- None: Replaces one full-size, non-transparent frame with another.
- Don’t Remove: When the next frame is displayed, the currently selected frame will not be
cleared from the screen. This means that the current frame will continue to display in all
transparent parts of the next frame. - Background: Before the next frame is displayed, everything will be cleared from the
screen. (This is the choice most animations will use for every frame, and is the default
selection.) - Previous: Before the next frame is displayed, the canvas will be restored to the state of a
previous frame that uses the Don’t Remove disposal setting.
- Color: Choose a color that will be rendered transparent in the animation. You must check the
box next to Transparent to use this option. When the Transparent Color window is open, you
can choose a color by clicking the swatch on the left or by clicking the image on the right.