

Now that you know how Layout Maker works, let’s put your skills to the test. Here we are going to walk you through a quick process on how to build a layout. This only covers the basics, but will get you on the path to creating your own awesome looking layout.
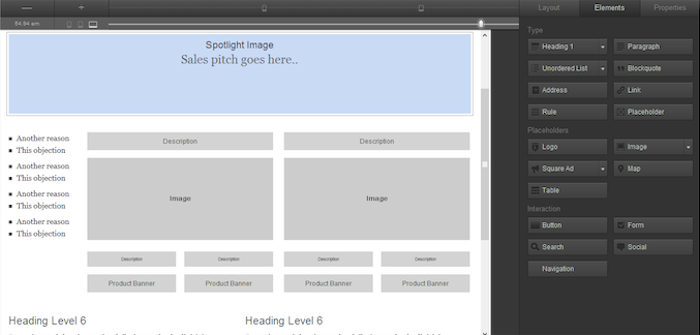
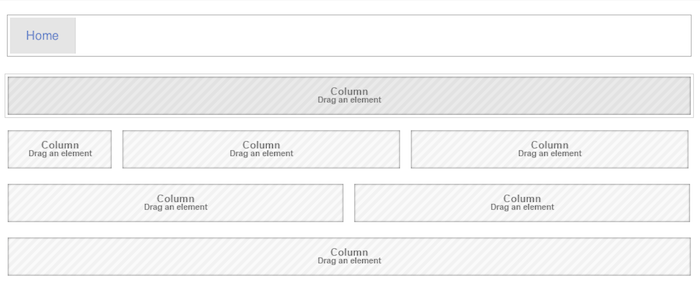
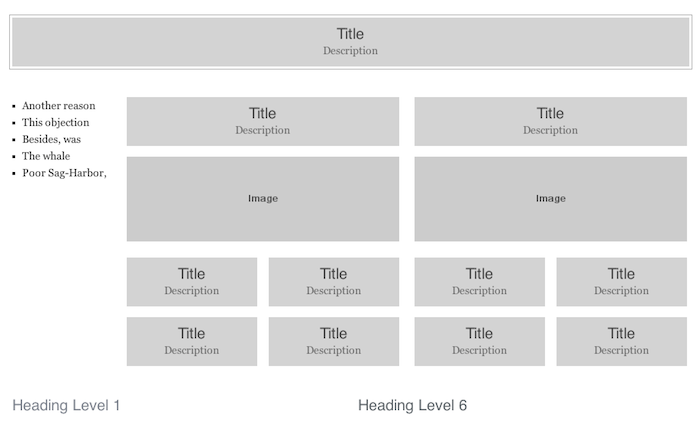
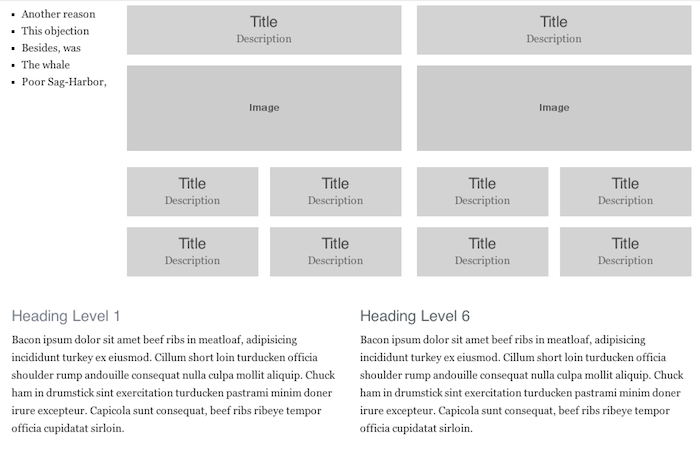
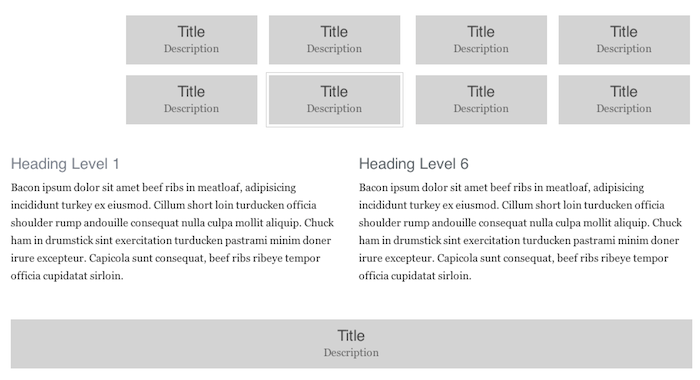
Following these steps will create a layout that looks like this. Keep in mind as you are creating your layout that you are using elements to represent an idea or function of your website. We use certain text to represent that element in the layout. In a future version you will have control over the exact text used on that element.
If you would like to skip ahead you can download the saved layout project file here.
Building the Layout Structure:
When you open the software for the first time, you will see that there are already two rows added to your layout. The first one contains the navigation and the second one is divided into 3 columns. The first column is using a span of 12, the second a span of 8 and the 3rd is using a span of 4.
Step 1
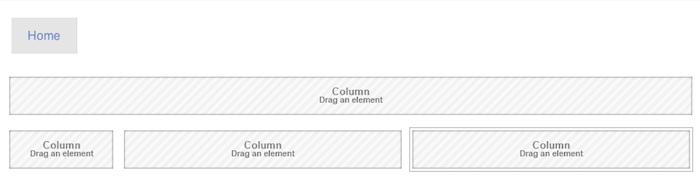
Click the Add Row button and a new row will appear at the top of the layout.

Step 2
The second row you will see has 3 columns and each of them will need to be adjusted to create the layout we are working towards. Click on the first column and then click the Layout Tab and adjust the width to a span of 4. Repeat the same process for the other two columns setting them each to span of 10. Remember, the maximum amount of spans that can be used in any row is 24.
Step 3
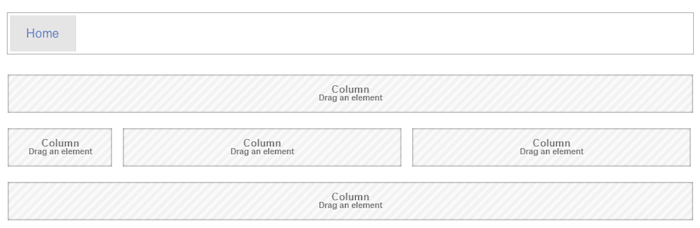
Click the Add Row button again to add another row and drag it to the bottom of the layout.
Step 4
Now we need to divide this row into 2 columns. Click on the row and then go to the Layout Tab and click Divide Column. Set the width to a span of 12 for both columns in that row.
Step 5
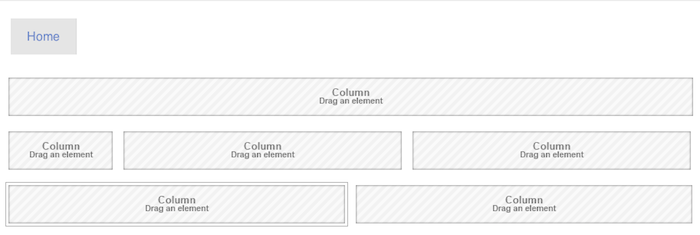
Click the Add Row button again to add another row and drag it to the bottom of the layout.
Adding Elements:
Now it is time to adding the elements to your layout.
Step 1
Click on the top row and go to the Elements Tab and drag the Placeholder Element into the Column. As your mouse moves over the text "Column - Drag an Element", you will see the text disappears and a grey horizontal line appears instead. Let go of the mouse and the element will be placed in that location.
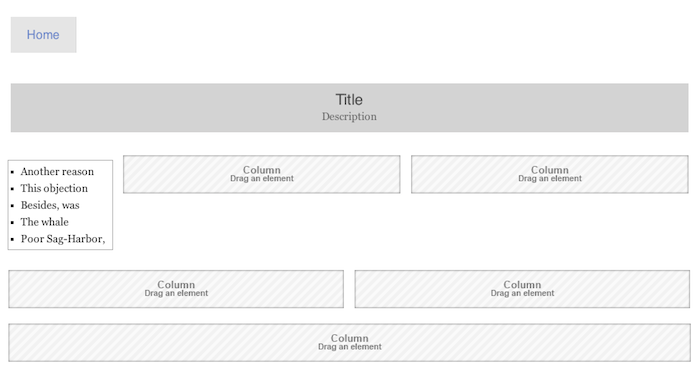
Step 2
Click the second row, first column and go to the Elements Tab and drag an Unordered List over to that column. The list will contain more words then we need, so double-click on the list text you want modify and you can change the text by removing words.
Step 3
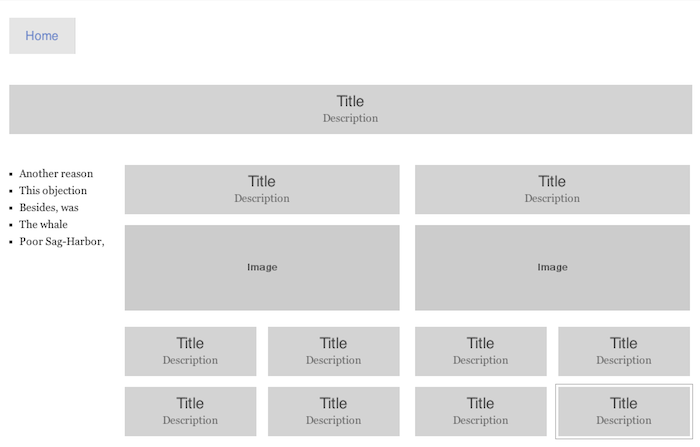
Now we are going to add combination of multiple elements to the other columns by stacking them on top of one another and adjusting the properties of each.
- Drag a Placeholder Element to the second column.
- Drag an Image Element over to the second column and place it under the Placeholder Element. This is how you stack elements on top of one another. Go to the Properties Tab and change the width from 200px to 600px and the height from 200px to 125px.
- Click on the first Placeholder Element and go to the Properties Tab and adjust the width to 48% and set the Float to Left. Repeat the same process for the third Placeholder Element.
- Click on the second Placeholder Element and go to the Properties Tab and adjust the width to 48% and set the Float to right. Repeat the same process for the fourth Placeholder Element.
- Repeat these steps to build the desired layout in the third column.
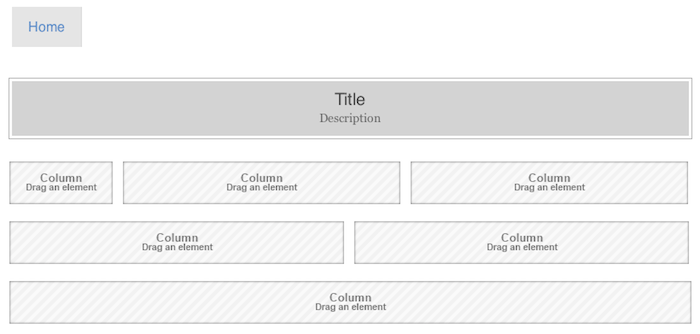
Step 4
Click on the third row, first column and go to the Elements Tab and drag the Heading Element into the column. The font size will be larger than we want, so click the Properties Tab and change the Font Size to 20. Repeat the same process for the second column.
Step 5
Click the third row, first column and go to the Elements Tab and drag a Paragraph Element over to that column placing it under the Heading. Repeat the same process for the second column.
Step 6
Click on the fourth row, first column and go to the Elements Tab and drag a Placeholder Element into it.
Adding a Navigation
What is a layout without a good navigation? Adding one to your layout can be accomplished in many different ways depending on your needs or style that you want to use. Here are three ways in which you can build one in your layout:
| Navigation Elements | As you add pages to your layout by clicking the Pages Toolbar Icon, the Navigation Element is automatically updated to reflect all the pages in your layout. This is the preferred method of adding a navigation to your website. In a future version you will be able to select which pages you want to appear in your navigation. |
| Buttons | This will give you a “form” style button. Adding multiple buttons to the same column will allow you to stack them on one another creating a navigational menu. |
| Links | In the same way Buttons work, you can use the Link Element to create your navigation. |
Adding Breakpoints
You will notice on the slider bar there are 2 icons. One is for tablet and the other for mobile devices. These are pre-set breakpoints. As you move your slider to left and hit the first break point, you will see all your content shift around. This will allow us to refine our design by adjusting each element's properties so that they display correctly when your site is accessed by that device.
Move the slider all the way over to the second breakpoint (mobile layout). The four paragraphs you will notice are now squished. The two paragraphs you will notice are now squished. To correct this, click on the first column and go to the Layout Tab and adjust the span from inherited to 4 spans. Repeat this for the other column.
Finally, we need to adjust the 2 images so that they are a bit larger. Click on the first column and go to the Layout Tab and adjust the span from inherited to 8 spans. Repeat this for both columns.
While we create 2 break points automatically, you can also create your own or as many as you need. To create your own, click on the Break, the line above the Sizer, and a circle will appear. That shows you just added a breakpoint. You can also add a new breakpoint by positioning the slider and clicking on the plus button on the left side. To remove one, select it and drag it off the Breaker or you can select the proper breakpoint using the slider and clicking the minus button on the left side of the application. Note, the 2 default breakpoints cannot be removed.
‹‹Previous Chapter››
‹‹Next Chapter››