

Mailing list support is without a doubt a snazzy and useful feature in Web Form Builder. When you set up a mailing list, you can use your form to collect information from people to be used on a newsletter or other email campaign. You can even personalize those emails using elements of your form!
Setting Up Your Mailing Lists
You'll need to have an account with the mail service MailChimp for mailing list support to work. Fortunately, it's free, and only takes a few moments to sign up.
After you've worked your way through the signup process, you'll end up on a page that says "Get Started With MailChimp in 3 Simple Steps". We're going to create a basic mailing list now so you can see how this works.
If you already have a MailChimp account, sign in and start following along here.
MailChimp Advanced Mode
Forms created in MailChimp Advance mode can not be used with Web Form Builder. You may only use MailChimps Visual Editor.
Option 1: Automatic
Step 1:
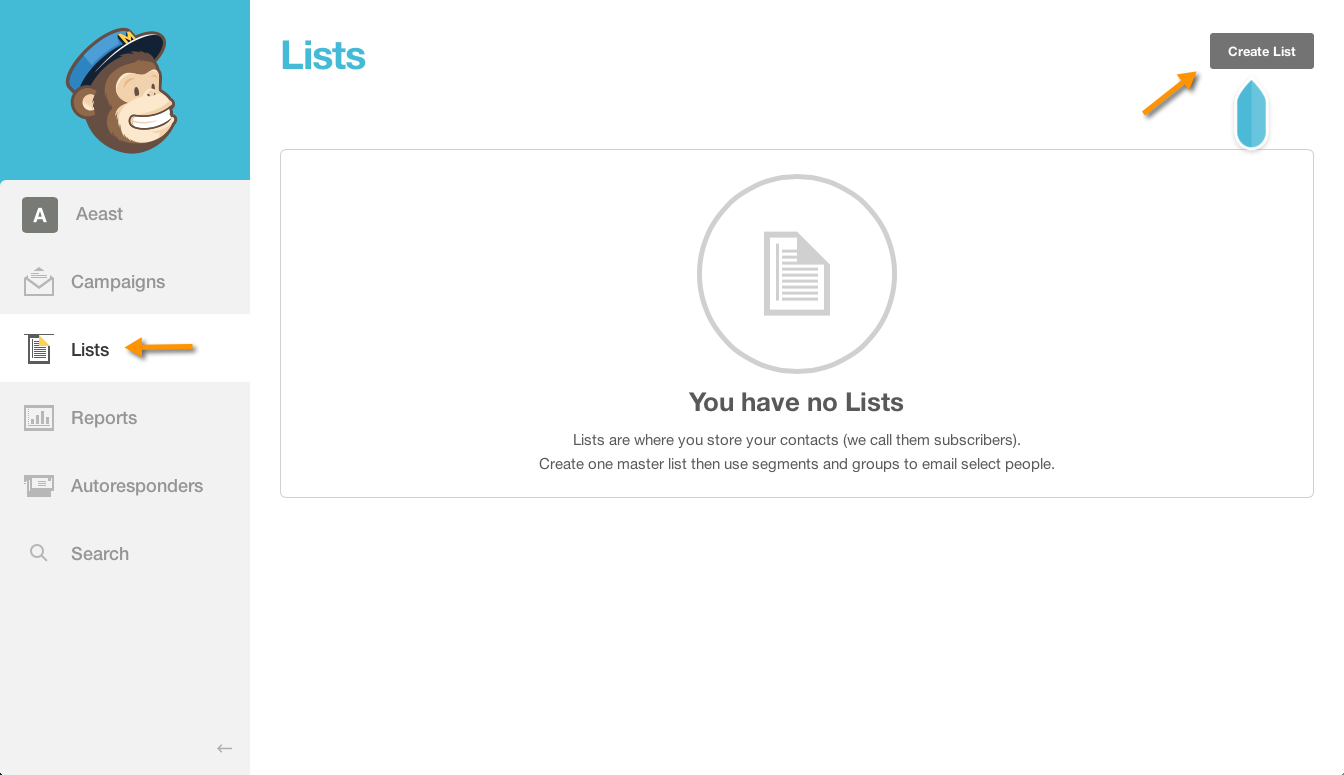
Look for the Lists link, click it, and click "Create List".
Step 2:
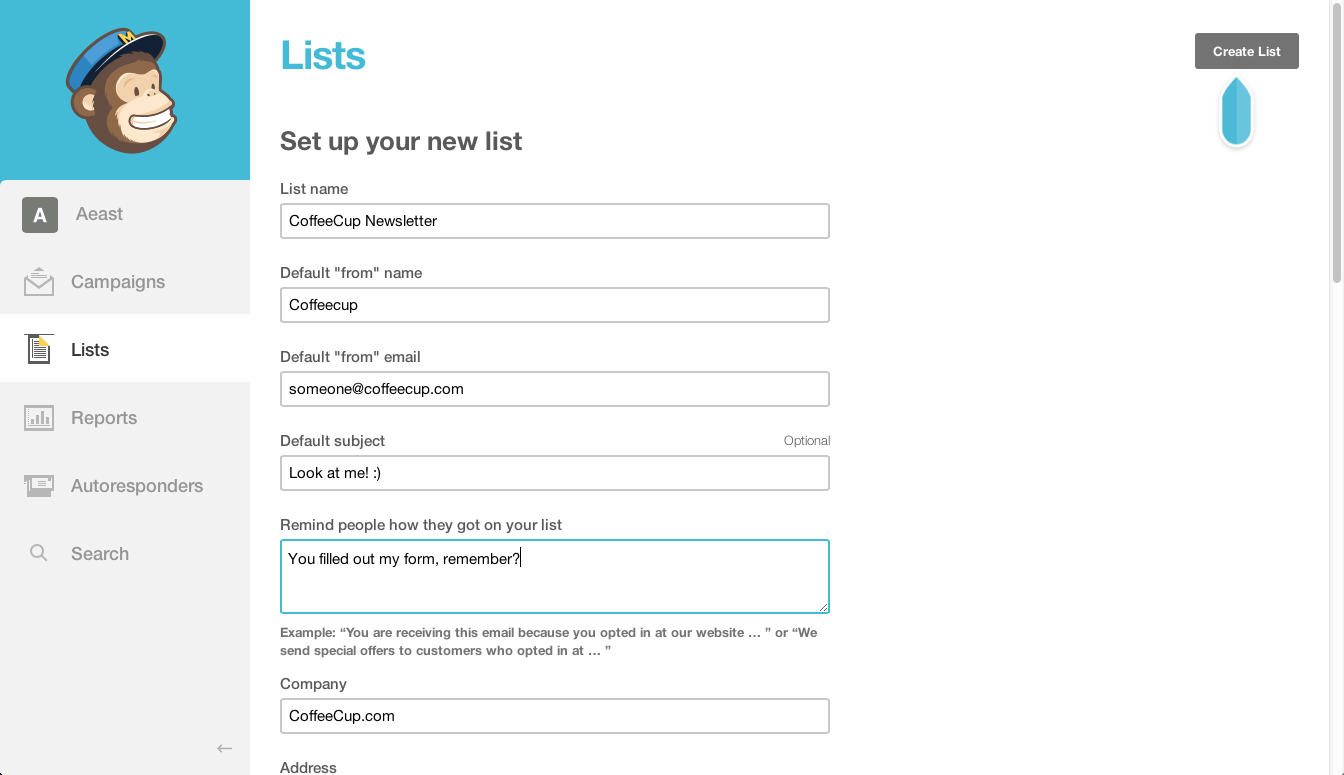
Supply a list name (this will show in Web Form Builder), a default from name (the name emails will come from), a default reply-to email (the address that will receive replies if someone chooses to do so), and a reminder of how people signed up for your list. Enter any other information you like and click Save.
Step 3:
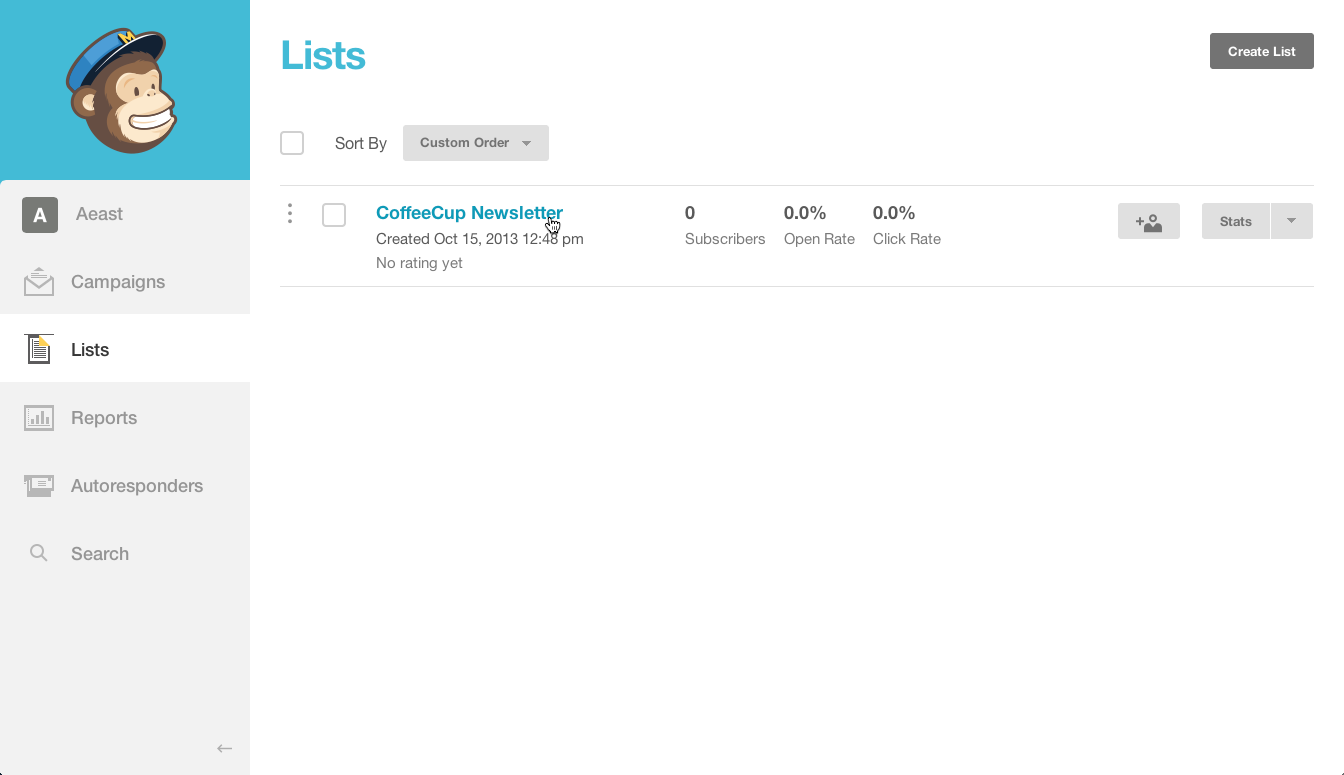
You should now see your list displayed and ready to create a signup form. Click on your lists name to enter the list Settings.
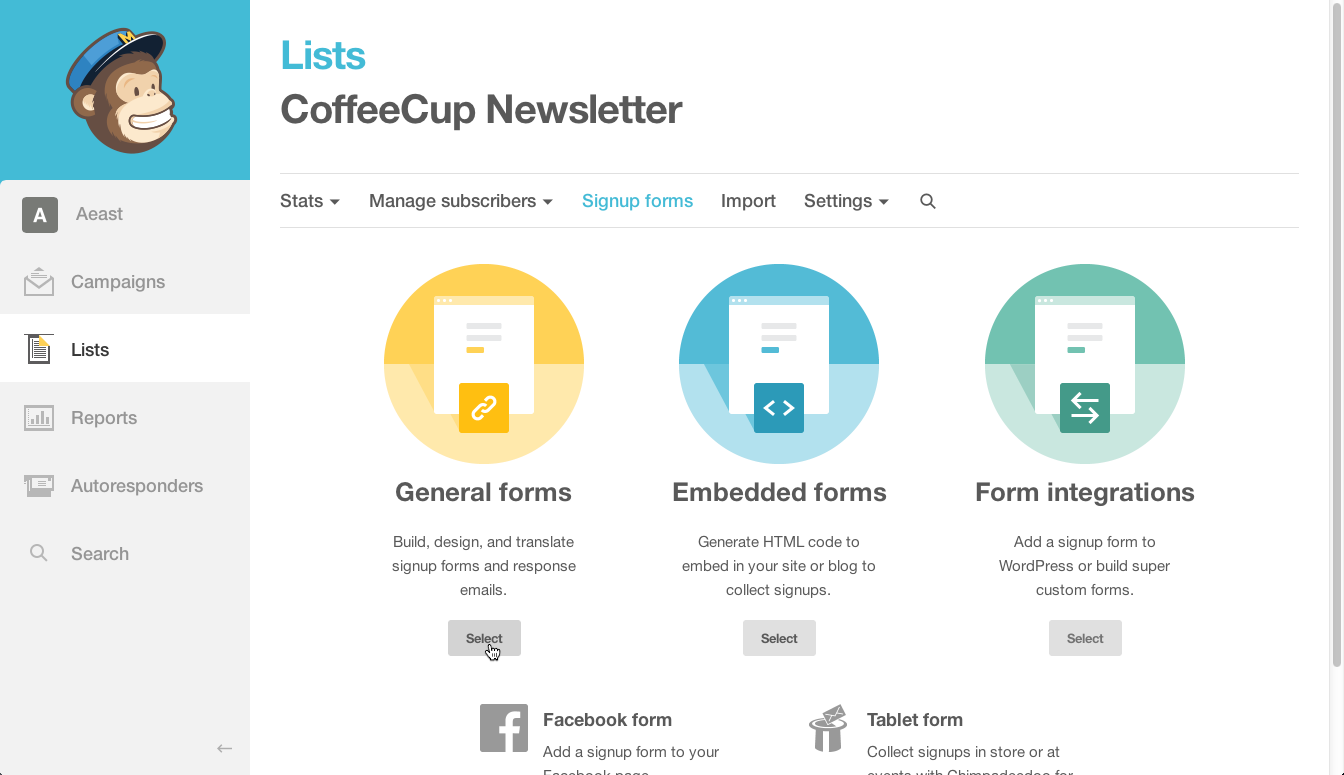
Click Signup Forms.

Step 4:
Select the General forms option.
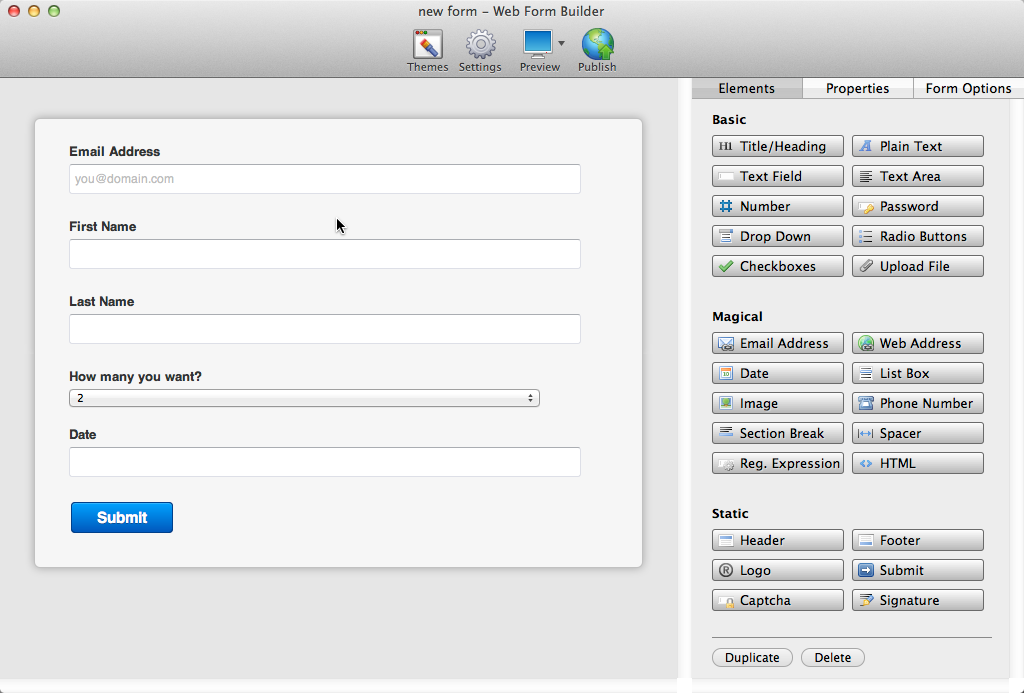
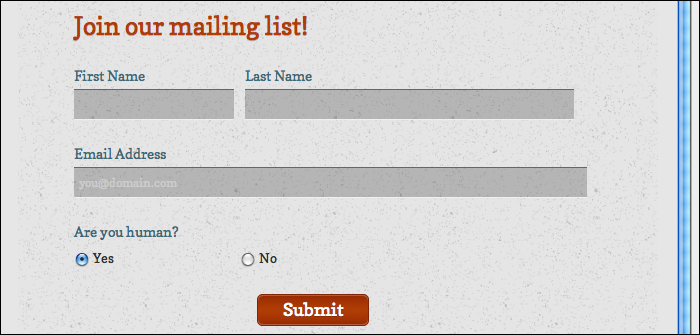
Here is where you will design the fields that you wish to gather for Mail Chimp. Once you have created all the fields you wish we can then import your form into Web Form Builder.
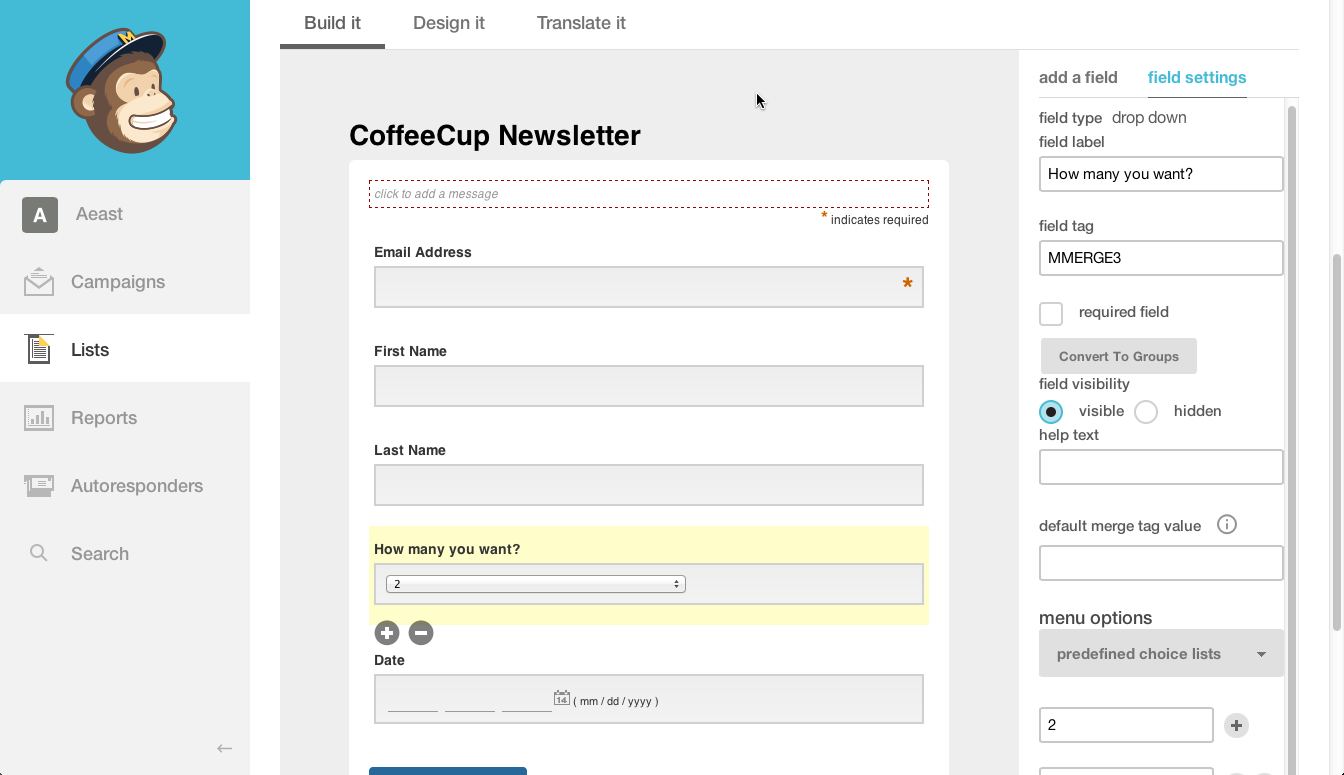
Creating and Configuring Your Signup Form
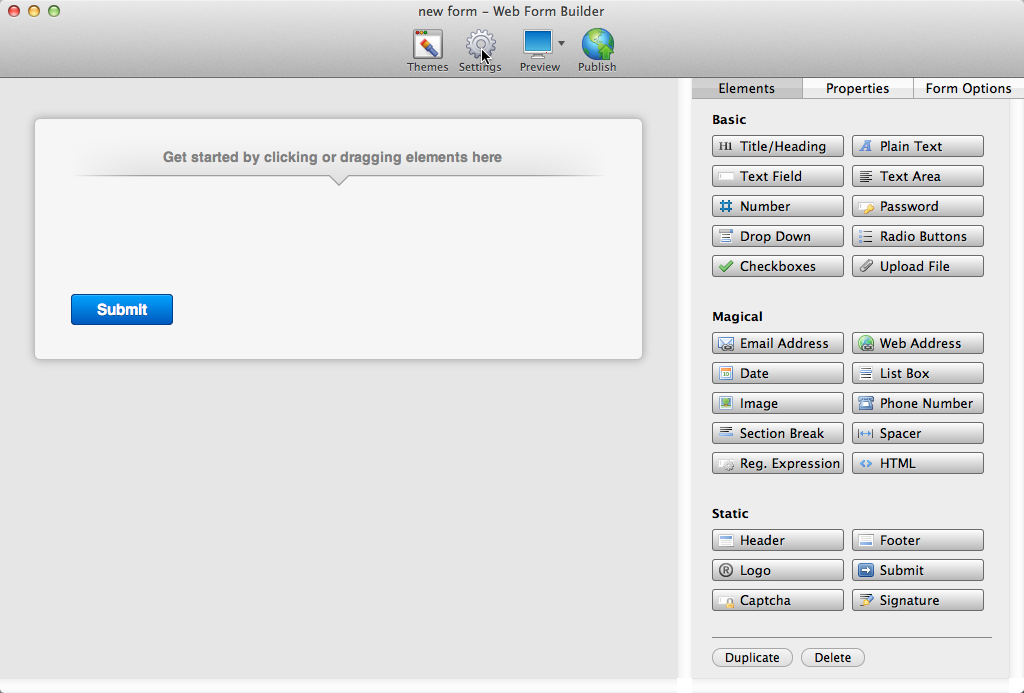
Now to create your signup form in Web Form Builder is very simple.
Step 1:
First open Web Form Builder and select Settings.
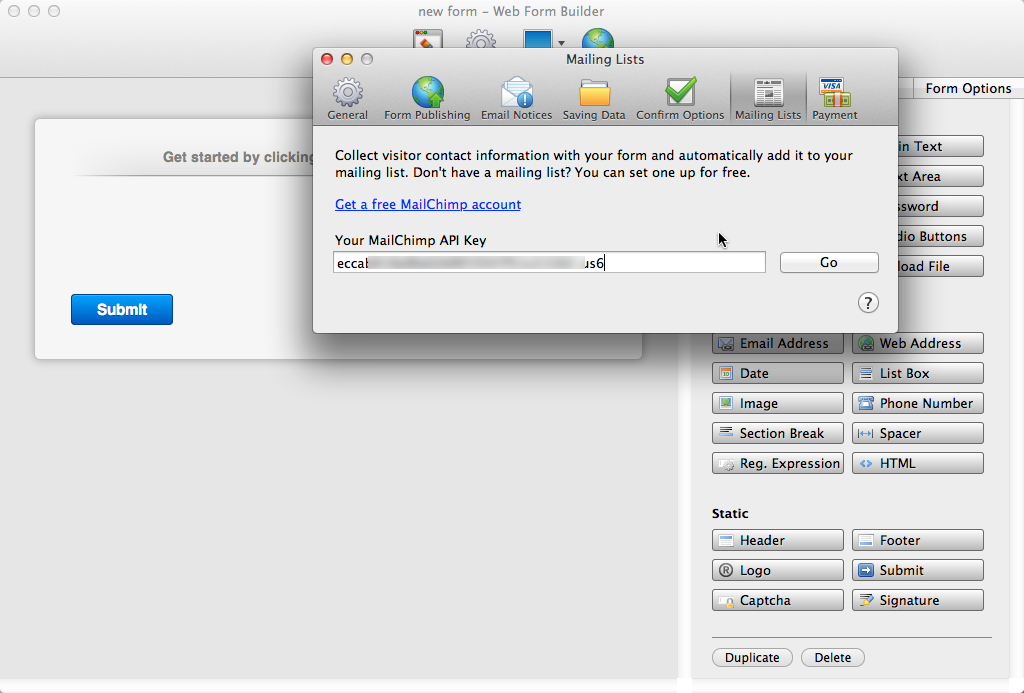
Step 2:
You'll need to enter a MailChimp API Key to proceed. To find this, click here.

Step 3:
From the Settings menu click on the Mailing List Tab and enter your Mail Chimp API and click GO.
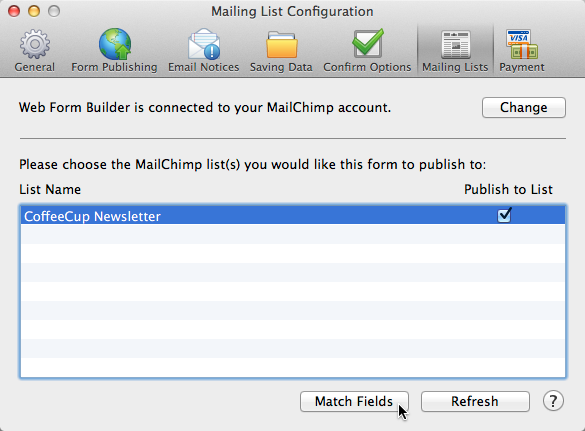
Step 4:
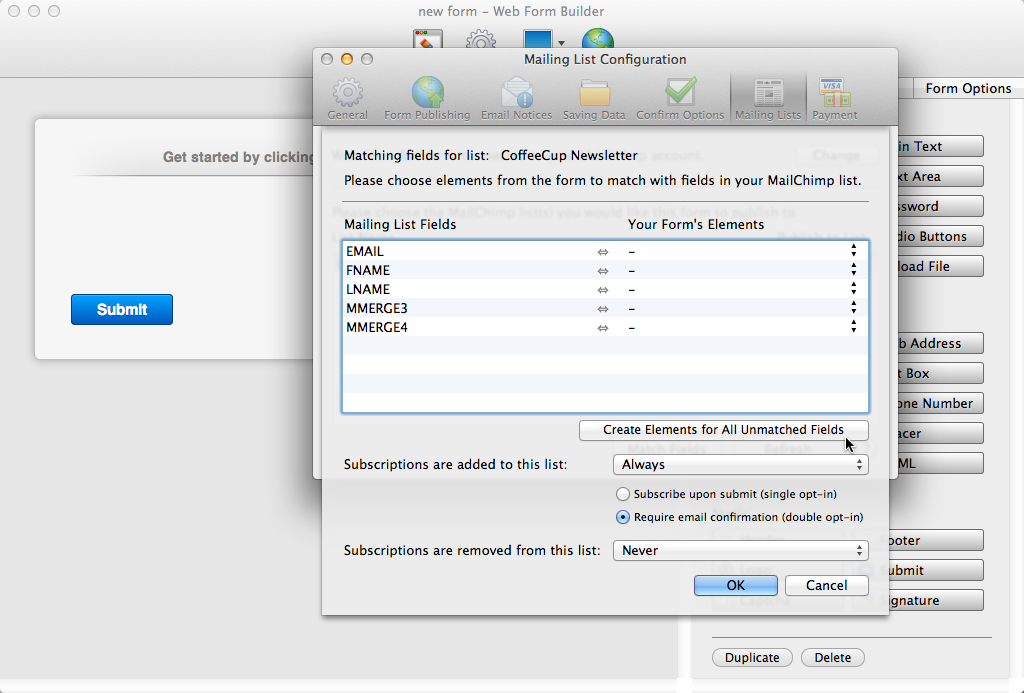
Select the list you wish to connect to the form and click Match Fields.
Step 5:
Next you will see all the fields that are currently in your Mail Chimp Form. The simplest way to create your form is by selected the "Create Elements for All Unmatched Fields" button. This will create your form for you! How sweet is that?
Step 6:
Click OK and you are done! Just publish your form and watch your list start to get subscripbers!
Option 2: Manual
When your form is ready, click the Settings button and click the Mailing Lists tab.
You'll need to enter a MailChimp API Key to proceed. To find this, go to the MailChimp website, sign in if you need to, and click the Account tab on the left of the site. Click API Keys & Authorized Apps, or click here.
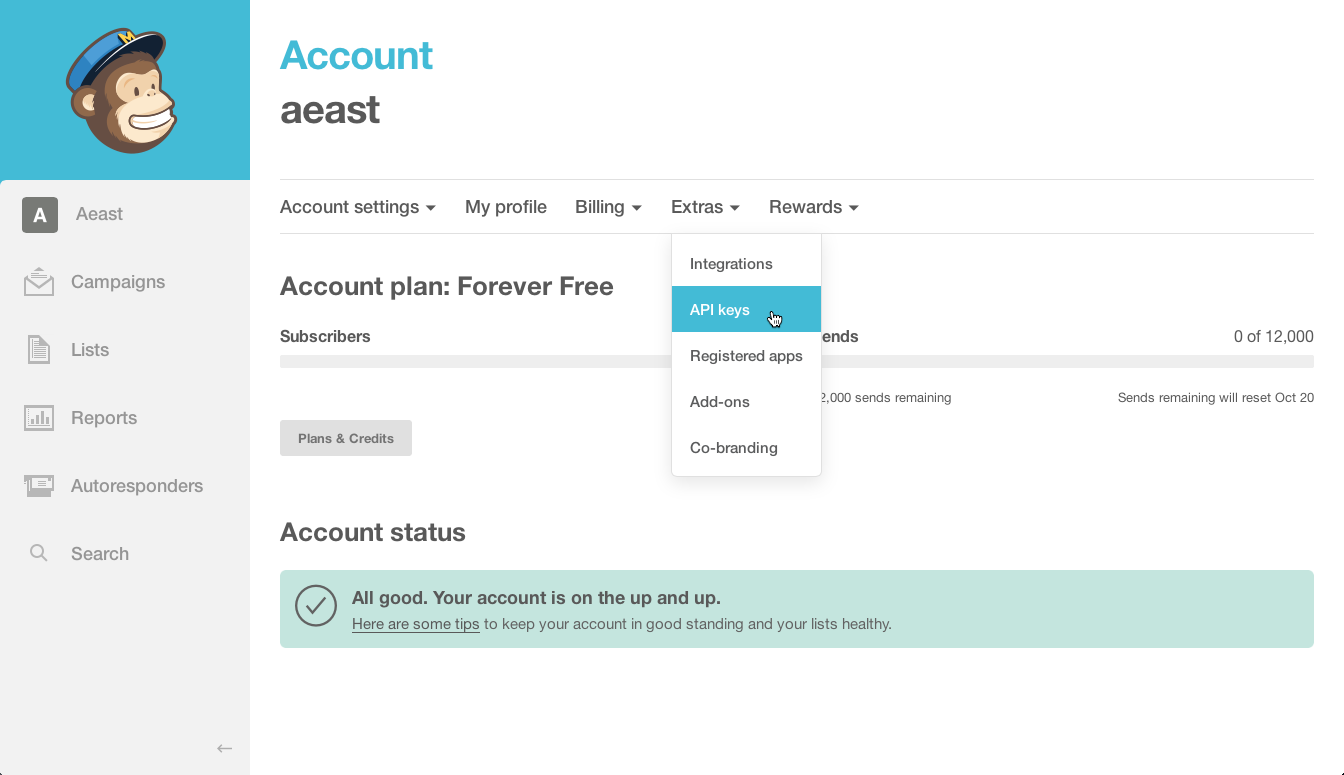
If you don't have a key yet, click Add A Key. MailChimp will generate one for you, which will appear in the API Key column. Highlight and copy it.
Go back to the Web Form Builder Mailing Lists tab, enter the API Key, and click Go.
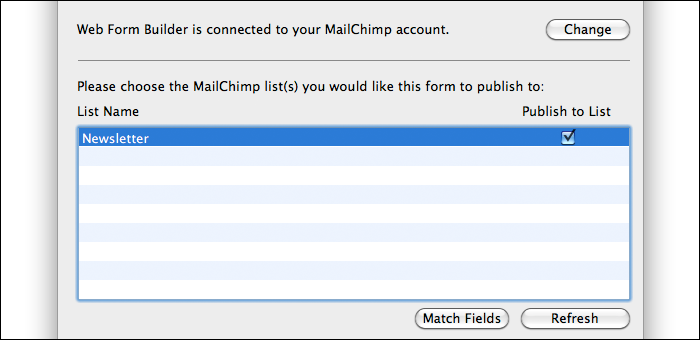
Check the box under Publish to List next to your list so the form will send information to MailChimp when someone fills out your form. Now select the list and click Match Fields.
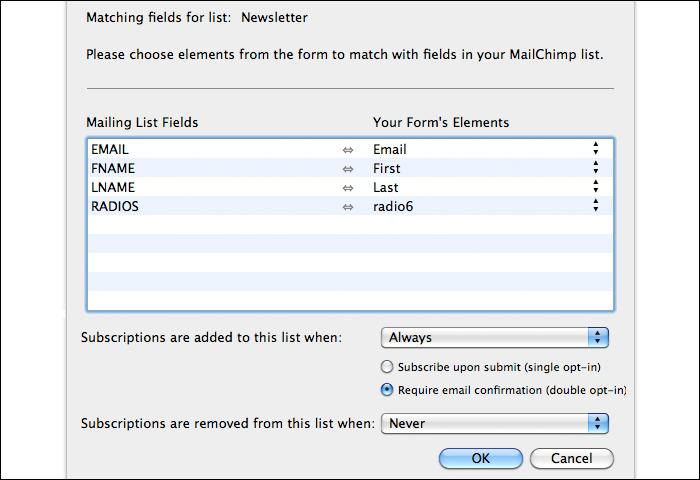
The column on the left shows fields in your MailChimp list, while the column on the right contains drop-downs in which you can select elements from your form. Match appropriate elements together, then click OK.

Uh Oh, Something Went Wrong!
Most likely, when you clicked OK, you got an error. This is because any element you match must be completely identical to the matched MailChimp field. Here are some things you'll need to double-check:
- You must have an email element. Doesn't make much sense to send subscriber information to a mailing list if you don't collect an email address, does it?
- Any MailChimp list fields that are marked as "Required" must be matched to form elements that are also marked as "Required."
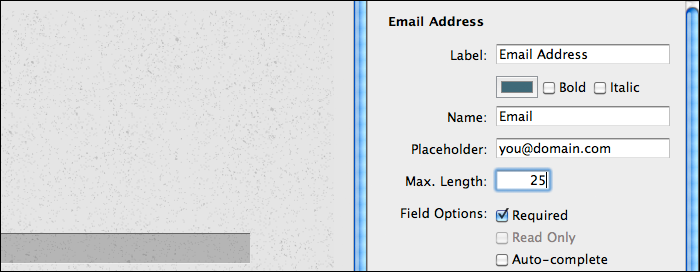
- The Max. Length of every element in your list must be equal to or less than the limit set by its matching MailChimp field.
- If you've got a list of items, like in a Radio Button element, they must be identical to the options in your matched MailChimp field. Yes, this means no spelling or capitalization differences at all.
Let's make a couple changes to our form before proceeding. We'll also add a set of radio buttons to our MailChimp list so that we can match it in Web Form Builder.
Click your Email Address element and change the Max. Length to 25. This is the maximum length for a medium-sized MailChimp field. (For more information on MailChimp field lengths, click here.) Also, check the box next to Required (since all MailChimp email address fields are required). Do the same for your other form elements depending on the maximum field length and "required" settings for those items in MailChimp.
Go back to your MailChimp account, click the List toolbar button, and click Design Signup Forms (you'll need to choose one from the options that appear if you have multiple lists).
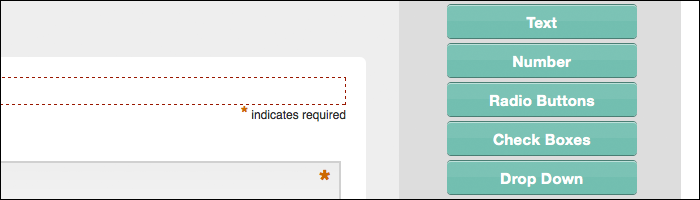
Click the Radio Buttons button to add a set of radio buttons to your list.
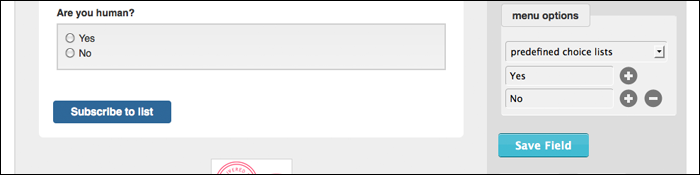
Make sure that all options are completely identical to the options in your radio button element in Web Form Builder! You can add and remove options by clicking the + and - buttons under menu options on the right. Don't forget to click Save Field. Then click Save & Exit all the way at the top.
In the Web Form Builder Mailing Lists tab, click Refresh to update all your lists. Now click your list and click Match Fields again.
You may now successfully match all your elements to MailChimp fields, assuming everything is properly configured. Notice that you can even match your radio buttons now. Click OK when you're done.
You're all set up! Your form will now send information straight to your MailChimp mailing list.
Adding and Removing Subscriptions
There are two more options in the Match Fields dialog:
- Subscriptions are added to this list when:
- Subscriptions are removed from this list when:
Most likely, you’re creating a mailing list signup form and will use the first option while leaving the second one set to Never. Let’s discuss those two options.
Add Subscriptions
From the drop-down menu, you can choose to:
- Always send a subscribe notice, every time the form is submitted
- Send a subscribe notice only when a certain option is selected (normally the property name of a checkbox or radio button selection labelled “Subscribe to our newsletter?”)
- Never send a subscribe notice with this form
Remember that if you are subscribing people to a mailing list, it is ethically sound to clearly inform them of this before they submit the form!
Then there are two more options:
- Subscribe upon submit (single opt-in): With this option selected, the user will be signed up for the mailing list as soon as the Submit button is clicked.
- Require email confirmation (double opt-in): With this option selected, the user will be signed up for the mailing list after clicking a confirmation link that is emailed to them when they click the Submit button. (They'll need to sign up with your form, then confirm by email—a "double opt-in"!)
Why the email confirmation? Well, depending on how strict you want the accuracy of your list to be, you might choose a double opt-in method. This way you are confirming that the email address that is receiving your correspondence is definitely owned by the person that signed up via your form.
Remove Subscriptions
From the drop-down menu, you can choose to:
- Always unsubscribe the person from the mailing list when the form is submitted
- Send an unsubscribe notice when a certain option is selected (normally the property name of a checkbox or radio button selection labelled “Unsubscribe from our newsletter?”)
- Never use this form to send unsubscribe notices
Note that you cannot use the same values for both drop-downs, because it would never make sense to perform both actions under the same conditions!
Okay, got it? Good luck on your mailing list!