

Embedding a form in a webpage or linking directly to it on its own page are easy, traditional ways for people to use your web forms. But with the release of Web Form Builder 2.1, there is a third option that lets you display your form in a pop-up window over a webpage.
There are two ways to configure a pop-up form: displayed when a link is clicked, or displayed automatically a specified number of seconds after the webpage is loaded.
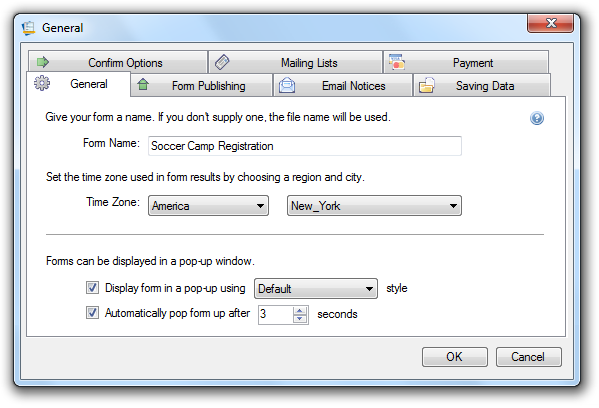
To configure a form to pop up when embedded, click the Settings toolbar button and navigate to the General tab.
In Windows:
In OS X:
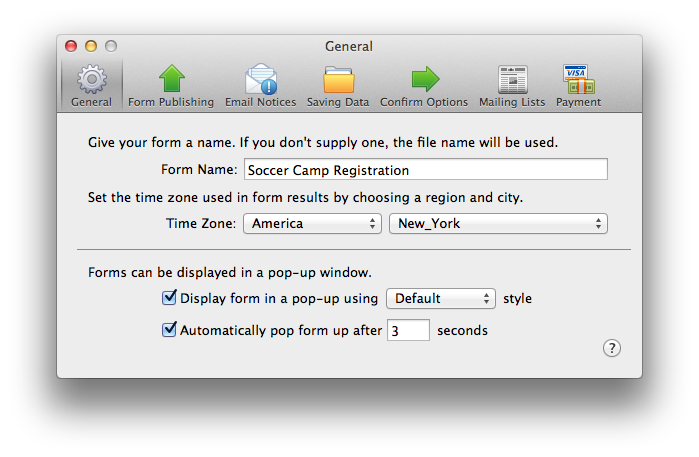
Check the box next to “Display form in a pop-up”, and when you publish or export, you’ll be given a special type of embed code that displays the pop-up form. From the drop-down menu, choose the style of pop-up you’d like to use.
Check the box next to “Automatically pop form up” and your form will automatically appear when the webpage it’s embedded in is loaded. Choose the number of seconds you’d like the form to wait before popping up.
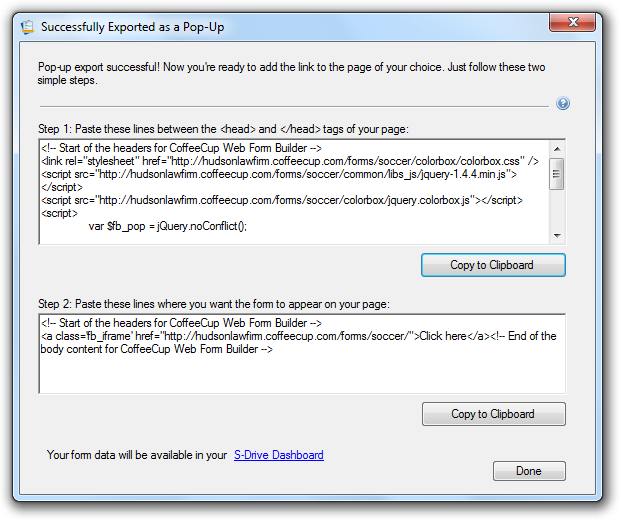
That’s all it takes to set up a pop-up form! Now just choose your publish or export option like always and follow the provided steps. There’s just one major difference in this process. For example, this window is shown when you Publish to S-Drive with the pop-up option enabled:
In Windows:
In OS X:
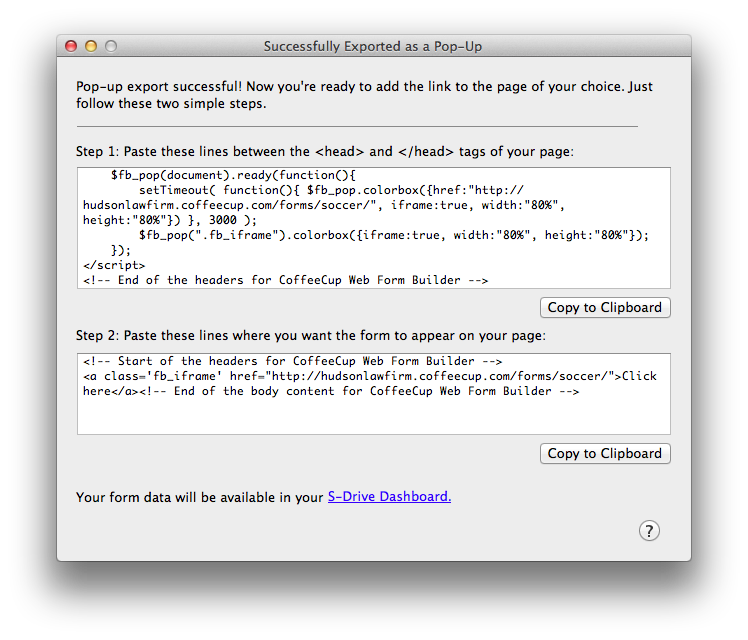
In a non-pop-up export, you are given embed code that creates the form on the webpage you place it within. But during a pop-up export, you are given code that simply creates a link, as seen in step 2 shown above. The first part of this link code is:
<a class='fb_iframe' href="[your web address here]">
Then folllowed by the content of the link, which in this case is:
Click here
And finally, the closing tag:
</a>
To customize your link, place the clickable content where the “Click here” is shown. It can be any text you like; it could even be another image. When clicked, this link pops up your form.
Note: If your form is configured to pop up automatically, the link content can be empty.