

In this tutorial, we’re going to design a shop with two categories, each with one product. This example is going to create product descriptions for CoffeeCup merchandise, but you can use the product or service of your choice as you follow along.
Step 1: Naming Categories
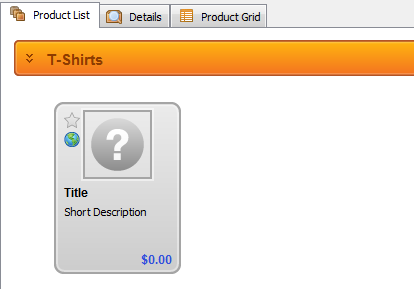
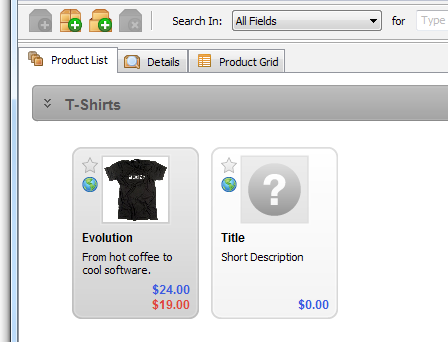
The first step is to name the default category. To do this, click where it says New Category and type the desired category name.
Step 2: Modifying Products
Next, you’re going to modify the default blank product in your category. To add a picture, double-click the default question mark image. This opens a window that lets you browse your computer for the desired picture. To edit the title, short description, and list price, click on the product icon where it says Title, Short Description, and $0.00, respectively.
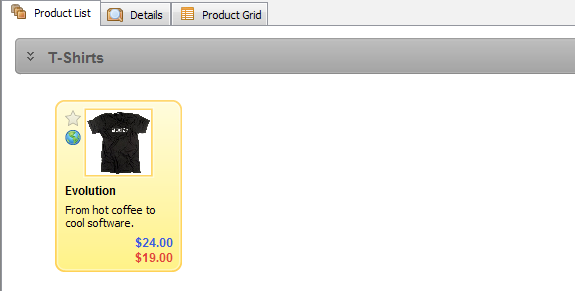
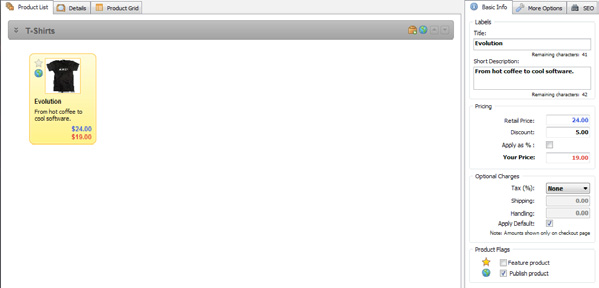
You can also edit these properties — as well as a few others, such as discounts —using the fields under the Basic Info tab.
Step 3: Switching to Details View
The Short Description is limited to 75 characters, so you’re going to want to switch over to Details view to say a bit more about your product. To do this, select the product you want to edit more thoroughly and then click the Details tab.

Once you’ve switched to Details view, you can add a long description and up to four additional pictures.
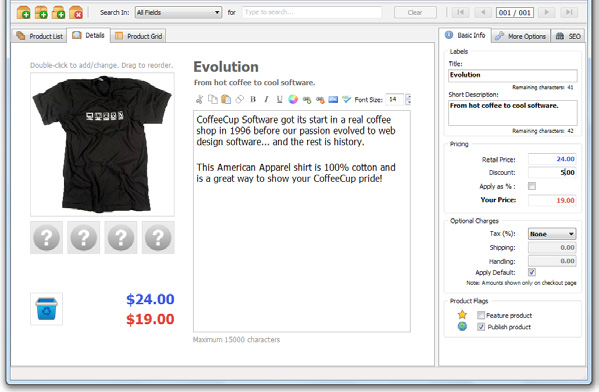
Double-clicking the default images prompts you to browse your computer for the pictures you wish to include. In addition to allowing you to enter a long description, the text field also gives you the option of formatting the style, color, and size of your text, as well as adding hyperlinks and HTML.
Step 4: Adding Products
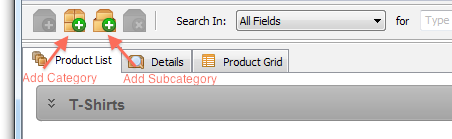
A store with only one product isn’t going to be very lucrative, so let’s navigate back over to Product List view and add another one. Click the Product List tab and then click the Add Product button in the Product List View toolbar.
You can also copy and paste existing products, which can be helpful if you want to reuse the information from one of your existing products.
Now you can edit your product the same way you edited the one in Step 2. Oh, and FYI, the process of adding categories and subcategories is the exact same as adding a product: Just click the Add Category or Add Subcategory button, both of which are located right next to the Add Product button.
Step 5: Naming Your Shop
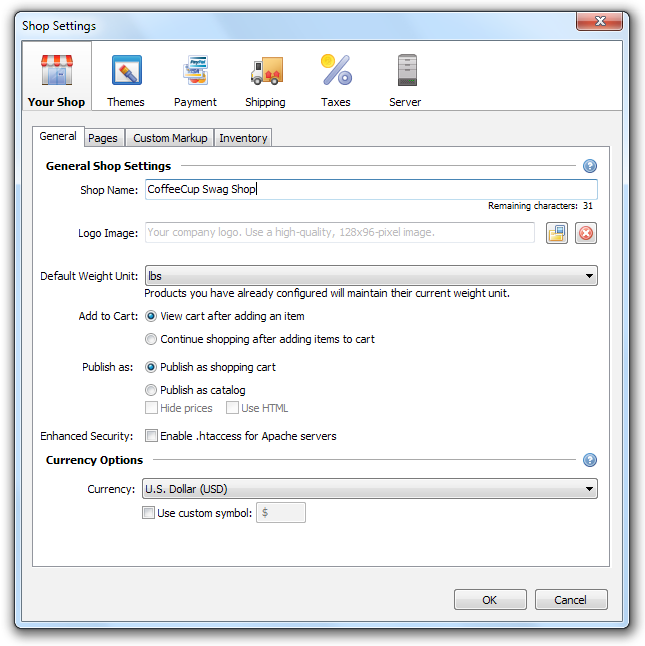
Now that you’ve set up the basic aspects of your store, the next step is to name it. Click the Your Shop button in the Toolbar.

This opens the General tab in the Shop Settings window. (You’ll see four other tabs, but for now, we’re going to keep things simple and just stick with the General tab.) Enter a name for your shop and select the default currency.
Step 6: Selecting a Theme
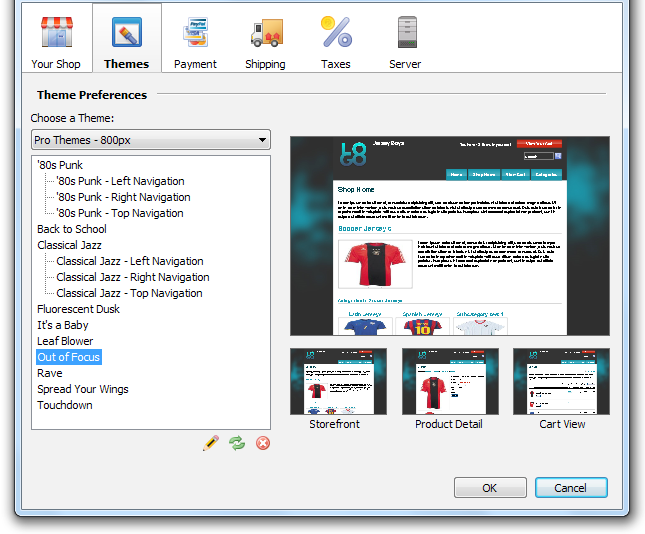
The next step is to choose a theme for your shop. To do this, select the Themes tab in the Shop Settings window and then choose the desired theme for your shop from the provided list.
Step 7: Previewing Your Shop
Now that you’ve chosen a theme and gotten the hang of adding elements, you have a solid handle on how to design a shop in Shopping Cart Creator Pro. Now would be a great time to preview your shop, just to make sure it looks just how you want it. Click the Preview button in the Toolbar.

This opens your shop in your default web browser. Because shop functionality is controlled by PHP, which needs to be uploaded to a server in order to work properly, your shop will not be fully functional. However, you’ll still have a chance to preview the design aspects of your shop in a browser.
We highly recommend previewing your shop in several different browsers! It’s a fact of web design that the same design can (and often does) look different in different browsers, and that the best way to make sure everything looks more or less uniform is to preview your design often in the most popular browsers: Internet Explorer, Firefox, Google Chrome, Safari, and Opera.
That’s it for the design aspects of Shopping Cart Creator Pro! Of course, you’re not done yet: You still have to set up the behind-the-scenes aspects of your shop — including inventory, payment, shipping, and taxes — and then upload the whole shebang to your server.