

The tax options in Shopping Cart Creator 3.5 and higher allow you to set up specific taxes for your location and any locations you would like to ship to. This article will show you how to use all the provided tools. You may wish to do some research about what taxes you should charge. This article is a good place to start: Advanced Tax Configuration Methods.
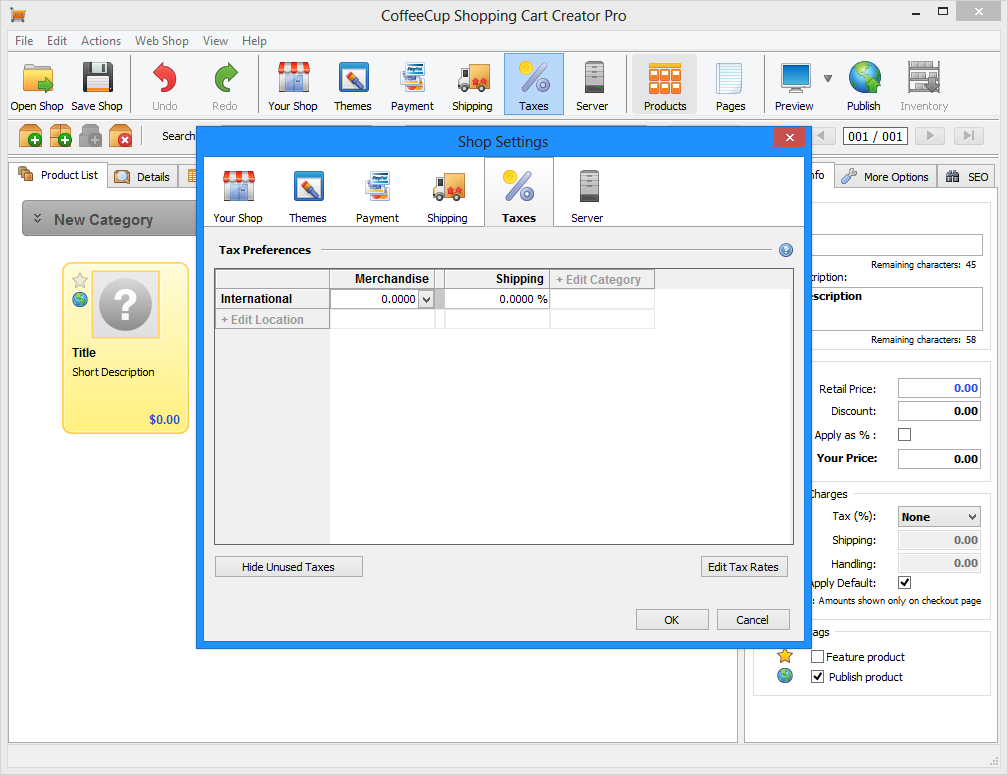
To set up your tax options, click the Taxes button in the Toolbar. This opens the Taxes tab of the Shop Settings window.
To get started, first click the Edit Category link. This opens the Tax Categories window.
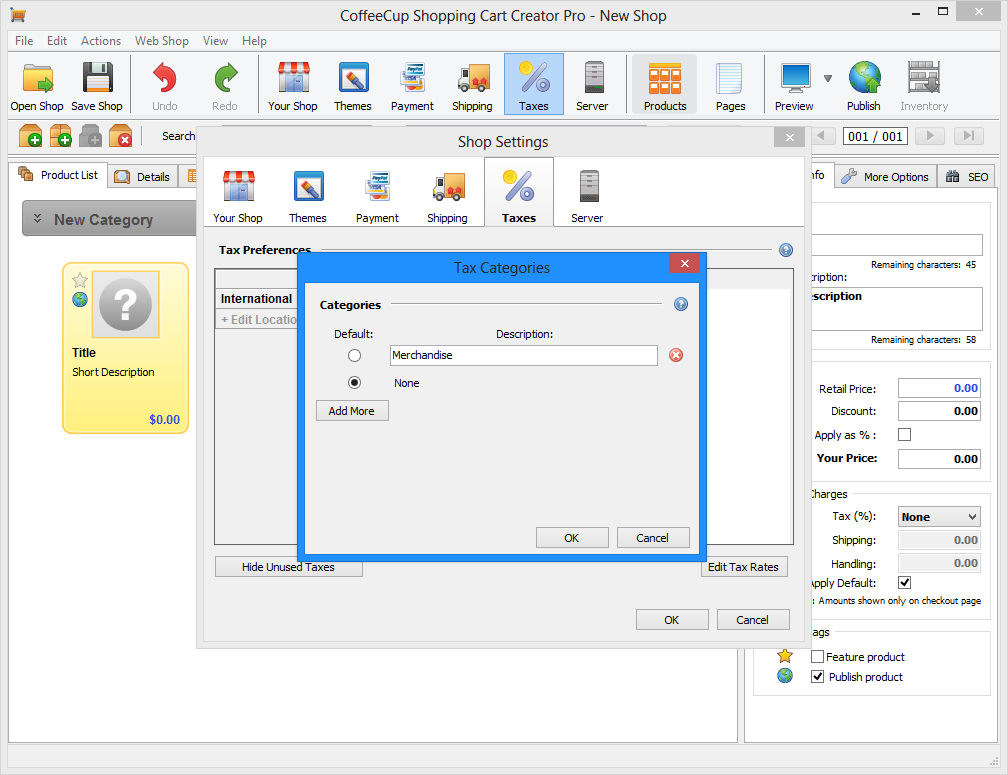
Use this area to add different categories of products. This is helpful if you are selling products that have different tax rates, such as food, merchandise, alcohol, etc. To add a new tax category, enter a name in the provided field. To create a new field, click Add More. To remove a tax category, click the corresponding red X icon. When you are done, click OK. Your new categories will appear at the top of the tax table.
Next, click the Edit Location link. This opens the Tax Locations window.
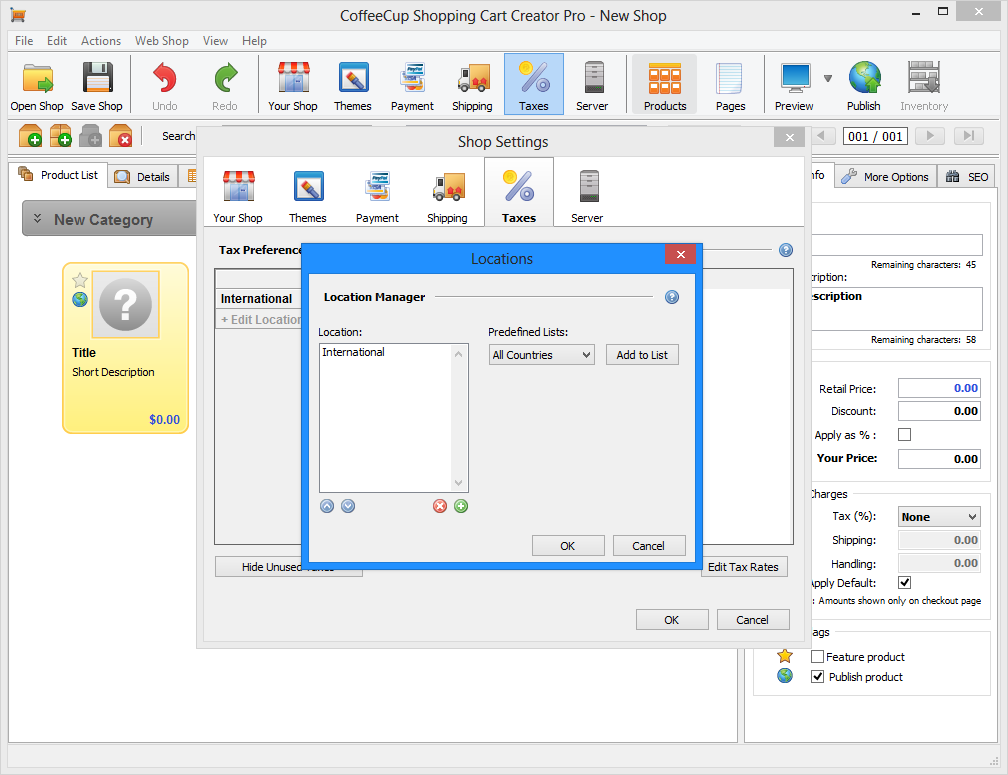
Use this area to add different locations where you will be selling your products. This is helpful if you may be selling products to different states/provinces or countries.
We have provided a few predefined lists to help get you started. To add a list to your locations, select it from the Predefined Lists drop-down list and click Add to List. Alternately, you can add individual locations by clicking the green plus sign icon. To remove a location, click the red X icon. To move a location up or down in the list, use the arrow icons. When you are done, click OK. Your new locations will appear along the left-hand side of the tax table.
The last step is to add your tax rates. To do this, click the Edit Tax Rates button. This opens the Tax Rates window.
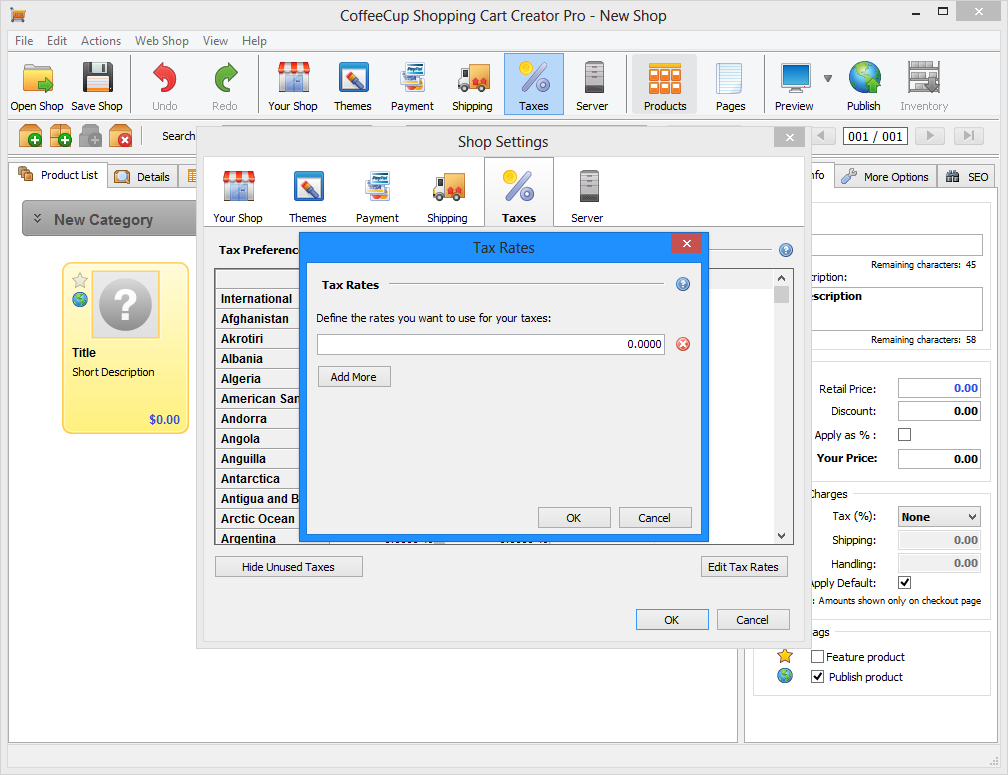
Use this area to add the rates you would like to charge for your various products in various locations. To add a rate, type it into the provided field. To add more fields, click the Add More button. To delete a rate, click the red X icon. When you are done, click OK.
The last step in configuring your taxes is to select a rate for each location-category pair. To do this, click the cell in the tax table that falls between the desired location and product. This opens a drop-down list that displays the rates you have configured.
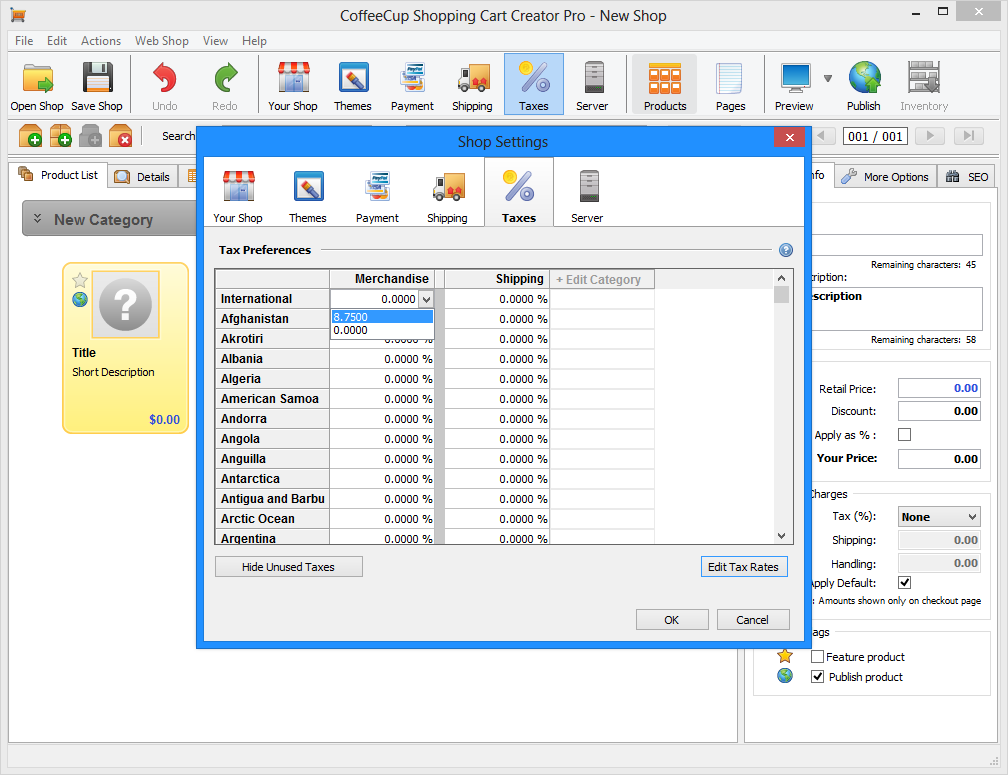
You can also manually enter a tax rate in this field.
Now that you're all done configuring your tax options, click OK to exit the Shop Settings window. Now you can set taxes for each of the products in your shop. To do so, select the product, switch to the Basic Info tab, and select the desired tax from the Tax drop-down list.
Google Checkout Customers:
If you are a Google Checkout customer, you may notice that under some circumstances, the total amount in your cart will be .01 cent different then on the Google Checkout page. This has to do with how Google Checkout handles rounding. For more information about this issue, read this article: HTML API - Rounding Policy.