

Create links to files, documents, external pages, anchors, email address and phone numbers.
Responsive Site Designer makes it easy to link to other pages, files, and documents. You can also transform links so that they work with the mailto or tel tags. Mailto tags, when clicked, will automatically compose a new email message, and tel tags will automatically dial the phone number (this is useful for touch devices). This article will focus on using a Text Link element, Button Link element, Paragraph element, as well as applying a link to a word (or words) using the Inline Text Editor.
Table of Contents
Linking to an HTML page
Linking to an internal HTML page is easy when using RSD. Before you can create the link though, you need to know the name of the page you want to link to. We can find the page name by clicking the Pages drop down on the toolbar.
Case, spaces and punctuation MATTER! When working with any page, you need to ensure that you are not using spaces, capital letters or punctuations. The only punctuation that Google highly recommends is a (-) dash. You would use the dash to separate words. As an example, let’s say you have a bunch of flower that are for sale. You want to name the page Flowers for Sale. When adding this as a page name though, you would write it out as flowers-for-sale as this would be considered an SEO driven page name.
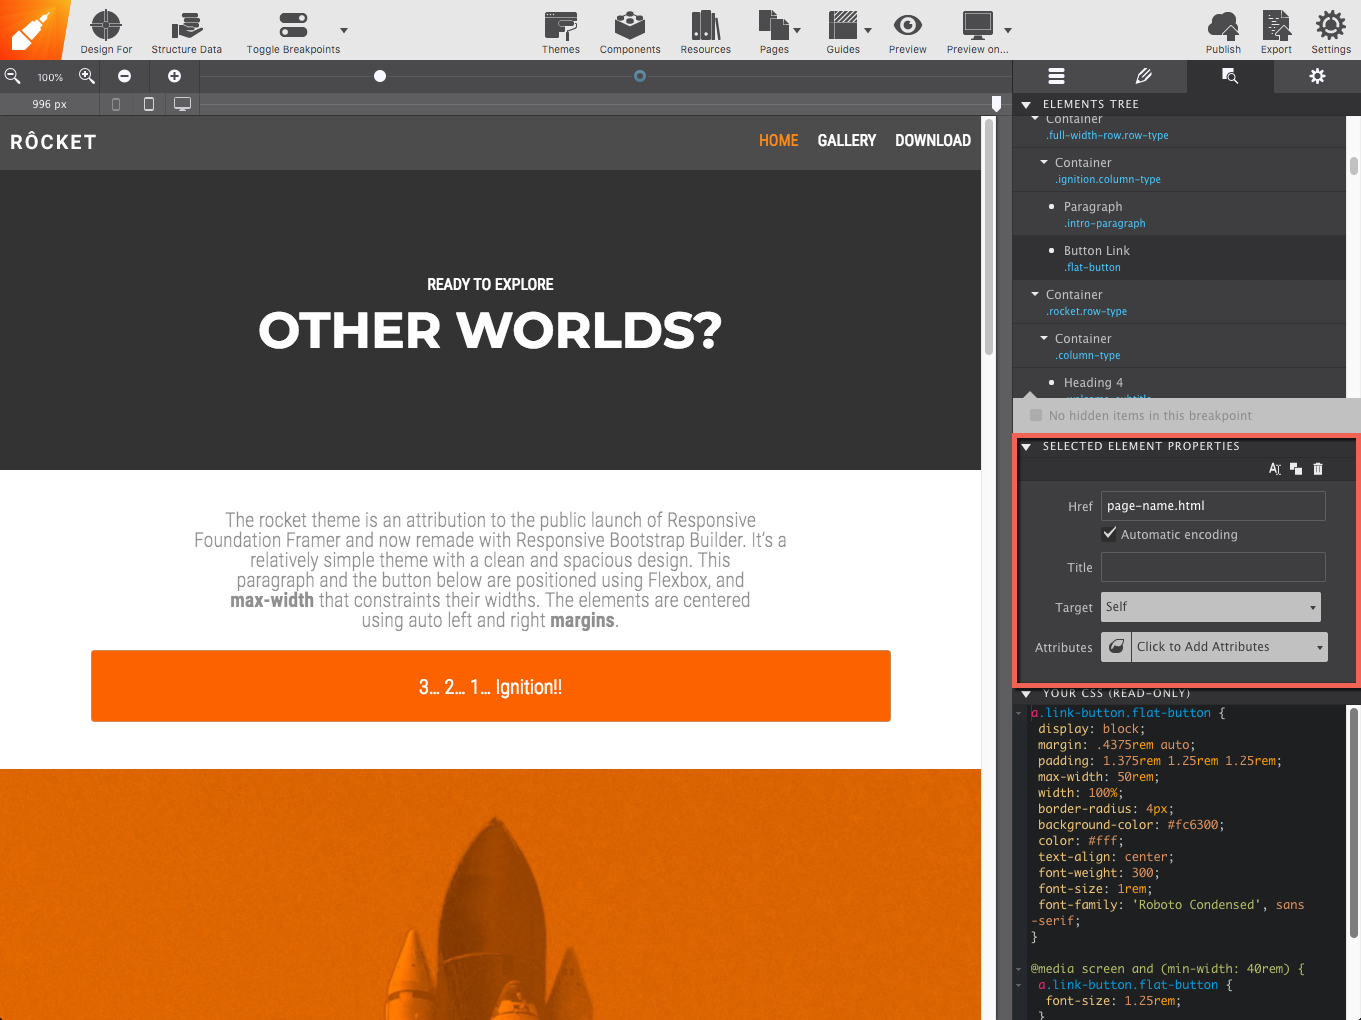
Now that we know how our page names should be named, let’s go ahead and add a link on the index page to the About Us page.
Add a button link to your project and go to the Element pane. Enter the page name about-us.html in the Href input. Make sure to add the .html to the end of the link (as this is not shown in the Pages drop down or Project Manager).
Unable to find the page in the drop down, or have not created it yet?
If you are unable to locate the page name in the drop down simply click the Pages drop down on the toolbar and you will see the list of all of them there. If you have not created the page yet, you simply enter what you want the name to be in the HREF box. You will then use that name when creating your new page under Manage Project.
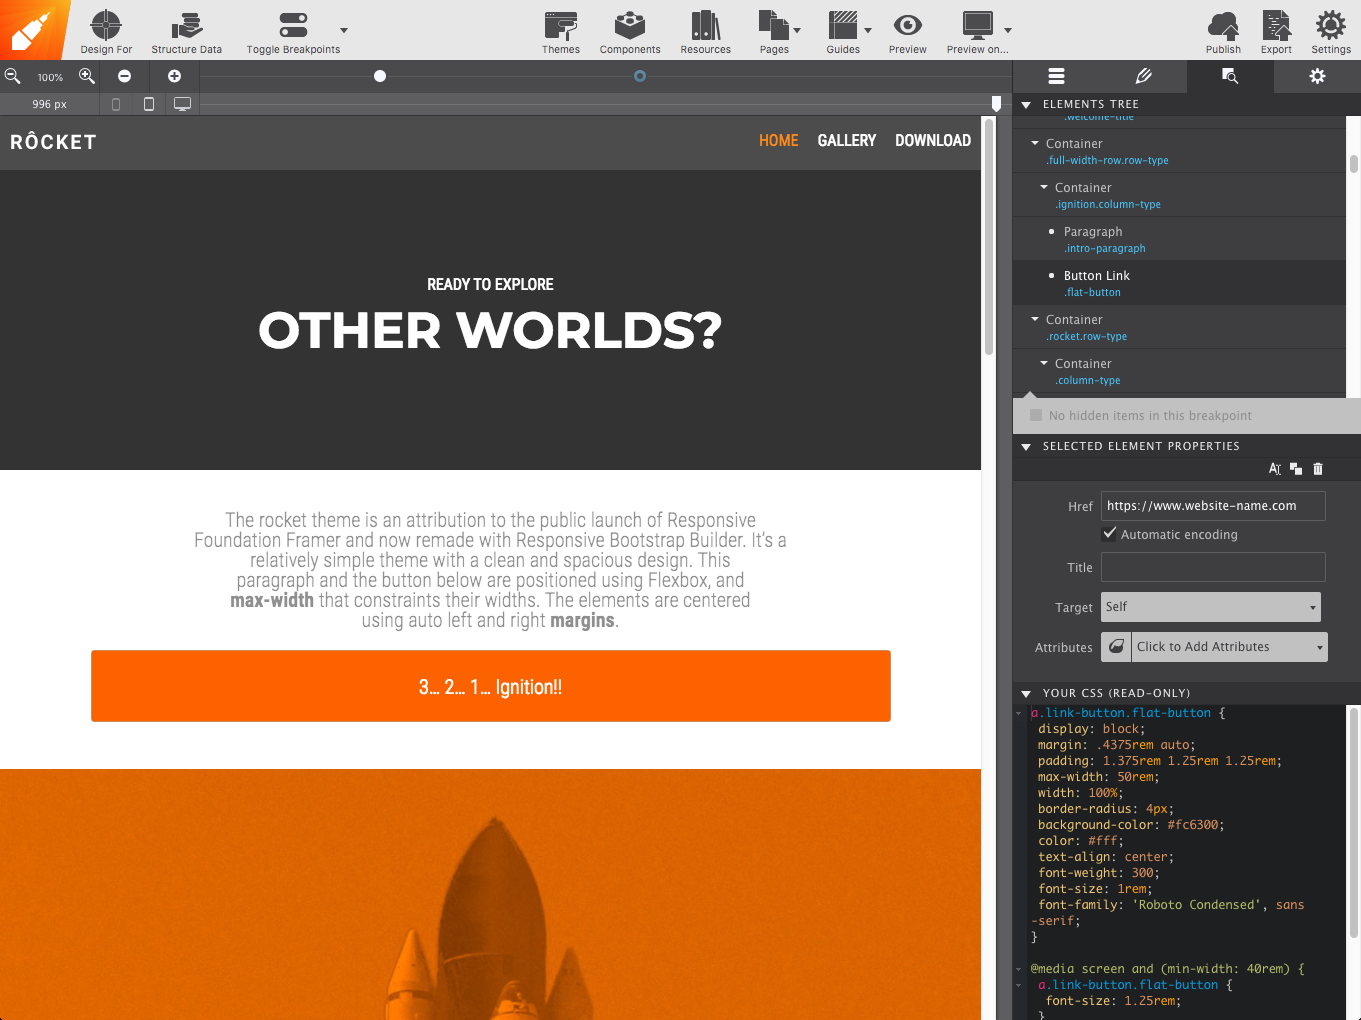
Linking to an external page
If you want to create a link to a web page that is not within your website, you follow the same process as you would for linking to an HTML file. But, instead of using just the HTML file name in the Href input, you would use an absolute URL like http://www.mydomain.com/about-us.html
Creating an anchor link
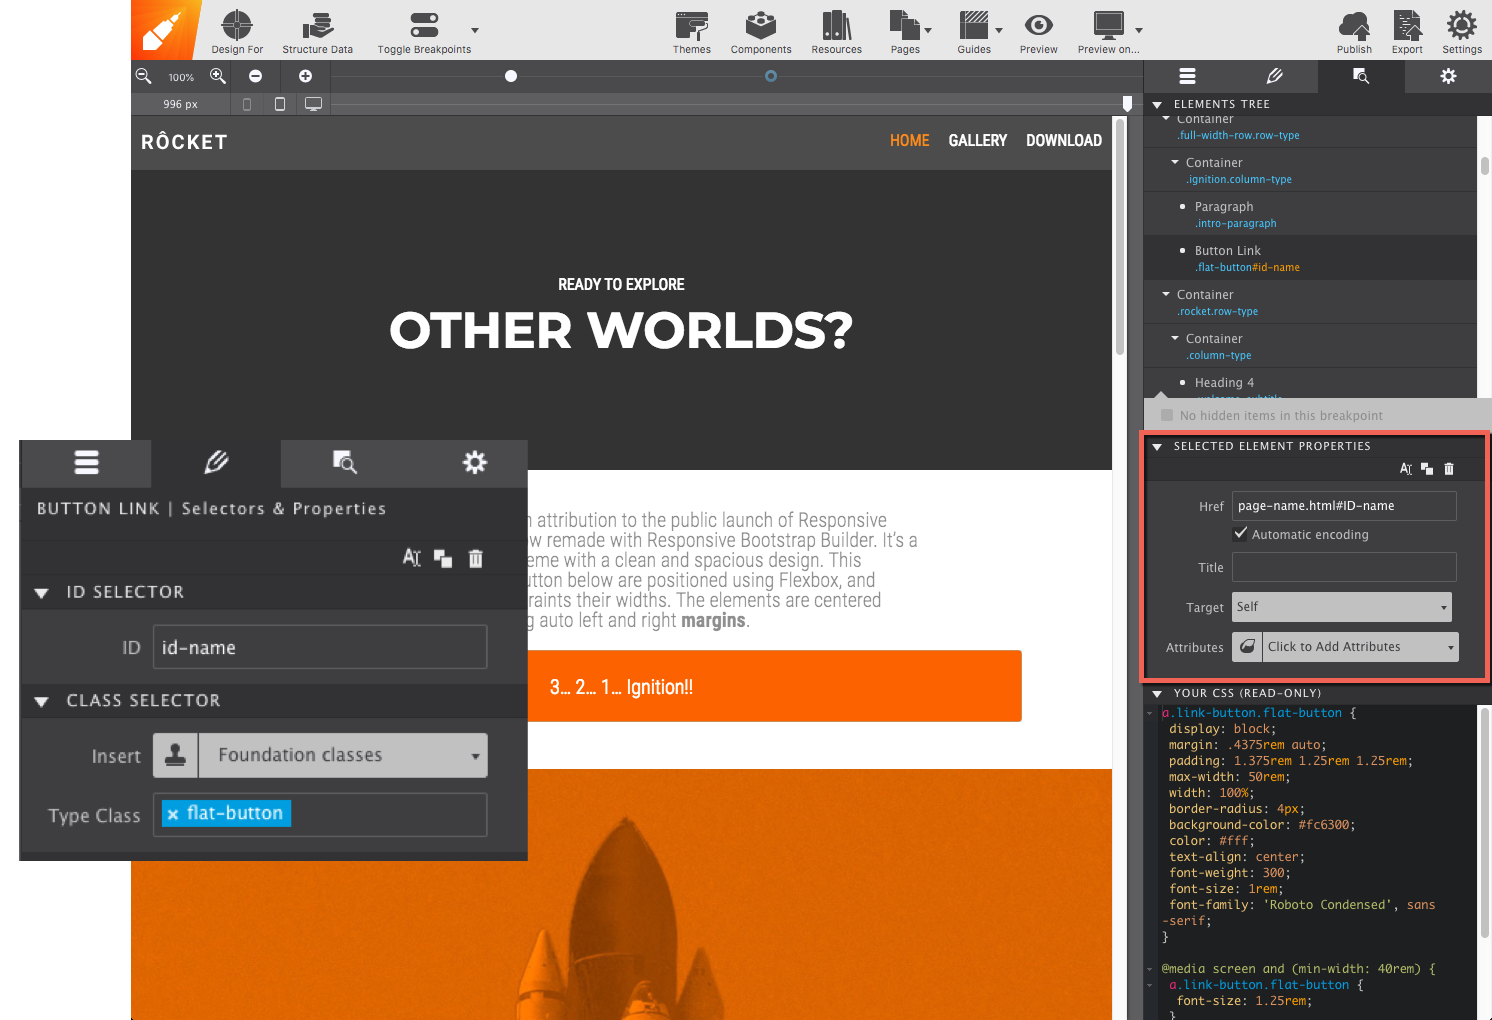
An anchor link, is the easiest link to create. These are added by linking to an ID that is applied to any element found in your project. When the link is clicked, it will take the user to the specific location of where the ID is located on the page. To accompish this, go to the Styles pane and enter the #id-name in the Href input.
You can also link to anchors located on another page by using the HTML file name and then append that with #id-name. An example would be about-us.html#staff.
Linking to a document
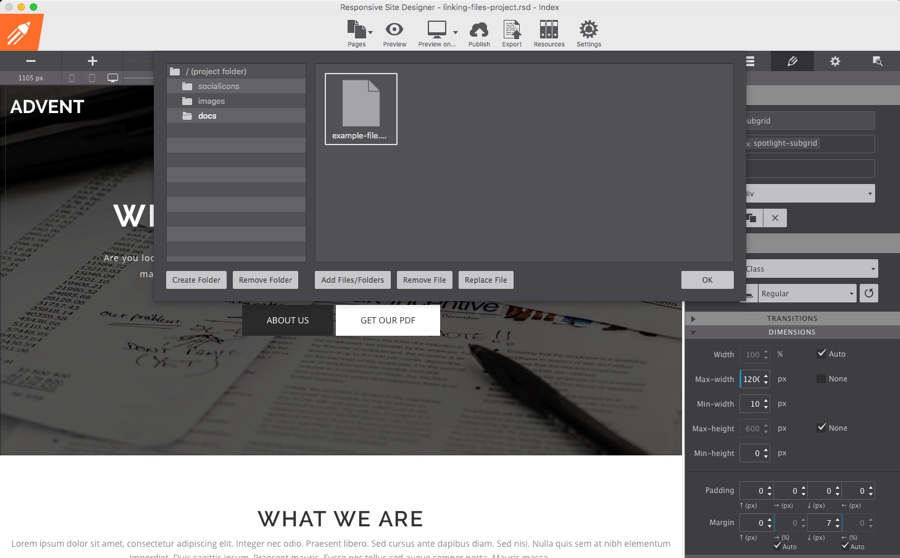
To get started, you first need to add the file (.doc, .pdf, .exe, zip, etc..) to the resources section of the RSD project. To do that:
- Click Resources and create a new folder under the root called
docs(file case is important, so please keep the folder name all lowercase). It will then appear under the / (project folder). - Select the docs folder that you just created to ensure that the file does get uploaded to the correct folder.
- Click the Add Files/Folders button and navigate to the file on your computer that you wish to add. Then click Open.
- Now that the file has been added to your resources you can link to it by using the HREF input or the Inline Text Editor (described below).
Be responsible with your folder names!
You can use a different folder name if you like or no folder at all when adding your files. It is highly recommended that everything does get placed in its folder rather than being placed in the root folder. Folder names should always be lower case, contain no spaces or punctuation marks. Acceptable folder name examples would be pdf, downloads, documents, pdf-files, downloads-folder, etc. Either way, make sure to edit the file path to match where you have placed the file.
Using the Inline text editor
- Open the text editor and select the word(s) that you wish to link.
- Click the + icon next to the Link control.
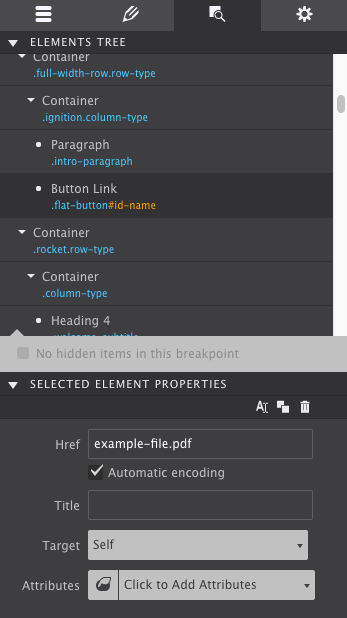
- Enter the path to the file in the URL input box. In this example that path would be
docs/example-file.pdf. - Click Apply.
Using a Text Link or Button Link element
- Add a Button Link element or Text Link element. (in this example we are using a Button Link element) and go to the Element pane pane.
- Under the Element section enter the path to the file in the HREF input box. In this example that path would be
docs/example-file.pdf.
Creating a link to an email address or telephone numbers
Similar to linking to a file, you can transform these links to perform a function when clicked. A mailto link will launch your default email program with a new message automatically started. For the tel link, this works two-fold; on a desktop computer a compatible internet phone program will launch (like Skype) and on a touch device the phone number will automatically dial. To get started:
- Add a Button Link element or Text Link element. (in this example we are using a Button Link element) and go to the Element pane pane.
- Under the Element section enter the email address or telephone number in the HREF input box. In this example that format would be
mailto:myself@yourdomain.comortel:+15555555555. For the link to work correctly, you must preface the email address with either the word mailto: or phone number with the word tel:
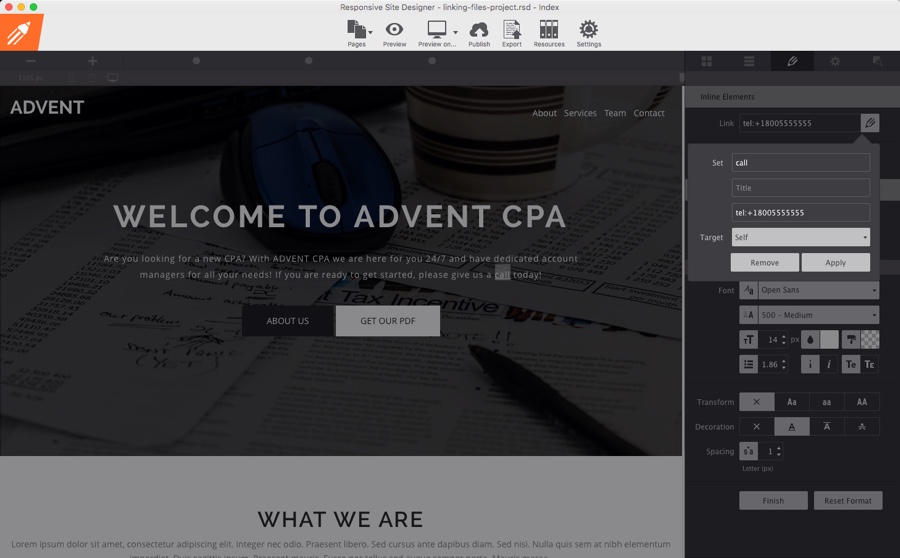
You can also use the same process with a Paragraph element with the inline text editor. Just select the word(s) that you wish to link and click the + icon next to the Link control and enter either mailto:myself@yourdomain.com or tel:+15555555555.
Use contact web forms instead of mailto links!
When using email addresses as links, you expose that address to BOTS, which will ultimately lead to an increasing amount of SPAM emails. Also, not everyone has an email client installed so for those individuals; the link will not work. Instead, use a contact form that makes it easier for your users to reach you, but also allows you to collect additional information that might be useful to have. Our Web Form Builder application is the perfect tool for the task.
See it all in action!