

We cannot stress enough how important Projects are. If used correctly, this tool can make broken links a thing of the past. You’ll never see those pesky red broken images again!
Before we get started, we want to remind you to save often! You never know when there might be a power outage or a computer crash, and you don’t want to lose any of your hard work. We also just want to tell you that there are a lot of different ways to do the things we show you in this guide. For example, to save your project, you can:
- Go to File > Save
- Use the keyboard shortcut Cmd+S
- Right-click the file in the Project Explorer pane and choose Save
All right, let’s make a website!
Step 1: Creating a Project
You’ve got several options for starting a new project. Go to File > New Project and take a look:
- From Files and Folders
- Quick Project
- From Theme
- From Server
Each of these options allows you to start a project via different means. Let’s explore them further.
New Project > From Files and Folders
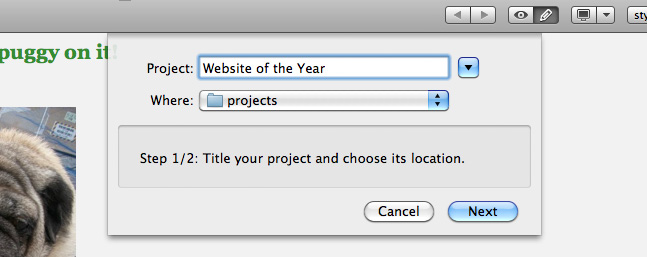
Choose this option if you have existing website files on your computer already. A window will pop up asking you to title the new project and choose the location where its files will be saved.

Clicking the down arrow to open the Finder may be an easier way for you to find the right location to save your files. When you’re done, click Next.
Now select all of the files and/or folders you want to use in this project.
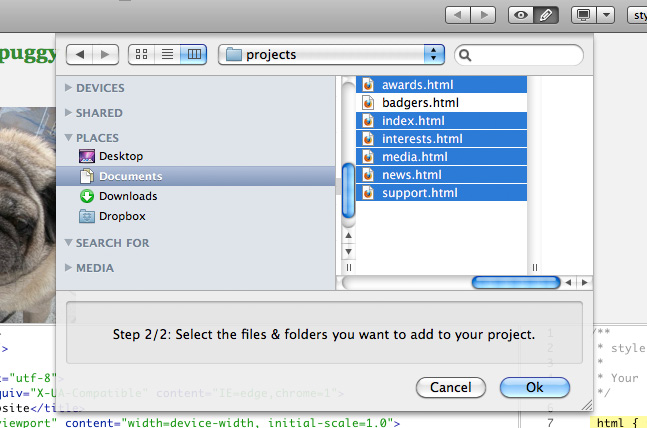
Click Ok, and your project will be all set up!
New Project > Quick Project
This option is the fastest way to begin a new project from scratch. It simply creates the project folder, a blank HTML file, and a blank CSS file.
New Project > From Theme
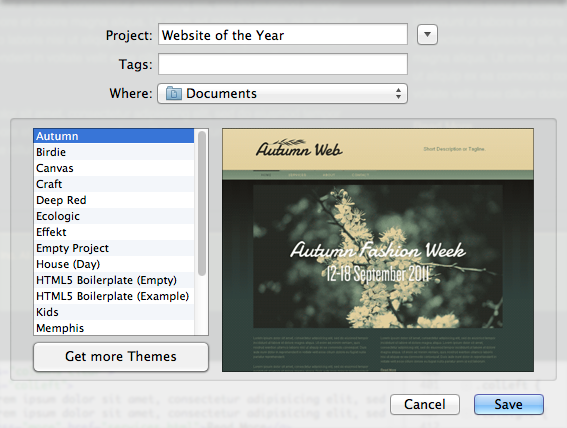
Choose this option if you’ve got a snazzy theme you want to use to jumpstart your website. Simply choose a project name, choose a location where the project should be stored, and pick a theme from the drop-down list. When you’re ready to move on, click Save.
New Project > From Server
If you’ve configured an S-Drive account or FTP server, you can download files from that location to add to your new project. For more information setting up a server.
A dialog will ask you to title the new project and choose the location where its files will be saved.
Clicking the down arrow to open the Finder may be an easier way for you to find the right location to save your files. When you’re done, click Next.
Now select the files and/or folders on the server that you’d like to add to your project.
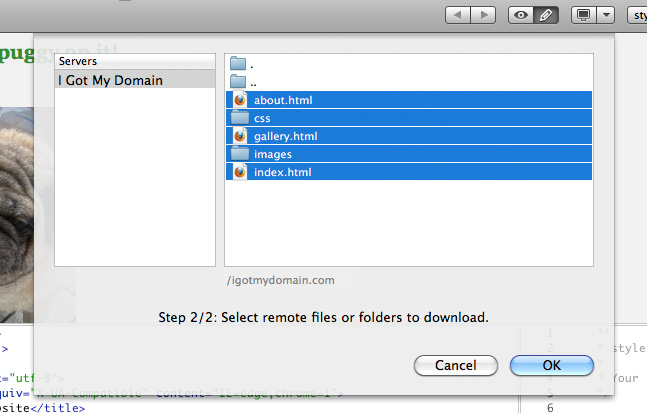
When you click OK, the Web Editor downloads the files and folders you selected to the folder you specified on your computer. A project is created in the Project Explorer containing all of these files.
Step 2: Adding Files to your Project
Oops! Did you forget to include some stuff when you created your project? No problem. Adding more files is simple, if you understand how the Project Explorer works.
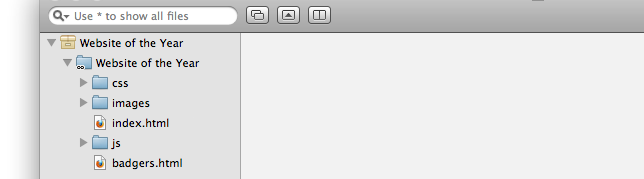
Regardless of which option you used to start a new project, the Project Explorer should be populated with files. Here’s what it looks like when creating a new project with the Simple Website theme:

There are several different types of items displayed here:
- Project: The brown icon indicates that everything in its tree is part of the project
- Folder: The blue icons that indicate categories where files can be stored
- Files: Any icon that doesn’t look like a folder!
You’ll also notice that one of those folders has a little icon that looks like a chain attached to it. This is what is called a reference; it refers to a location on the hard drive where the folder can be found. All other files and folders within this folder’s tree are a mirror of the actual file system found on your hard drive. This means that any folders and files found within the “Website of the Year” folder on the hard drive appear here in the Project Explorer.
With that in mind, adding folders and files to your project is extremely easy! You just need to know the location of the main folder, and then copy or drag content into it. Here’s what it looks like after we drag the file “badgers.html” from another folder into the “Website of the Year” folder:
Similarly, if you remove that file from the folder, it disappears from this list.
Adding References
You can also add files that are not inside the project folder on the hard drive by going to File > Add File to Project. This opens a window where you can select the files and/or folders. You can choose which project to add the content to with the drop-down menu below, which is helpful if you’ve got multiple projects open at once. Here we’ve added a file called “contact.html” to the “Website of the Year’ project:
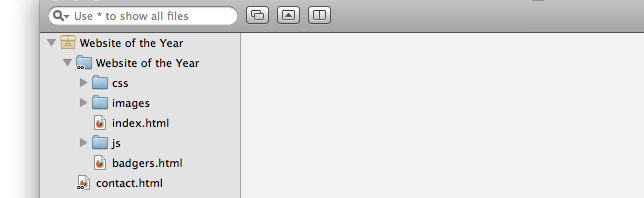
Notice the tiny chain icon next to this new file? It’s part of the project tree, but not part of the directory tree. Yep, it’s a part of the project, but it’s not located within the “Website of the Year” folder on the hard drive. Instead, it’s a link to where the file can actually be found. Don’t worry, it’ll function perfectly and will be uploaded with the rest of your content. Note that you can’t delete this file from the Project Explorer—just the reference to it.
Step 3: Creating a New Webpage
In the last chapter we discussed how to start and maintain a website project, but what do you do when you just want to create a single new page for your website? Well, you’ve got two great options.
New Blank Page
To create a new file for your website, go to File > New File. This opens a window where you can choose the name, location, project, and theme to use for the new file.
And here’s what each section of this window is for:
- File name: The name of the file you are creating
- Where: The location where the file will be saved
- Project: The name of the currently open project that you wish to add this file to
- Use theme: You can choose from a list of file types that this file will be saved as. In general, you’ll want to just use the Empty HTML File option. (Read more in the Themes chapter.)
Don’t forget to click Save when you’re ready to move on!
Quick File
If you want to configure all of that stuff later, you can go to File > Quick File or press Cmd+N to quickly open a blank HTML file. This file will be temporarily stored in a Project Explorer category labeled Non- -Project Files.
When you’re ready to add this file to a project, go to File > Save As… and save it within the folder of the chosen project. For example, we saved our new file in the “Website of the Year” folder. When you save this file, it will be moved from Non-Project Files to the project you’ve chosen.
Step 4: Previewing Your Project
You’ve built your webpage. All along, you’ve been watching it take form in the Preview pane, but now you want to see what it looks like in an actual browser window. You can do this without having to upload your entire website!
Important: For the preview to work properly, you’ll need to save the currently opened document. This is because the browser preview reads the saved file on your hard drive, and not the opened file in the Web Editor. Hit Cmd+S before every browser preview!
Click the Browser Preview button, found in the upper-right corner of the window. It looks like this:

Clicking the left side of this icon (the computer monitor) opens the saved version of the currently selected document in the preferred browser. You can configure the preferred browser in the General tab of the Preferences.
If you want to preview using another browser, click the right side of this icon (the down arrow.) This expands a list of all the browsers installed on your computer:
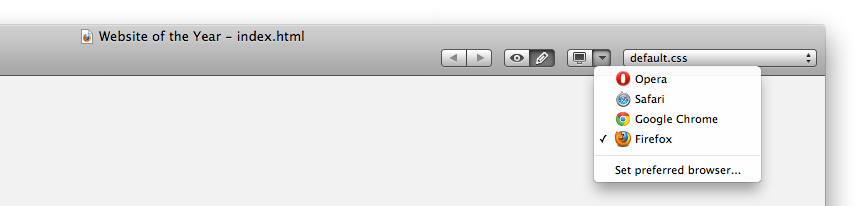
Simply select the browser you want to preview with and your document will open in that browser. Notice that you can choose your preferred browser within this menu by selecting Set preferred browser.
If this is your last preview before uploading your website, we strongly suggest previewing in every browser you have. Since no two browsers render code exactly the same way, this will help you catch any inconsistencies in code before they are broadcast to the web.
If everything looks good in preview, there’s only one thing left to do: Upload your website!
Step 5: Uploading Your Project
You can upload your entire website project straight from the Project Explorer with a simple right click on your project’s name. But first, you’ll need to set up your S-Drive or FTP account by going to Remote > Server Management.
Now that your project is ready to be uploaded to the web, and you’ve set up your server profile, right click your project name in the Project Explorer and choose Remote > Configuration.
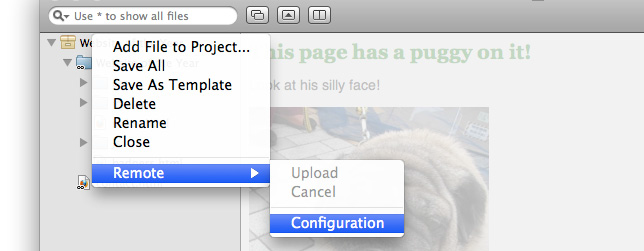
This opens the Project Server Configuration window.
Choosing an S-Drive Site
If you’ve set up an S-Drive profile, you can select it to display your S-Drive addresses.
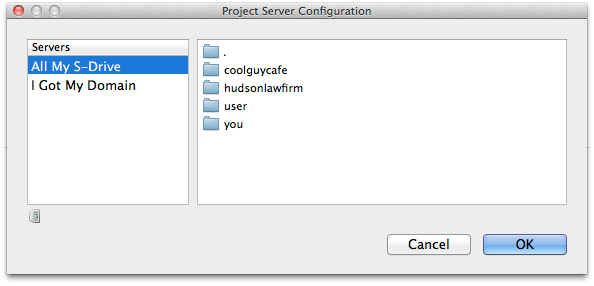
Simply choose where you want your project to be uploaded by selecting one of these folders and finding the exact location where you want all your files to go. When you’re done, click OK.
Choosing an FTP Account
If you’ve set up an FTP server, you can select it to display the files and folders it contains.
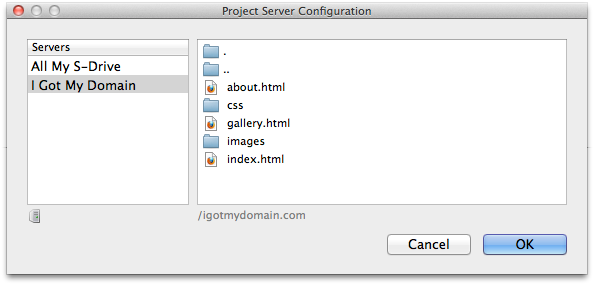
Though web hosting servers tend to manage files and domains in slightly different ways, you’ll be able to see the content that currently exists on your FTP account. Simply choose where you want your project to be uploaded and click OK when you’re done.
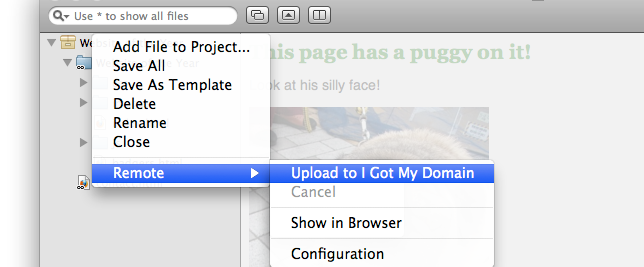
Uploading Your Project
Once you’ve configured a publishing destination, you can now upload your project. It’s very easy! Simply right click your project’s name in the Project Explorer and choose Remote > Upload to [name of your server profile].
That’s all there is to it! If you’ve configured everything correctly, your project is now live on the web. Congratulations! You can choose the Upload feature as often as you like.
Now that we’ve gone from zero to website in just five steps, let’s take a closer look at the many features and functions that make this the best code editor OS X has ever seen.