

Speed is a big ranking factor with the search engines, so you want your website to load as fast as possible. More compact images take less time to load and therefore speed up your website and your visitor's experience. It is a simple process that can have a positive impact on your overall SEO.
We would like to introduce you to the Image Compression tool.
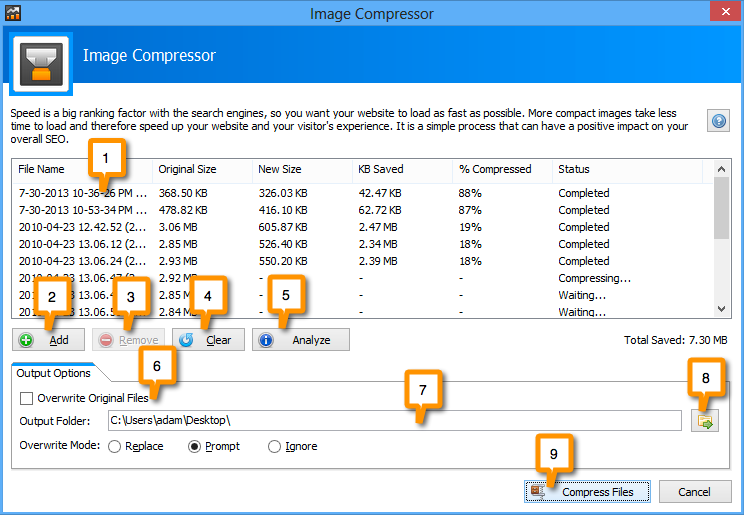
1. File Tree
Here you will see the list of images you have added for compression.
2. Add Button
This button allows you to add images to be compressed. You may also drag and drop files into the file tree area.
3. Remove Button
Does what it says it does. :) This removes an image from the file tree.
4. Clear Button
This will clear all the images you have added to the file tree area.
5. Analyze Button
This will allow you to check each image to see how much will be saved before you compress them!
6. Overwrite Original Files
This option will allow you to simply overwrite the orginal file in its current location.
Note: Use with caution as you will be overwriting your orginial file so make sure you have a backup!
7. Output Folder Path
Here you will see the output folder path where your compressed images will be saved.
Note: If you selected the Overwrite Original Files option this path will be greyed out.
8. Folder Browse Button
By clicking this button you will be able to select your local path from the Explorer Window.
9. Compress Files Button
And here is where the magic happens. Once your images have been added to the file tree you can compress them by pressing this button!