

The HTML Editor does a few more things in a unique way that you may need some more information with. The most commonly used functions are shown here.
Switching Between Open Files
There are a couple of different options for switching between open files in the HTML Editor.
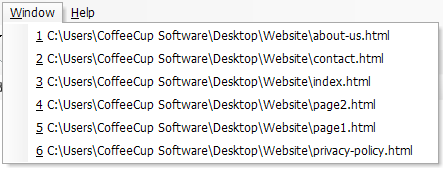
Window Menu
The Window menu allows you to see all the files open in the Editor. Click a file to open it for editing.
Open Document Tabs
The open documents are displayed via tabs at the top of the program. To switch between open documents, click the tab for the file you want to edit.

Adjusting Code Highlighting Options
Code syntax highlighting is a great way to tell different tags, tag attributes, and tag values apart. For example, it may be difficult or time-consuming to try to find every instance of an [code][/code] tag, but if you set your highlighting options to make all [code]
[/code] tags red, then all you’d have to do is look for the color red.
Follow these steps to create your own code highlighting color scheme:
Step 1
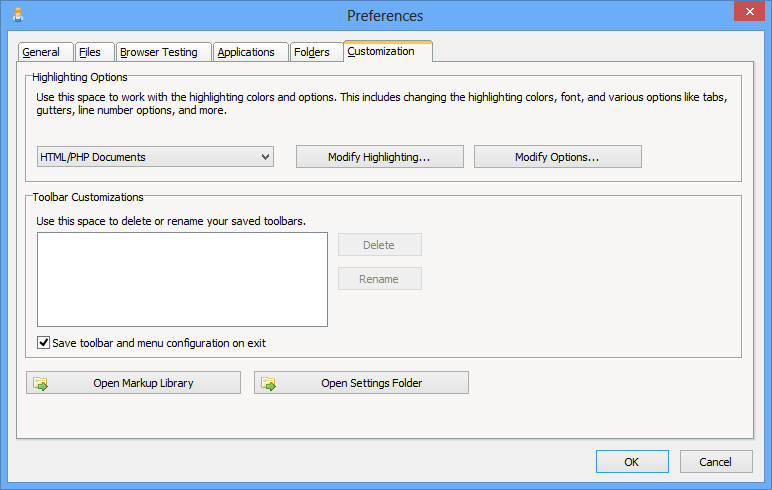
Go to Tools > Document Display Properties. This opens the Customization tab of the Preferences window.
Step 2
Select the language whose highlighting scheme you want to edit from the provided drop-down list. In this tutorial, we’ll be working with HTML/PHP Documents, so select it. Next, click the Modify Highlighting button. This opens the Highlighting Options window.

Step 3
Select the element whose color you want to change from the Element list. In this tutorial, we’ll change HTML Attributes, so select that option from the list.
Step 4
Apply the color and/or style changes you want to appear in the code syntax. You can preview them in the area at the bottom of the window. For this example, let’s change HTML attributes to be magenta and bold. To change the text color, select it from the Foreground color swatch, and to make it bold, select the Bold checkbox.
After making these changes, you’re all done! Click OK to close this window, and then return to the Code Editor, where you’ll get to see your custom code syntax highlighting in action.
Customizing Code Completion Tags
Have you ever wanted to know how to add your own custom elements, attributes, or attribute values to the Code Completion list in the HTML Editor? It’s actually pretty easy. For example, let’s say you wanted to add a custom attribute for the [code][/code] tag. Here’s how you’d do it:
Step 1
Go Edit > Add/Edit HTML Tag Markup. This opens the Add/Edit HTML Tag Markup window.

Step 2
Select img from the Elements list on the left-hand side of the window. When you do, all the available attributes will appear in the Attributes list.
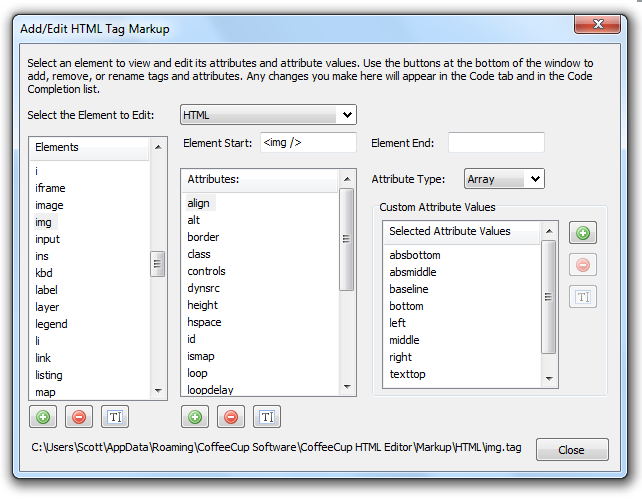
Step 3
At the bottom of the Attributes list, you’ll see a green plus sign icon. Click this icon to add a new attribute to the list. By default, it is called Attribute1.
Step 4
Make sure Attribute1 is selected, and then click the Edit Attribute icon, which is also located at the bottom of the Attributes list. In this tutorial, we’ll change the name to longdesc, but naturally, you can give your attributes any names you want.
And that’s it! Click Close. Now whenever you add an [code][/code] tag to your HTML document, the longdesc attribute will show up in the Code Completion list. It will also appear in the Code tab on the left-hand side of the program when HTML is selected.