

Before we start, make sure you have secured your copy of (responsive) Menu Builder. This awesome app helps you create HTML & CSS3 navigation menus without coding—sweet!
- For the full scope on creating Responsive Navigation Menus with the software, go here.
- For instructions on embedding a menu to your pages on OS X, click here.
- For steps on adding a menu to your site on Windows, click here.
The Export option generates the code and files you need to add your menu to a webpage.
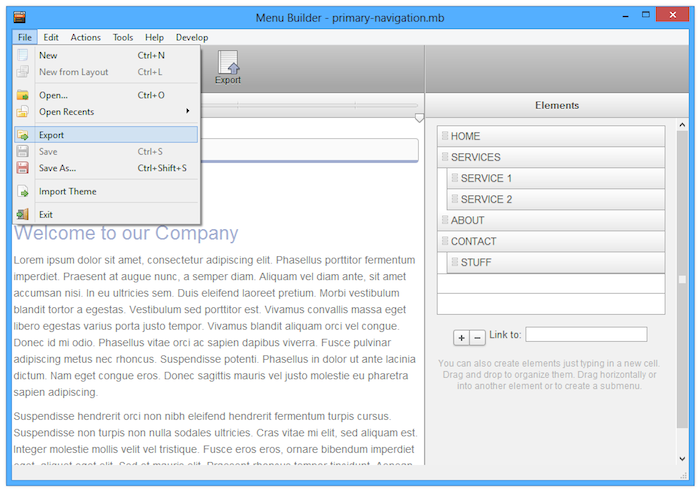
Windows Menu Builder
To export your menu for use on your own server, go to File Menu > Export or click the Export toolbar icon:
Next, you'll select a location where your menu files will be exported. Everything you need for your menu to work on your server will be stored in this folder.

Once you've chosen a location, the Menu Successfully Exported window will appear:

You now need to follow three steps:
- Paste the code from Step 1 within the <head> and </head> tags of the webpage that will contain the menu.
- Paste the code from the Step 2 box within the <body> and </body> tags of the webpage that will contain the menu, making sure to place it where you want it to appear on the page.
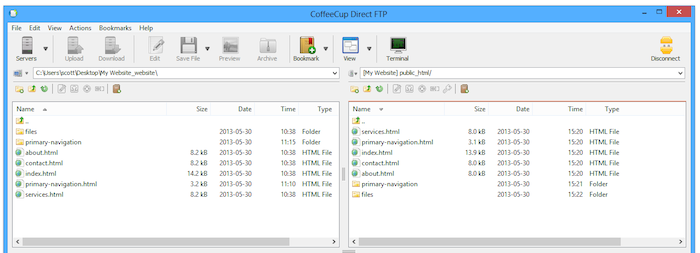
- Upload those exported files to your server using an FTP program (like Direct FTP).
So, what files actually get uploaded, and where do you need to put them? You'll notice that this window provides you with the full path to the exported files with a button that says Open in Explorer. Click it to open the folder that contains your menu's files. You should see two items:
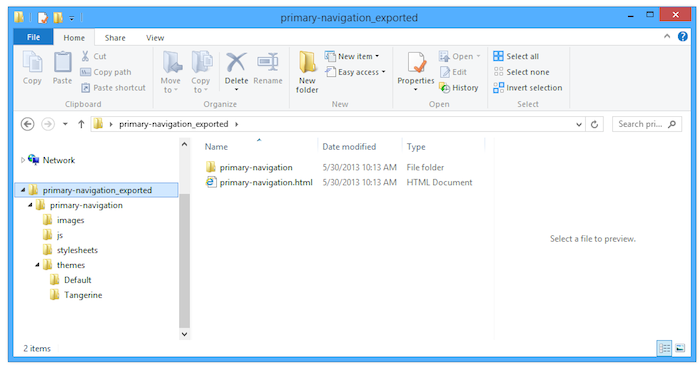
Upload them both to your web server. They'll need to be placed in the folder that contains the HTML file your menu will appear in.
Your menu should now be visible on your webpage. Enjoy!
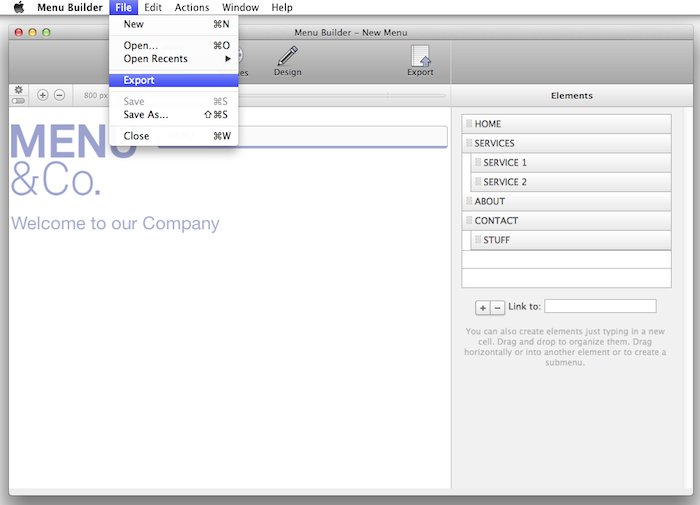
OS X Menu Builder
To export your menu for use on your own server, go to File Menu > Export or click the Export toolbar icon:
Next, you'll select a location where your menu's files will be exported. Everything you need for your menu to work on your server will be stored in this folder.

When you click the Export button, the Menu Successfully Exported window will appear:
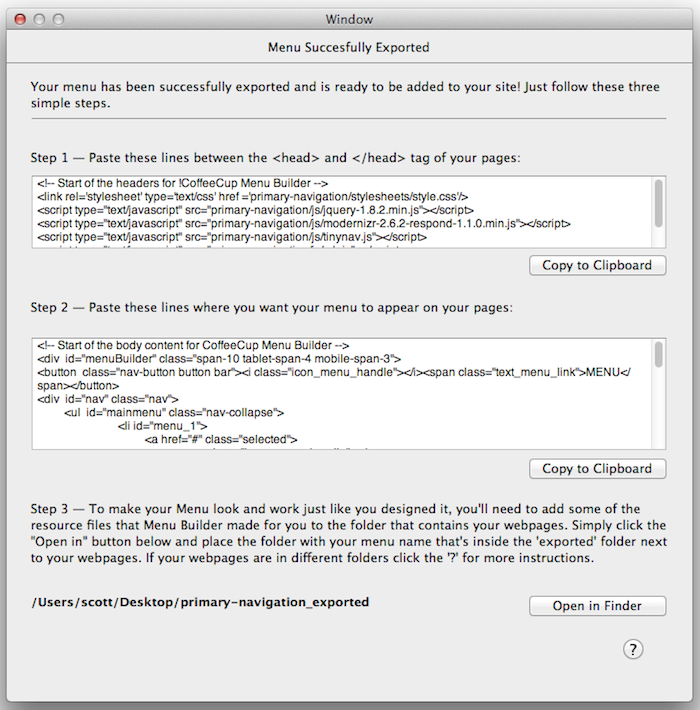
You now need to follow three steps:
- Paste the code from Step 1 within the <head> and </head> tags of the webpage that will contain the menu.
- Paste the code from the Step 2 box within the <body> and </body> tags of the webpage that will contain the menu, making sure to place it where you want it to appear on the page.
- Upload those exported files to your server using an FTP program.
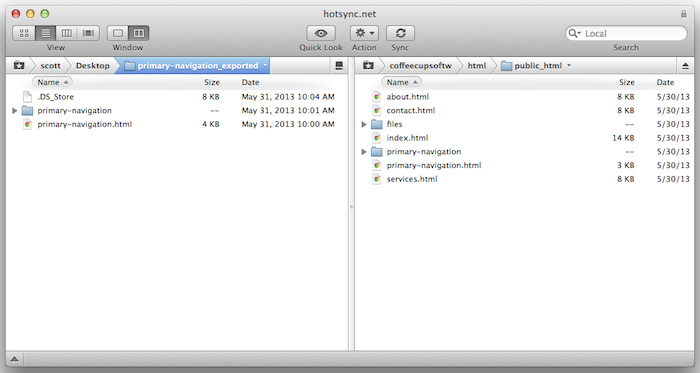
So, what files actually get uploaded, and where do you need to put them? You'll notice that this window provides you with the full path to the exported files with a button that says Open in Finder. Click it to open the folder that contains your menu's files. You should see two items:

Upload them both to your web server. They'll need to be placed in the folder that contains the HTML file your menu will appear in.
Your menu should now be visible on your webpage. Enjoy!